Multitron - Incubation Shaker
Operation
25 February 2019 Page 71 of 146
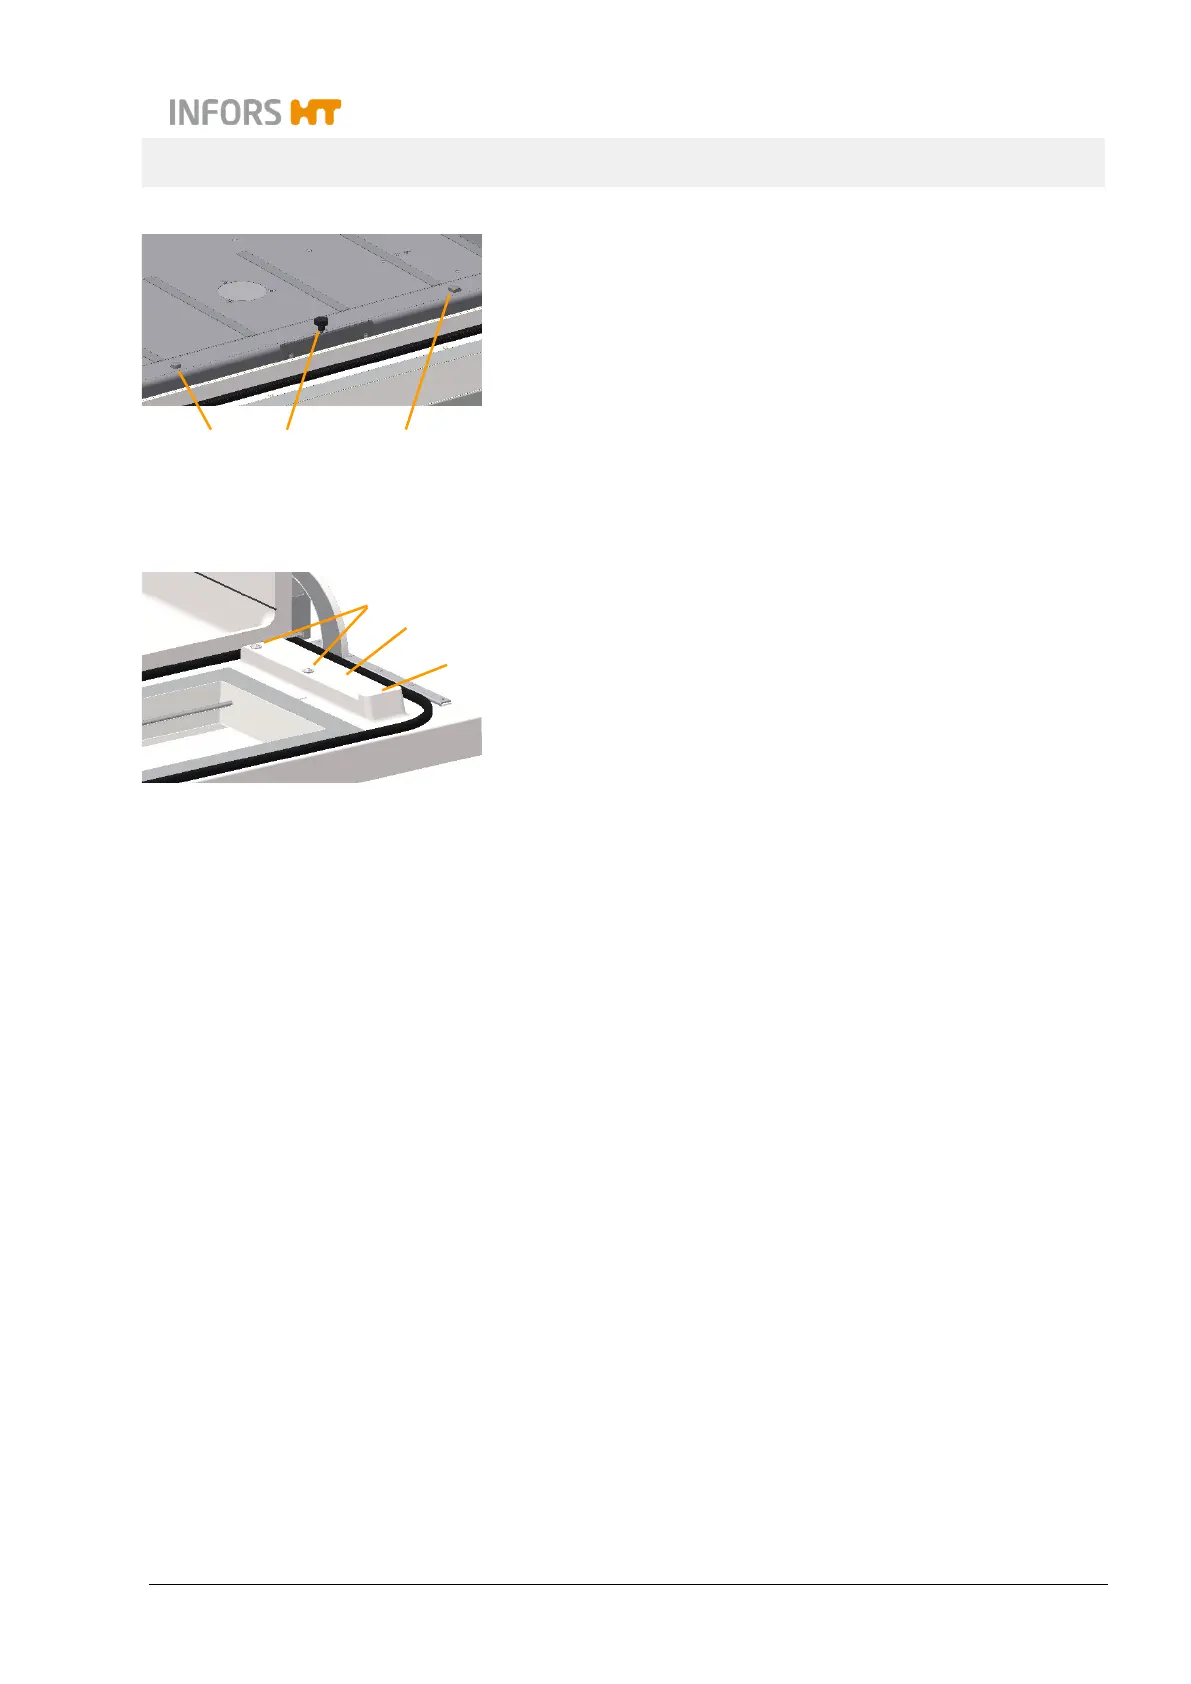
Equipment with 3 mm throw:
To insert the tray, manually move it into the incubation chamber all
the way to the limit stop and lower it into the locking cones (1) in
the front section of the table. The tray then has to be affixed to the
table using a knurled screw (2).
To remove th
e tray from the incubation chamber, the knurled screw
has to be unscrewed again. Following that, the tray can be lifted
out of the locking cones and be pulled out of the incubation cham-
ber by hand.
Removing the tray
The tray is always removed from the incubation chamber in the
same way, irrespective of the throw. The tray is pulled onto the
door by hand. Slide rails (2) and the cylindrical ball casters therein
(1) on the door guide the tray. Two stop bars (3) in the slide rails
limit how far the tray can be pulled out. When pulled out all the
way, the tray lies partially on the door and partially on the table.
Proceed as follows:
Procedure 1. Open the equipment door all the way.
Equipment with 25 mm or 50 mm throw: The safety mecha-
nism lifts the tray out of the cones. The tray is thus free and
can be pulled out of the incubation chamber.
2. Equipment with 3 mm throw: Loosen the knurled screw and
remove it
3. Lift the tray by the handle.
4. Pull the tray over the front stop bar and onto the open door.
If you cannot pull the tray out, check whether the door is open
all the way. Push the door down as far as it will go.
Inserting the tray
To insert the tray, proceed as follows:
Procedure 1. Open the equipment door all the way.
2
1
3
1 2 1