2. [edit] user@switch# delete system commit factory-settings
3. [edit] user@switch# set system root-authentication plain-text-password
4. [edit] user@switch# commit
5. Check the member ID and primary-role priority with the show virtual-chassis command and check to
see whether there are remaining sengs for uplink VCPs by using the show virtual-chassis vc-port
command.
Reverng to the Factory-Default Conguraon Using the EX Series Switch LCD Panel
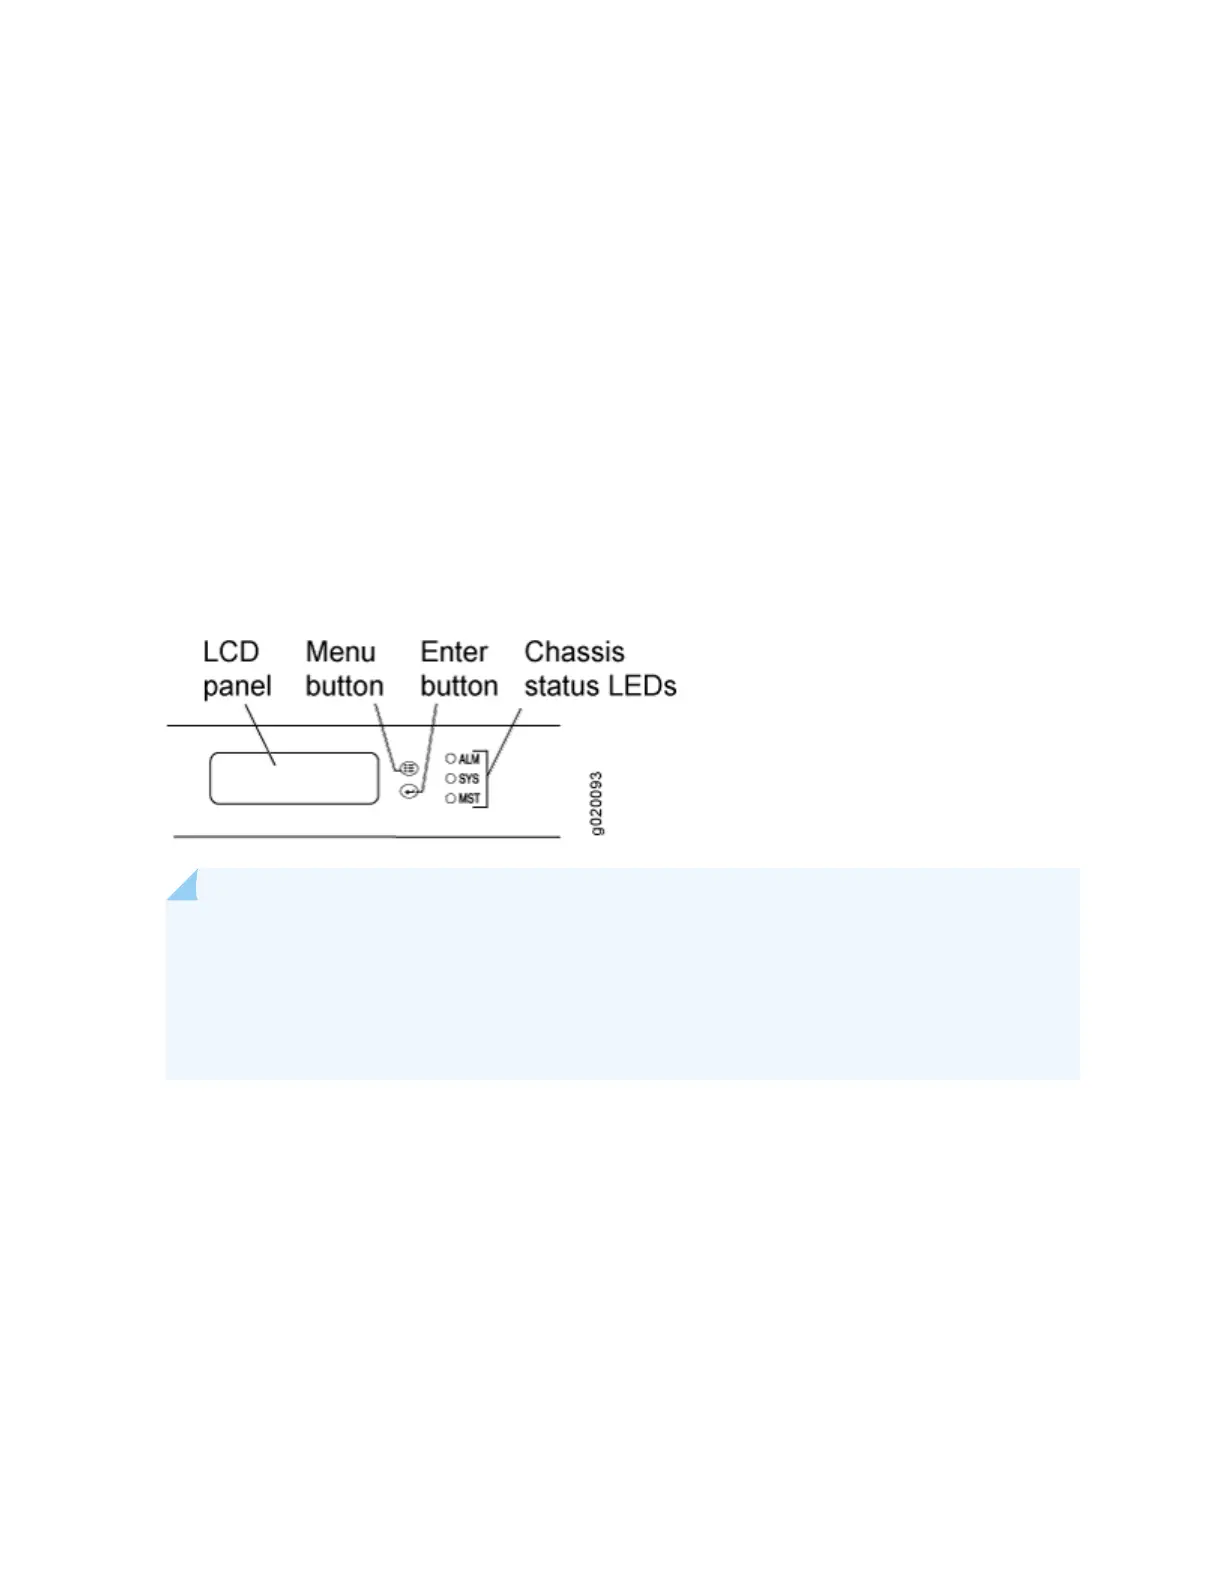
To set the switch to the factory-default conguraon, for EX Series switches, you can use the LCD panel
and buons on the front panel of the switch. If the EX Series switch model does not have an LCD panel,
use one of the procedures described in the following secons.
Figure 85: EX Series Switch LCD Panel
NOTE: To revert a member switch of a Virtual Chassis to the factory-default conguraon, rst
disconnect the cables connected to the Virtual Chassis ports (VCPs) to avoid aecng Virtual
Chassis conguraon parameters (member ID, primary-role priority, and seng of VCP uplinks)
on other members. See
Disconnect a Fiber-Opc Cable
,
Disconnecng a Virtual Chassis Cable
from an EX4200 Switch
, or Disconnecng a Virtual Chassis Cable from an EX4500 Switch.
To revert to the factory-default conguraon by using the LCD panel:
1. Press the Menu buon unl you see MAINTENANCE MENU on the panel.
2. Press the Enter buon.
3. Press Menu unl you see FACTORY DEFAULT.
4. Press Enter. The display says RESTORE DEFAULT?
5. Press Enter. The screen ashes FACTORY DEFAULT IN PROGRESS and returns to the idle menu.
6. Complete the inial conguraon of the switch. See
Connecng and Conguring an EX Series Switch
(CLI Procedure)
or
Connecng and Conguring an EX Series Switch (J-Web Procedure)
.
254