E Series Automated Dispensing System
83www.nordsonefd.com info@nordsonefd.com 800-556-3484 Sales and service of Nordson EFD dispensing systems are available worldwide.
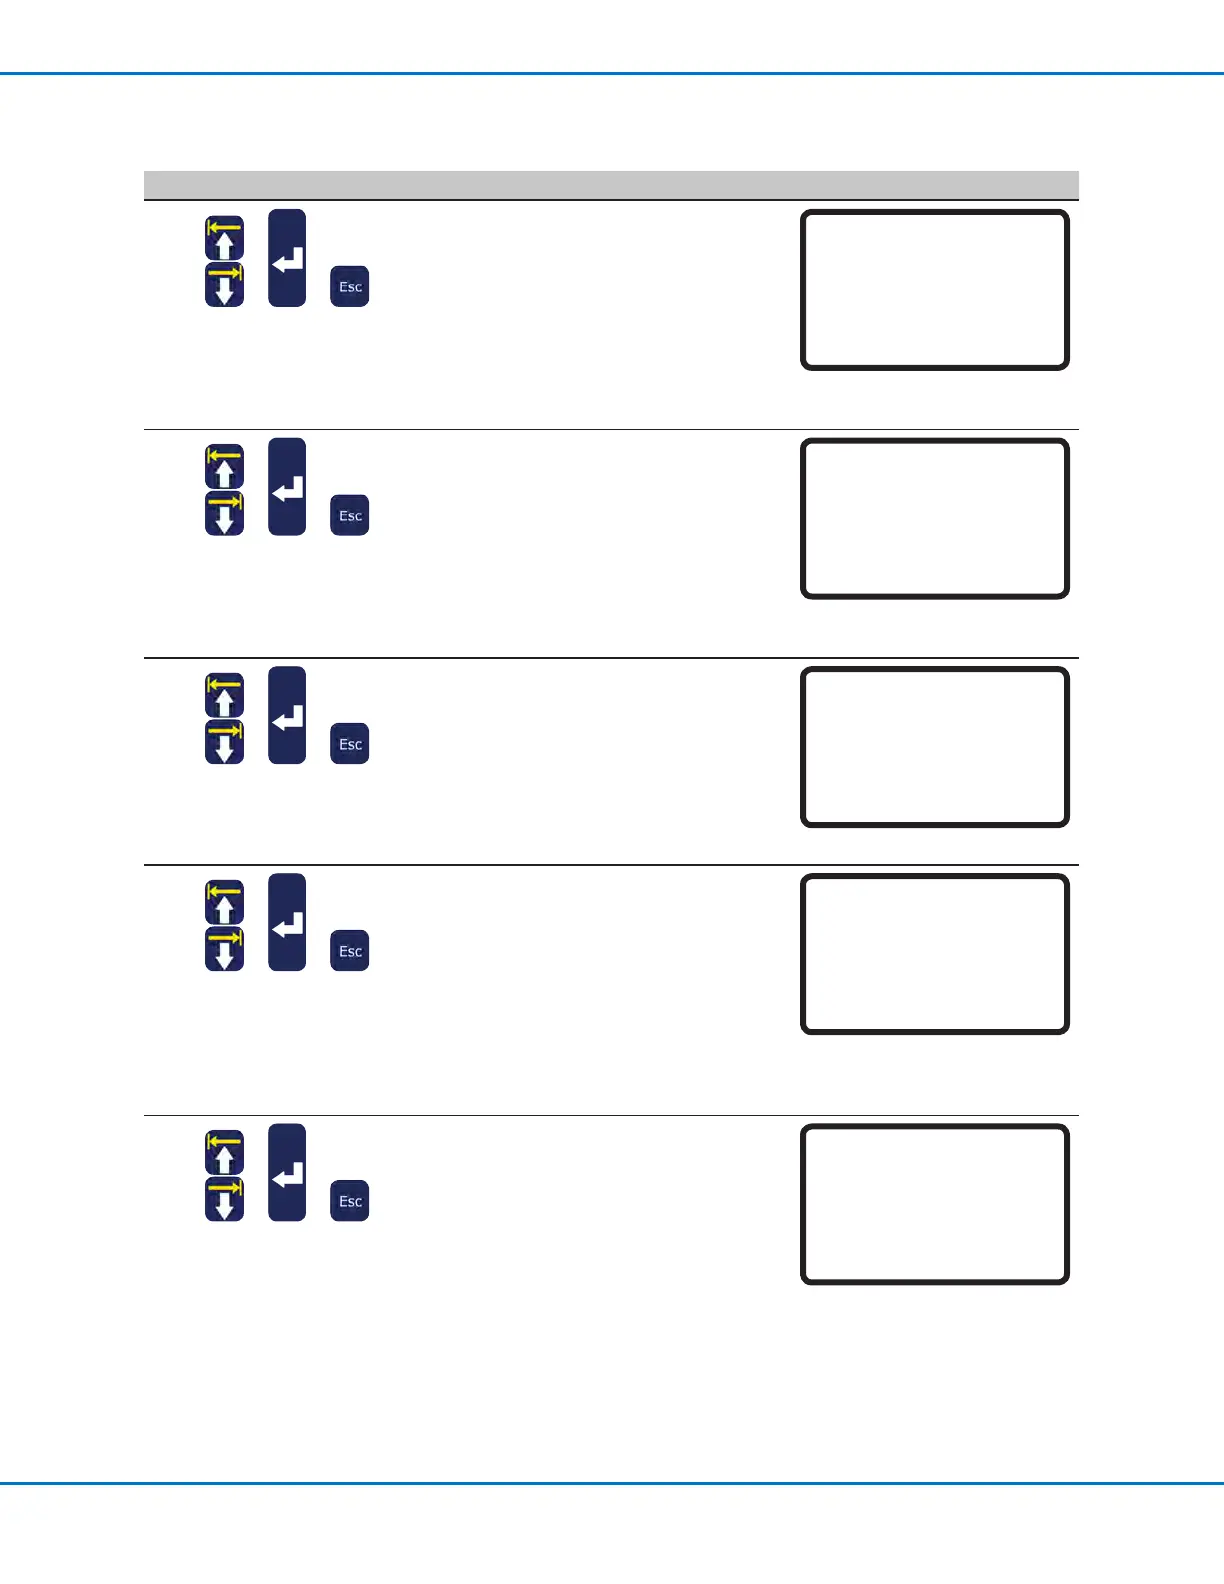
# Key Press Step Teach Pendant Display
4
> >
• Select FRONT PANEL to test the front
panel buttons.
• Press each front panel button one at a
time.
- If a button is functioning properly, the
displayed value for the axis changes
from 0 to 1.
• Press ESC to return to the Diagnostic
menu.
Front Panel
Press front panel buttons
------------------------------
Start Button : 0
Purge Button : 0
Emergency Stop: 0
Needle Sensor : 0
5
> >
• Select INPUT/OUTPUT to test any
connected inputs or outputs.
- If an input / output is functioning
properly, the displayed value for the
input / output changes from 0 to 1.
- Refer to “I/O Port” on page87 for
the IO PORT schematic.
• Press ESC to return to the Diagnostic
menu.
Input/Output
------------------------------
IN : 00000000
OUT: 000000000
Press Key 1-8 Set Output
Press Key 9 Set Dispenser
6
> >
• Select TEACH PAD to test the Teach
Pendant keys.
• Press each TP key one at a time.
- If a key is functioning properly, the
displayed value for SCANCODE
changes from 0 to 1.
• Press ESC to return to the Diagnostic
menu.
Teach Pad
Press key on teach pad
------------------------------
SCANCODE: 0
7
> >
• Select RS232 to test the RS232
connection.
• Connect a DB9 with pins 2 and 3
shorted into the RS232 port on the back
of the robot.
- If the connection is functioning
properly, the system recognizes the
data being sent and received.
• Press ESC to return to the Diagnostic
menu.
RS232
Cross RS232 Pin2 & Pin3
------------------------------
Send Char :00
!!! NO RESPONSE !!!
8
> >
• Select MOTOR to test the robot motor.
• Press the corresponding number key to
test the motor axis.
- If the axis motor is working, a slight
back and forth movement (~10 mm)
of the axis occurs.
• Press and hold ESC until the axis
movement stops and to return to the
Diagnostic menu.
Motor
Axis moves back & forth 10 mm
------------------------------
1 X
2 Y
3 Z
0 Home
Diagnostic Checks (Diagnostic Menu) (continued)