Periodic Inspection and Maintenance
8
8.4 Replace a Cooling Fan and Circulation Fan
SIEPYEUOQ2A01G AC Drive Q2A Technical Manual 327
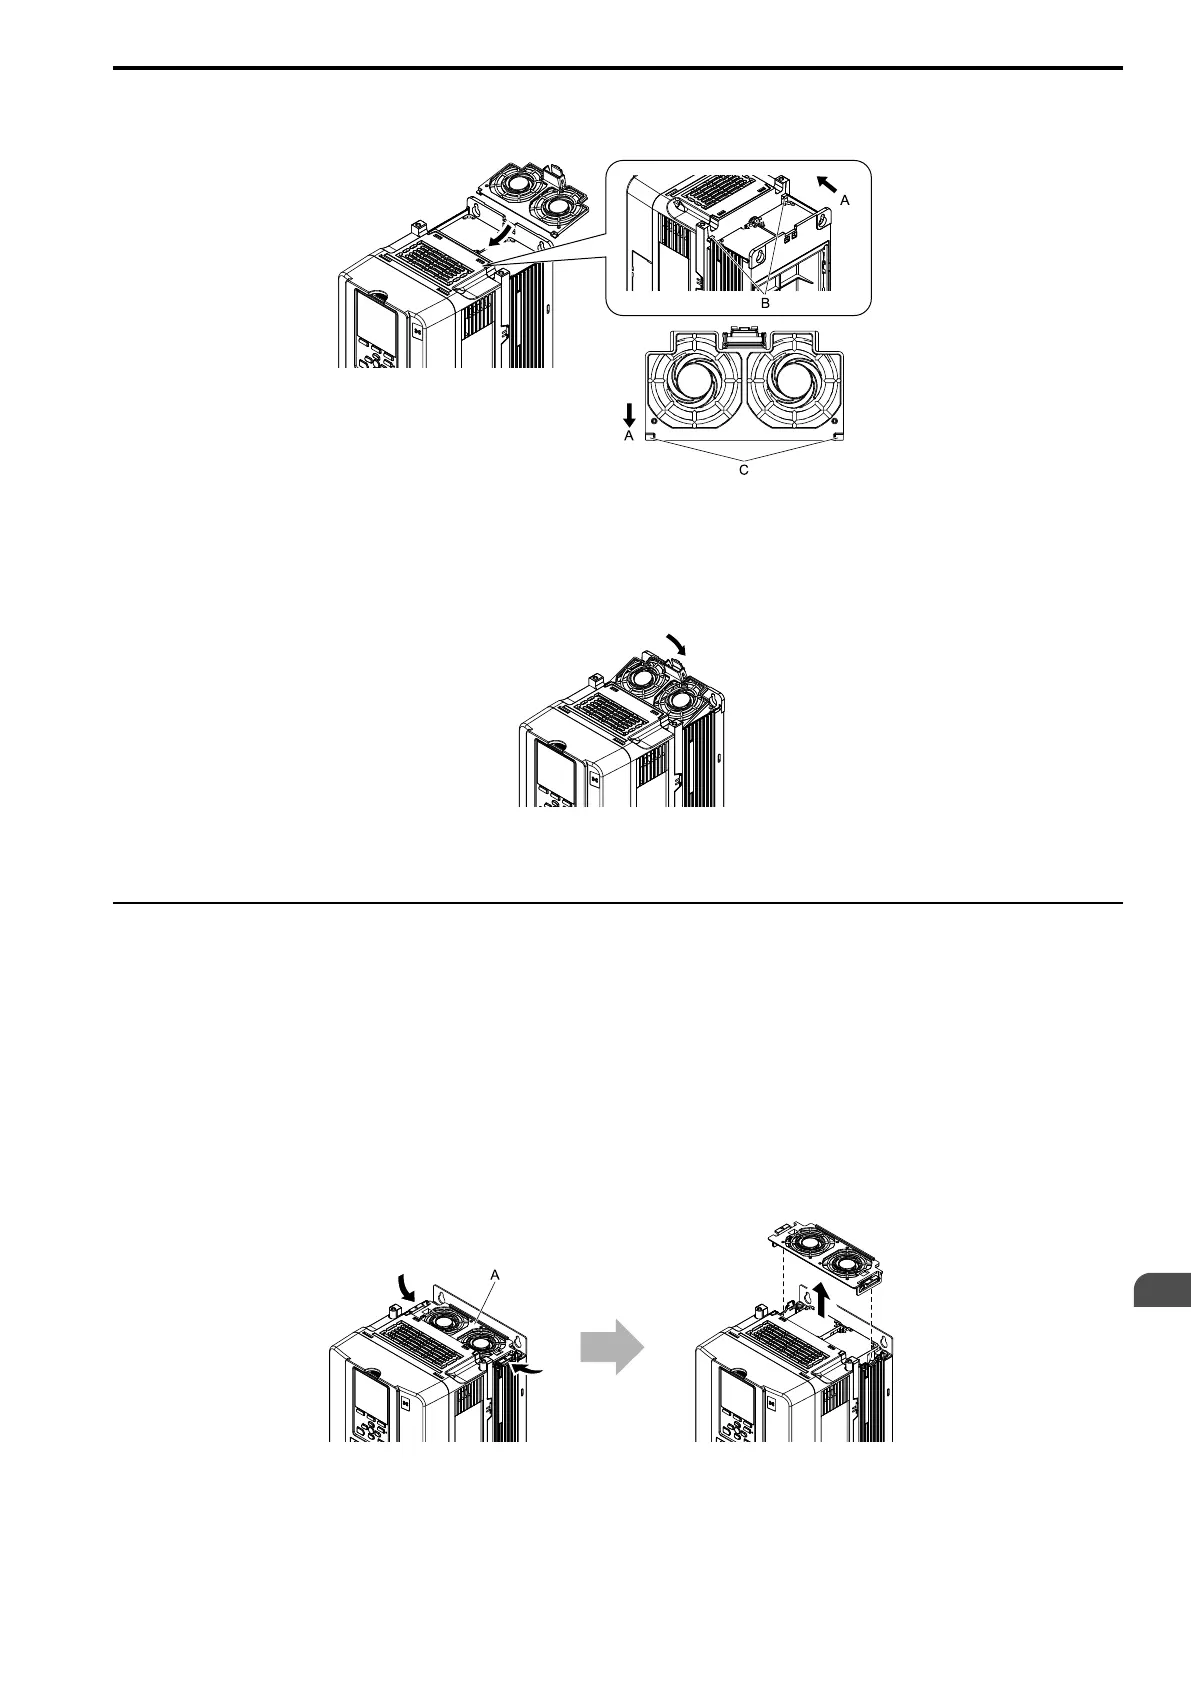
4. Hold the fan finger guard at an angle and put the connector tabs on the fan finger guard into the holes on
the drive.
A - Front of drive
B - Drive holes
C - Connector tabs
Figure 8.12 Reattach the Fan Finger Guard
5. Push the hook on the back side of the fan finger guard and click it into place on the drive.
Figure 8.13 Reattach the Fan Finger Guard
6. Energize the drive and set o4-03 = 0 [Fan.Oper Setting = 0 h] to reset the cooling fan operation time.
◆ Replace a Fan (Models 2056, 4031, 4038)
WARNING! Electrical Shock Hazard. Electrical Shock Hazard. Do not examine, connect, or disconnect wiring on an energized
drive. Before servicing, disconnect all power to the equipment and wait for the time specified on the warning label at a minimum.
The internal capacitor stays charged after the drive is de-energized. The charge indicator LED extinguishes when the DC bus
voltage decreases below 50 Vdc. When all indicators are OFF, measure for dangerous voltages to make sure that the drive is
safe. If you do work on the drive when it is energized, it will cause serious injury or death from electrical shock.
CAUTION! Burn Hazard. Do not touch a hot drive heatsink. De-energize the drive, wait 15 minutes minimum, and make sure
that the heatsink is cool to replace the cooling fans. Failure to obey can cause minor to moderate injury.
NOTICE: Follow cooling fan replacement instructions. Replace all fans when performing maintenance to help ensure maximum
useful product life. Improper fan replacement could cause damage the drive.
■ Remove a Fan
1. To remove the fan finger guard from the drive, push the hooks on the left and right sides of it and pull up.
A - Fan finger guard
Figure 8.14 Remove the Fan Finger Guard