EasyManuals Logo

RadioLink RC8X User Manual

RadioLink RC8X
155 pages
To Next Page IconTo Next Page
To Previous Page IconTo Previous Page
Page #142 background imageLoading...
Page #142 background image
RadioLink Electronic Limited
www.radiolink.com
141
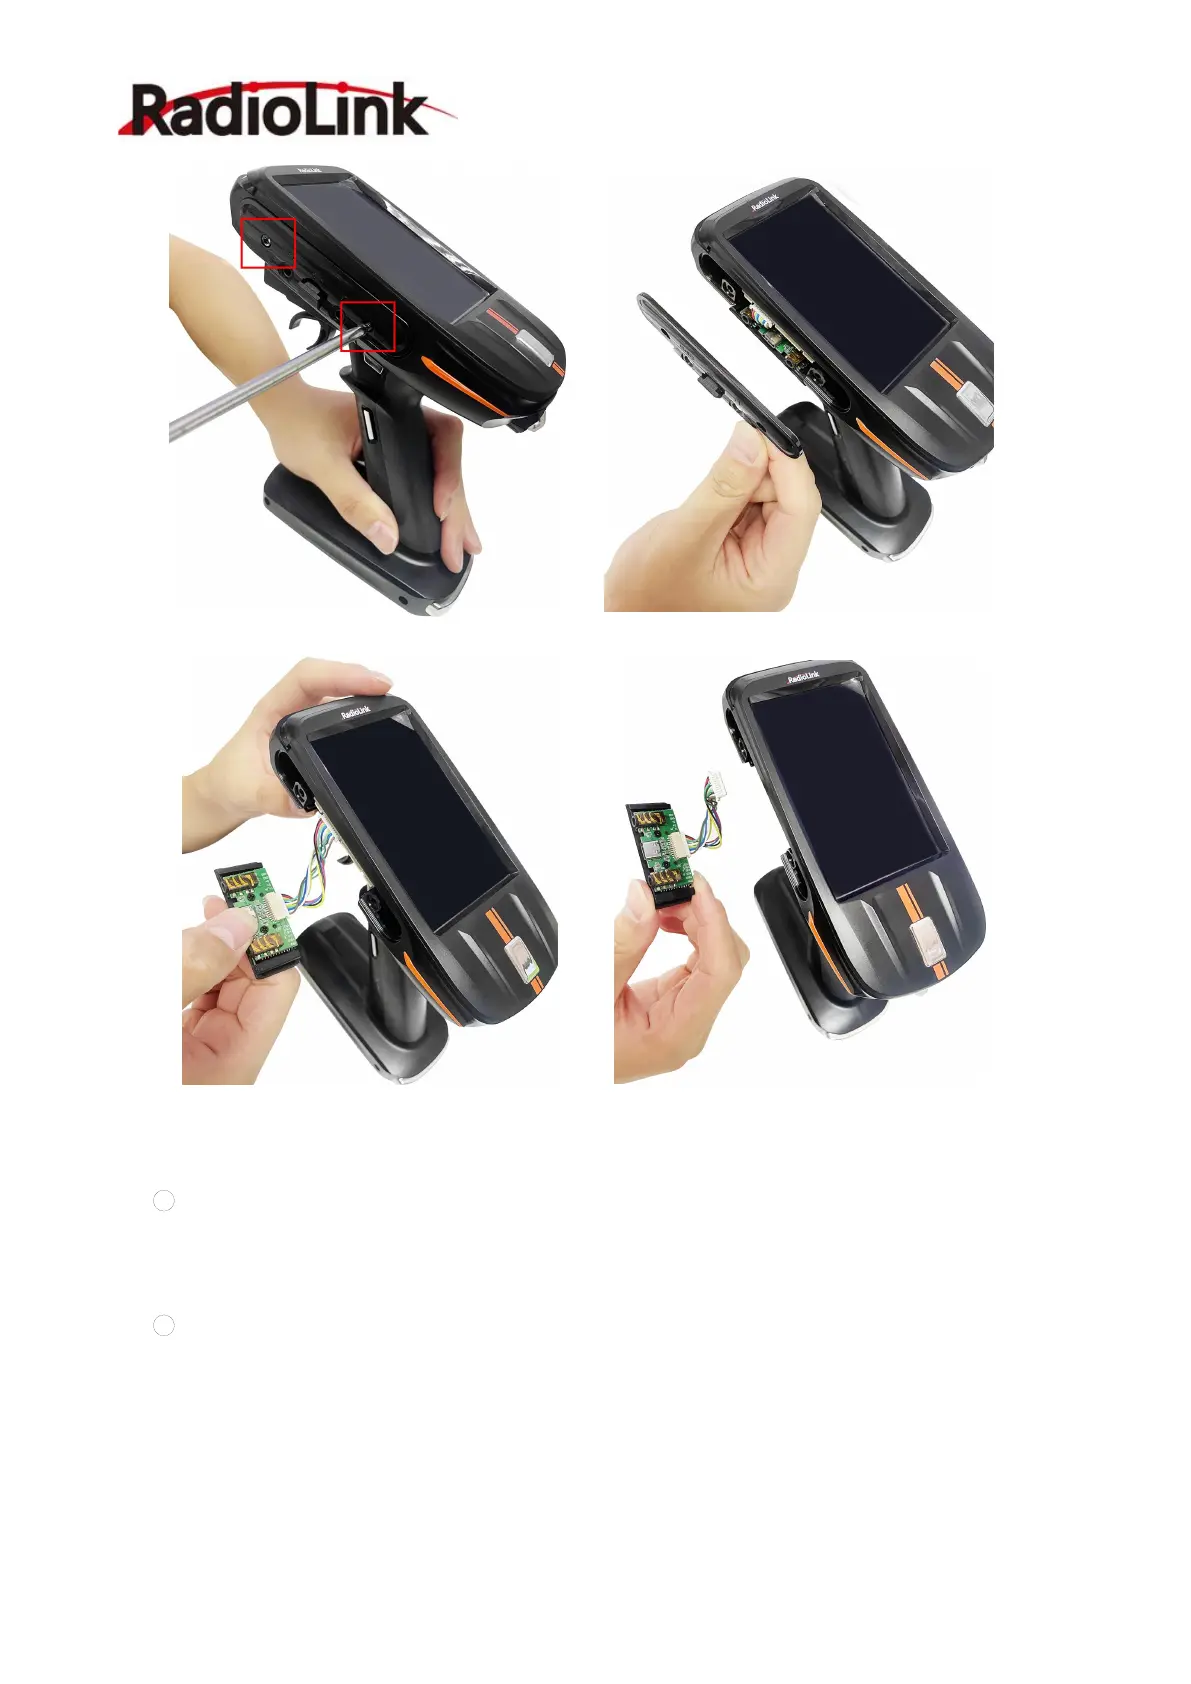
2.10.3 Install Wheel
1
Insert the 14pin plug, 3pin plug and 4pin plug on the steering wheel into the
corresponding socket in the middle of the PCB motherboard on the left side of the RC8X.
2
Insert the plastic steering mounting plate. When inserting part of it, gently insert the
extra part of the 3 connector wires into the interlayer of the RC8X PCB board.
Note: do not block the installation position of the two screws when jamming the cables.
Otherwise installing the wheel will crush the cable.

Table of Contents

Other manuals for RadioLink RC8X

Questions and Answers:

Question and Answer IconNeed help?

Do you have a question about the RadioLink RC8X and is the answer not in the manual?

RadioLink RC8X Specifications

General IconGeneral
Channels8
Frequency2.4GHz
ModulationFHSS
TelemetryYes
Spreading SpectrumDSSS
Antenna TypeDual Antenna
Output SignalPWM, PPM, SBUS
Low Voltage AlertYes
SimulatorYes
Battery TypeLiPo
Voice AlertsYes
Display3.5 inch color screen, 320*480 resolution
Frequency Band2.4GHz
Operating Voltage3.5-4.2V
Channel Resolution4096
Model TypeHelicopter, Airplane, Glider, Multirotor
Compatible ReceiversR8EF, R6FG, R4FGM, R4F
Battery3.7V 3000mAh LiPo

Related product manuals