21 August 2006
3-82
BOOKLET QUALITY ADJUSTMENT
3.9.3 STAPLE POSITION TO CLINCHER
Checking Adjustment
1. Open the Top cover and disconnect a staple detection lead, close the Top cover.
2. Hand feed a two sheet set of paper.
NOTE: Open and close the Top cover and the Booklet maker will automatically cycle
and advance staples.
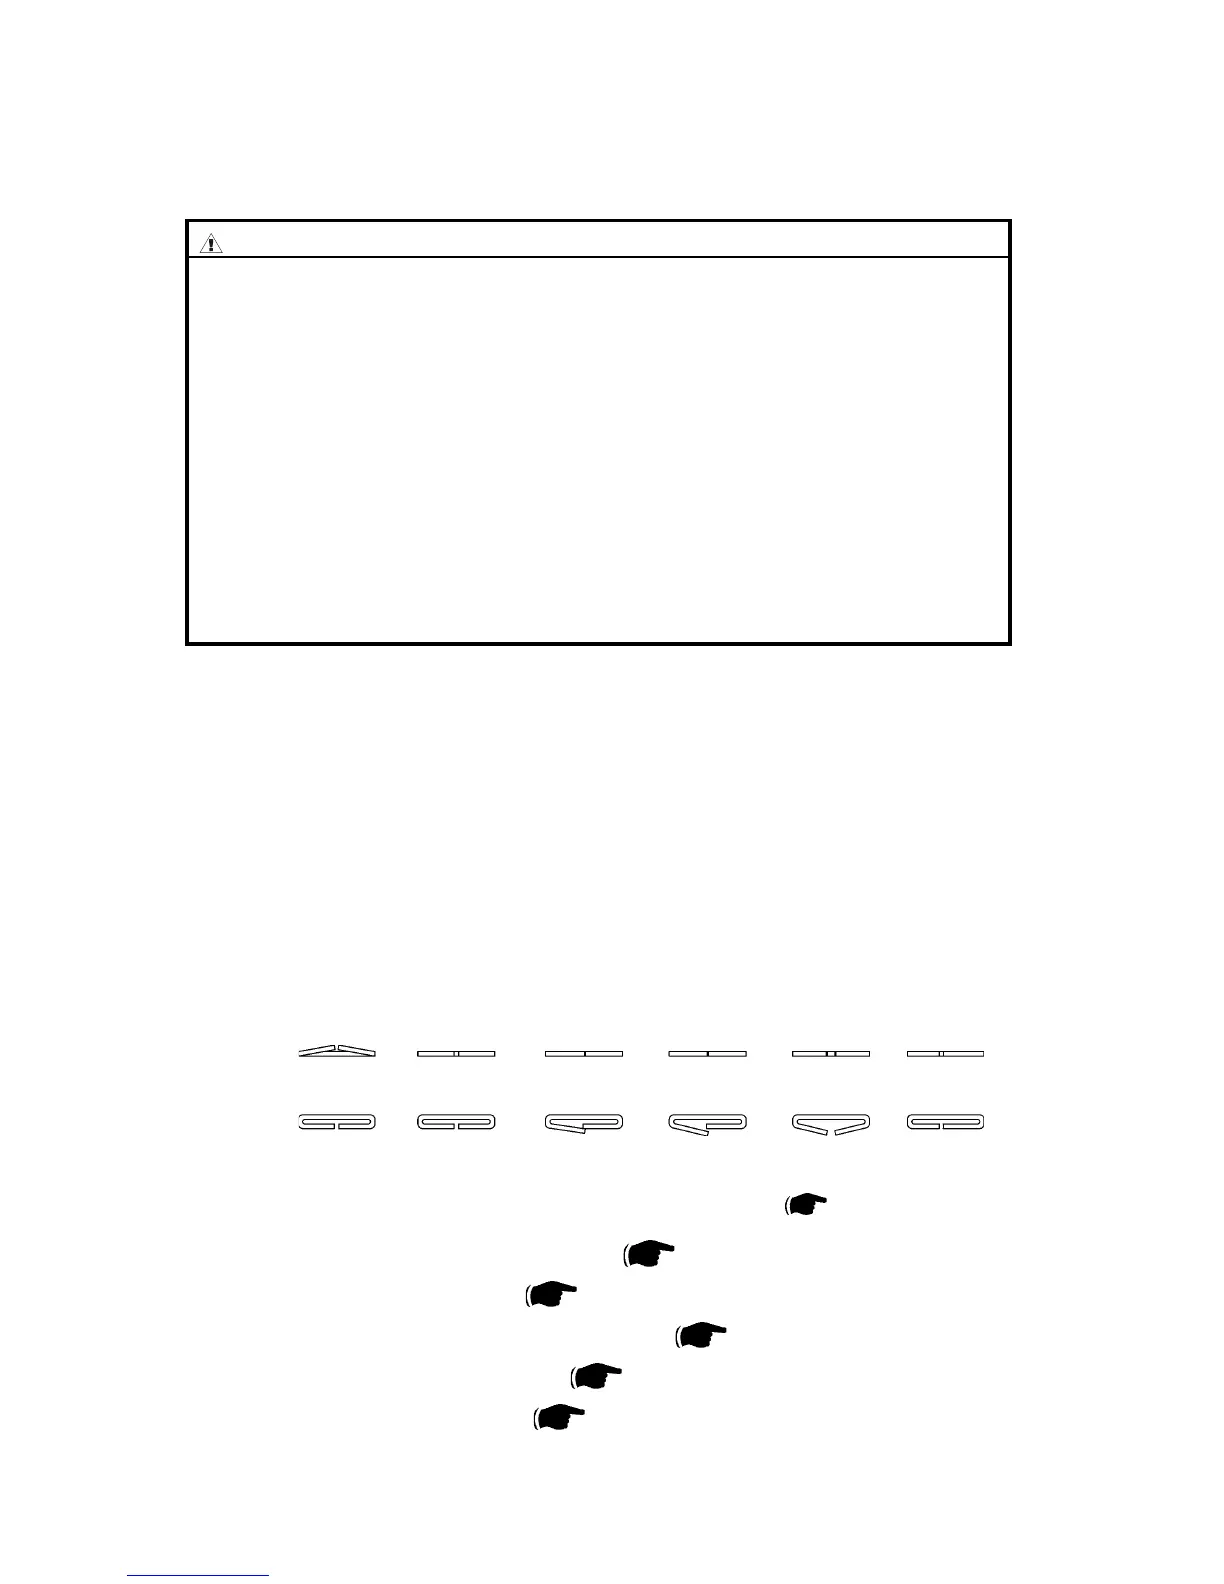
3. Check that the staples are formed properly, according to Figures below.
4. If a bad staple result is achieved, rst perform step 1-20, then proceed from step 21.
5. If a good staple result is achieved on two sheets of paper,
double check the adjustment by running a 20 sheet set.
View from
above
View from
side
Bad
Incorrect
pressure
( 3.9.4)
Deformed
Lengthwise
Bad Bad
BadGood
Good
Deformed
Lengthwise
Deformed
Sidewise
Continued on next page....
CAUTION
Alignment of the stapler head to clincher is carried out at factory. Screws are
sealed with red paint to ensure that alignment is maintained and also to indicate if
it has been moved.
Alignment will not change over time and will therefore not need further adjust-
ment. However, if the adjustment has been tampered with (i.e if red seal is broken)
it is very important to strictly follow the described procedure below. The align-
ment of the stapler head to anvil is crucial and will determine the staple result as
well as the lifetime of the stapler head.
The procedure requires 2 brand new stapler heads.
If, at any time during the procedure the new stapler heads were cycled, when
adjustment were off (staple legs not hitting the slot in the anvil/clincher), stapler
heads are ruined and must be replaced.
The Stapler heads must be adjusted very precisely in order to achieve proper
staple result.
Adjustment
1. Check/adjust Stapler Assembly Drive Bar (
3.4.15).
2. Check/adjust Stapler Pressure (
3.9.4).
3. Check/adjust Stapler Head Retraction distance (
3.4.13).
4. Check/adjust Clincher points height (
3.9.5).
5. Check/adjust Clincher pressure (
3.9.6).
 Loading...