1-65
Installation
04 October 2007
COM BK5010
COM BF5010
COM BK5010
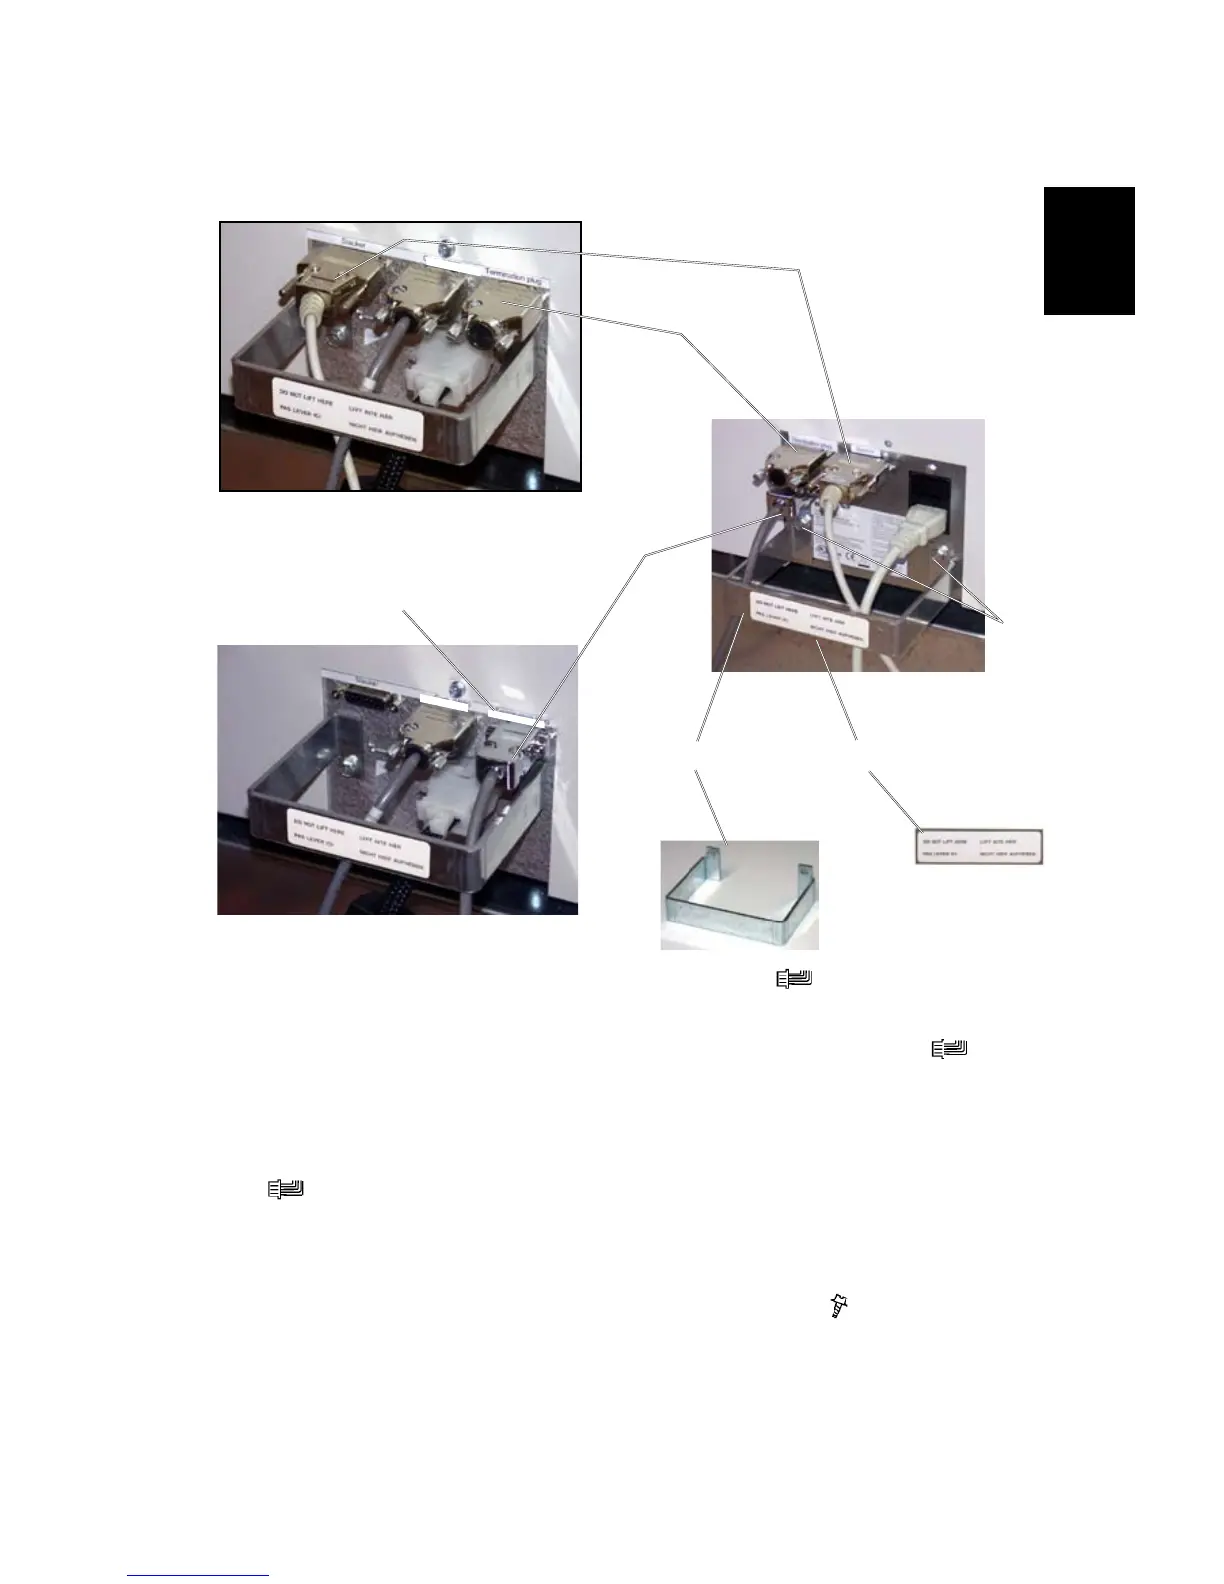
1.6.5 CONNECTORS
[B]
[A]
[C]
1. Move the Belt stacker cable [A] to the Book Folder (
x 1).
NOTE: Do not connect the Belt stacker cable [A] to the Trimmer.
2. Move the Terminator plug [B] from the Trimmer to the Book Folder (
x 1).
3. Install the COM. BF5010 sticker [C], from the installation kit, over the “Termi
-
nator” sticker on the Trimmer.
4. Install the Communication cable [D] between the Trimmer and the Book Folder
( x 1).
5. Connect the power cord from the BK5010 to the BF5010
6. Mount the cable protector [E] positioned as shown with two screws in the
holes [F] and route the cables inside the cable protector ( x 2).
7. Attach the sticker “Do not lift here” [G] on the cable protector.
8. Install the cable holder on the rear side of the Book Folder.
9. Route cables through the cable holders on the rear side of the Booklet Maker,
Trimmer and Book Folder.
Book Folder
Trimmer without Book Folder installed
[D]
Trimmer with Book Folder installed
[G]
[E]
[F]
BOOK FOLDER INSTALLATION