Replacement
Adjustment
21 August 2006
Replacement
Adjustment
3-81
BOOKLET QUALITY ADJUSTMENT
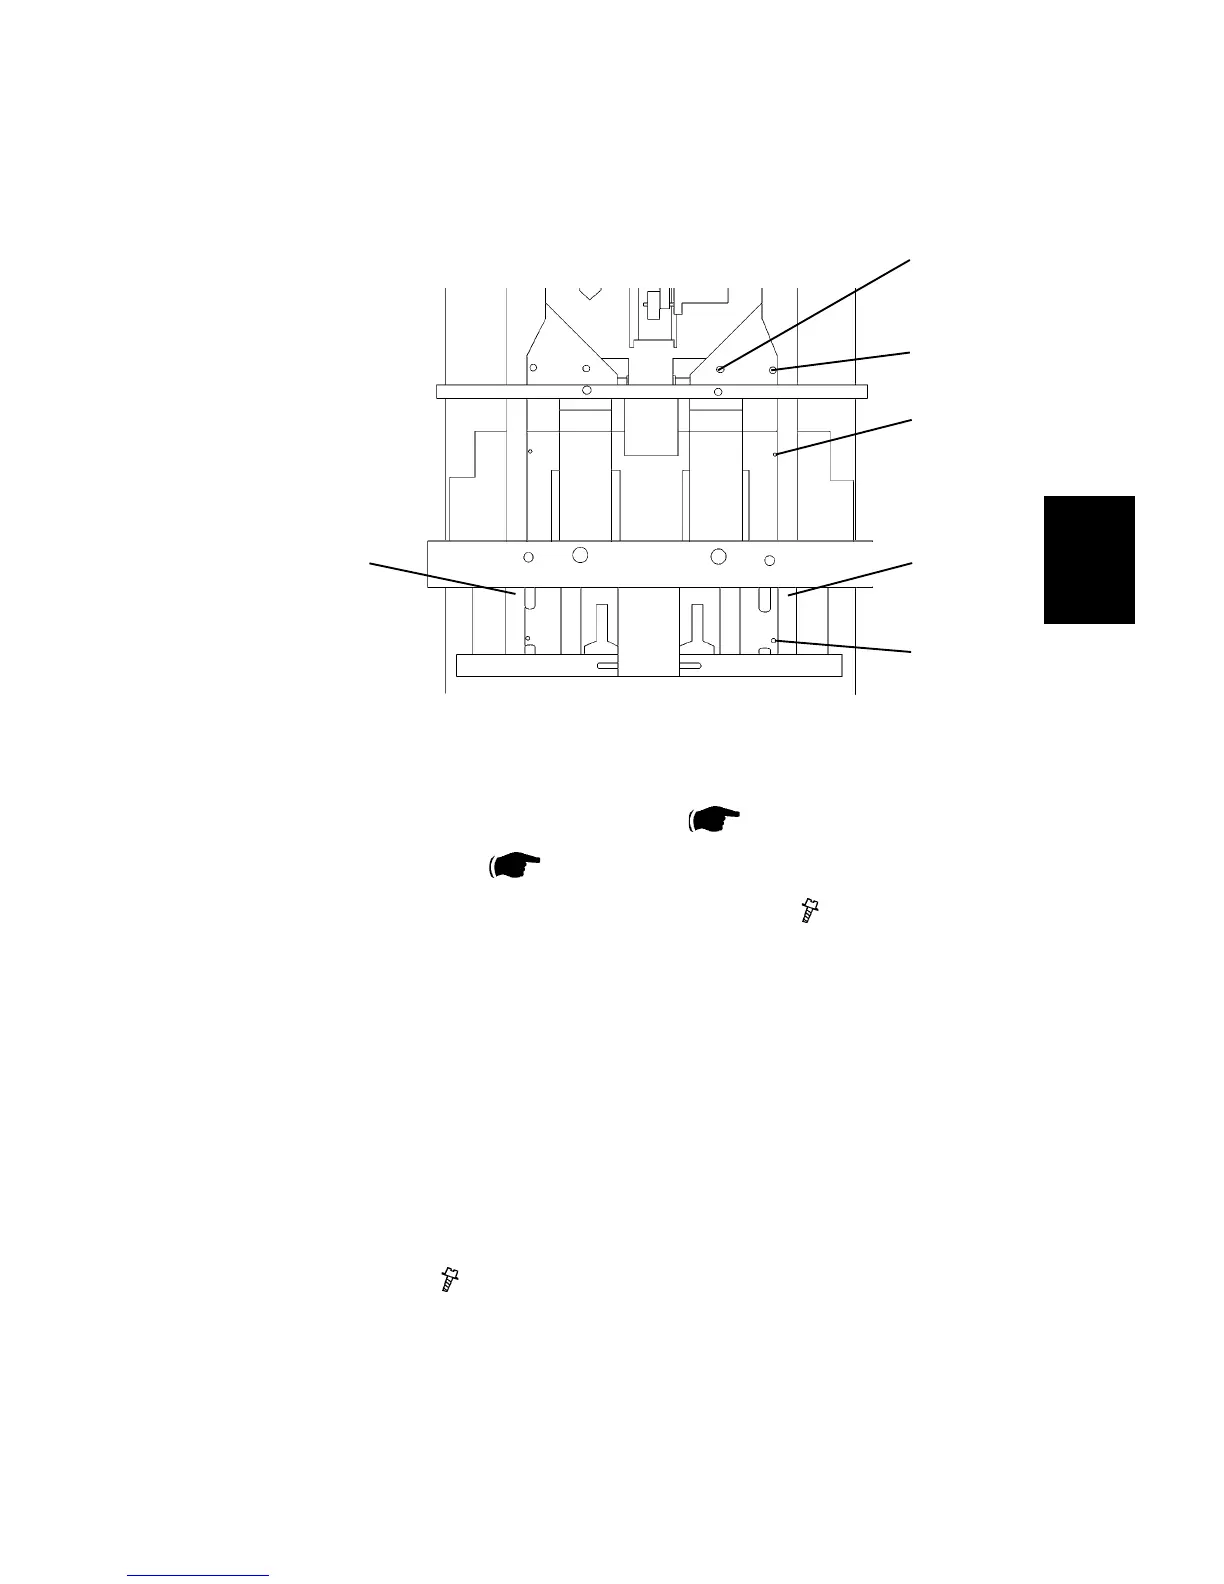
3.9.2 SIDE GUIDE PARALLELISM
Removal Front
1. Check/adjust Staple stop gate parallelism (
3.9.1).
2. Remove Infeed cover ( 3.3.2 ).
3. Remove screw [A] and [B] to the Front side guide [C] (
x2 ).
NOTE: The nut plate may fall down into the machine.
4. Same procedure on the Rear side guide [D].
Adjustment
1. Move the side guide [C] to the two holes [E] and [F] in the paper path.
2. Check the distance between the two holes and the side guide. The distance
should be equal ± 0.3 mm between the lower hole [E] and the side guide [C],
and the upper hole [F] and the side guide [C]. If not, go to step 3.
3. Loosen screw [A], also loosen screw [B] a little. Adjust the side guide [C] ac
-
cording to step 2 ( x2 ).
4. Perform the same check on the Rear side guide [D], adjust if needed.
Replacement
1. Reverse the removal procedure.
Stapler area seen from above, with the
stapler heads removed.
[B]
[A]
[E]
[F]
[D] [C]