BOOKLET MAKER INSTALLATION
1.3.4 CONNECTORS
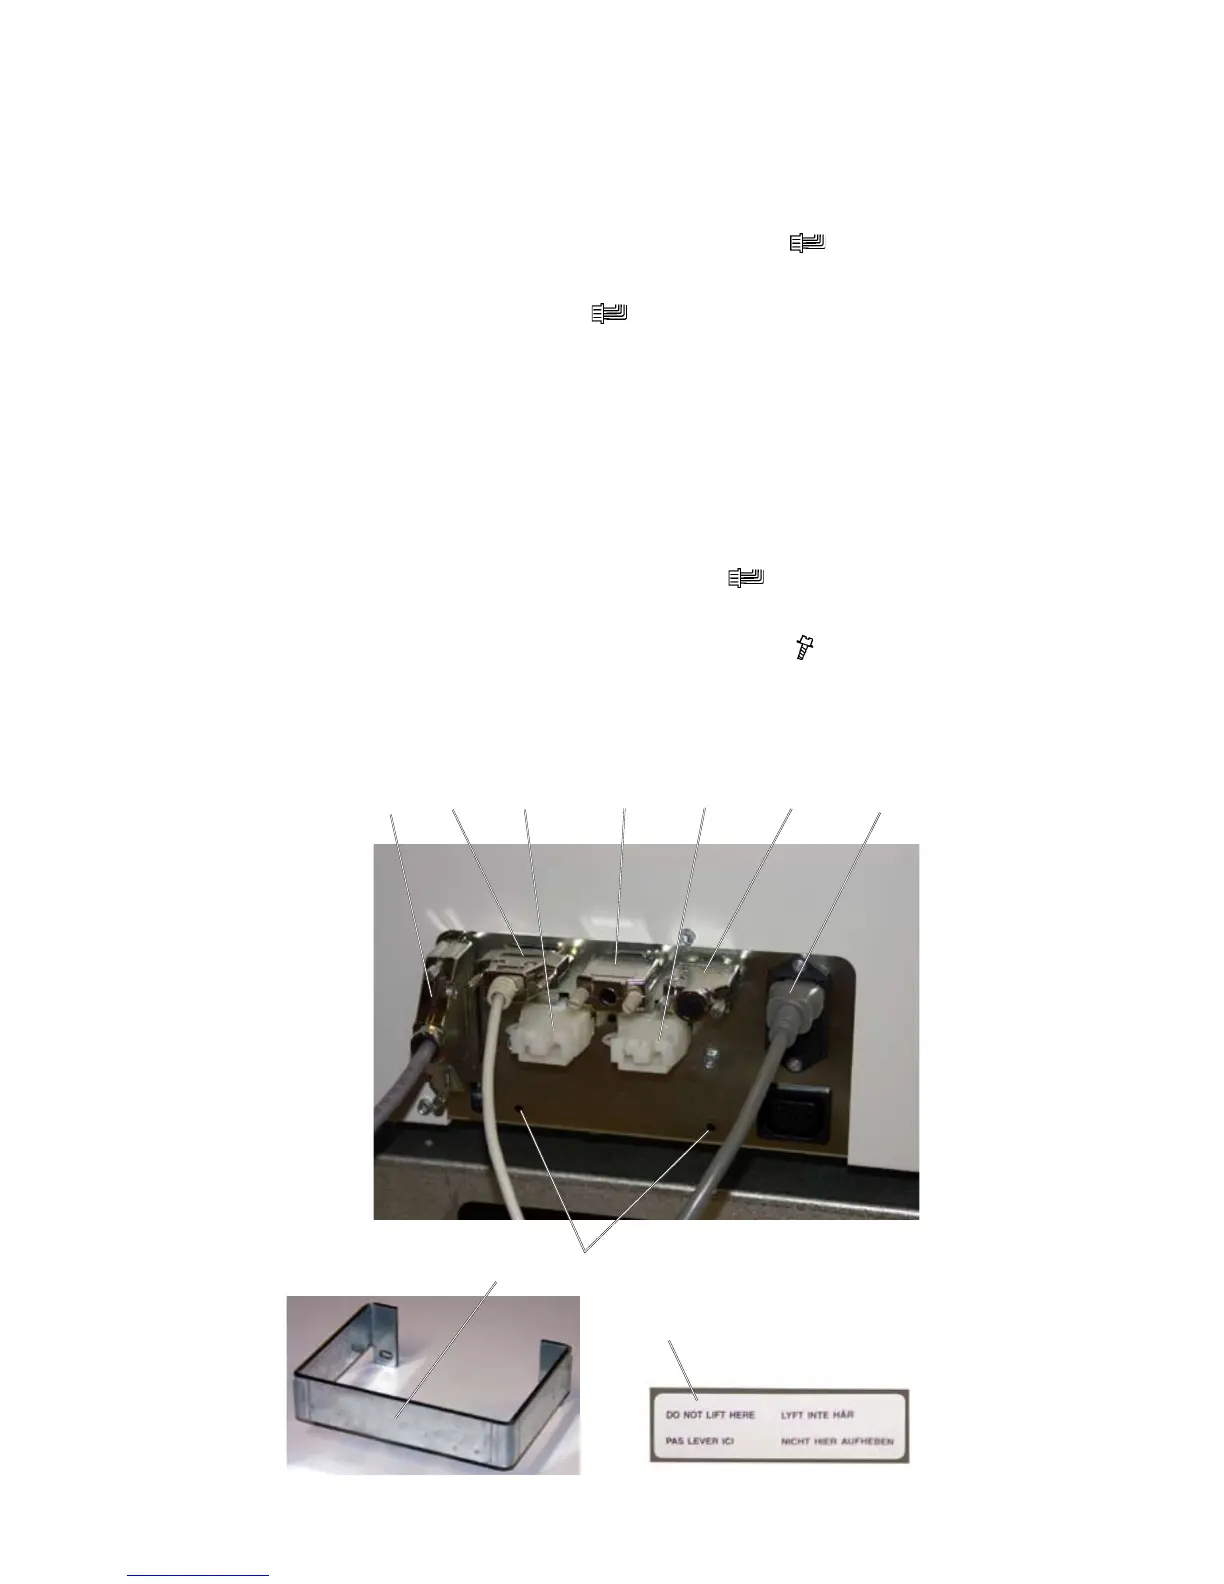
1. Connect the communication cable [A] from the nisher ( x1), to the Book-
let maker.
2. Connect the Belt Stacker cable [B] (
x1).
NOTE: Unless Trimmer TR5010 and/or Book Folder BF5010 will be installed.
If so, Belt Stacker cable will be connected to the last module in the system.
3. Install the Terminator plug [C] and the Interlock jumper [G].
NOTE: The Terminators and Interlock jumpers are stored in the installation kit.
4. Install the Terminator plug [D] and the Interlock jumper [F].
NOTE: Unless Trimmer TR5010 will be installed. If so, communication cable
and power cord between BK5010 and TR5010 will be connected.
5. Connect the powercord [E] to the Booklet maker (
x1).
6. Mount the cable protector [H] positioned as shown with two screws in the
holes [I] and route the cables inside the cable protector ( x 2).
7. Attach the sticker “Do not lift here” [J] on the cable protector.
8. Install the cable holders on the rear side of the Booklet Maker and route the
cables through them.
[B][A] [C] [D] [E][F][G]
Only Booklet Maker installed
[H] [I]
[J]