21 August 2006
3-84
Staple deformed Lengthwise
21. Loosens screws [B] and [F] (
x2).
22. Turn Screw [H] maximum 1/8 of a revolution (45°).
NOTE: Turn clockwise if adjusting stapler assembly downwards and vice
versa.
23. Tighten screws [F] and [B] (
x2).
NOTE: First tighten screw [F] while pushing Stapler head bracket upwards.
Secondly tighten screw [B] while pushing Stapler head bracket against
screw [A].
24. Repeat
Checking Adjustment.
NOTE: This procedure may need to be performed several times before a good
staple result is achieved.
Staple deformed Sidewise
25. Repeat step 6-20 regarding the sidewise adjustment.
NOTE: Do not loosen screw [F] this time.
BOOKLET QUALITY ADJUSTMENT
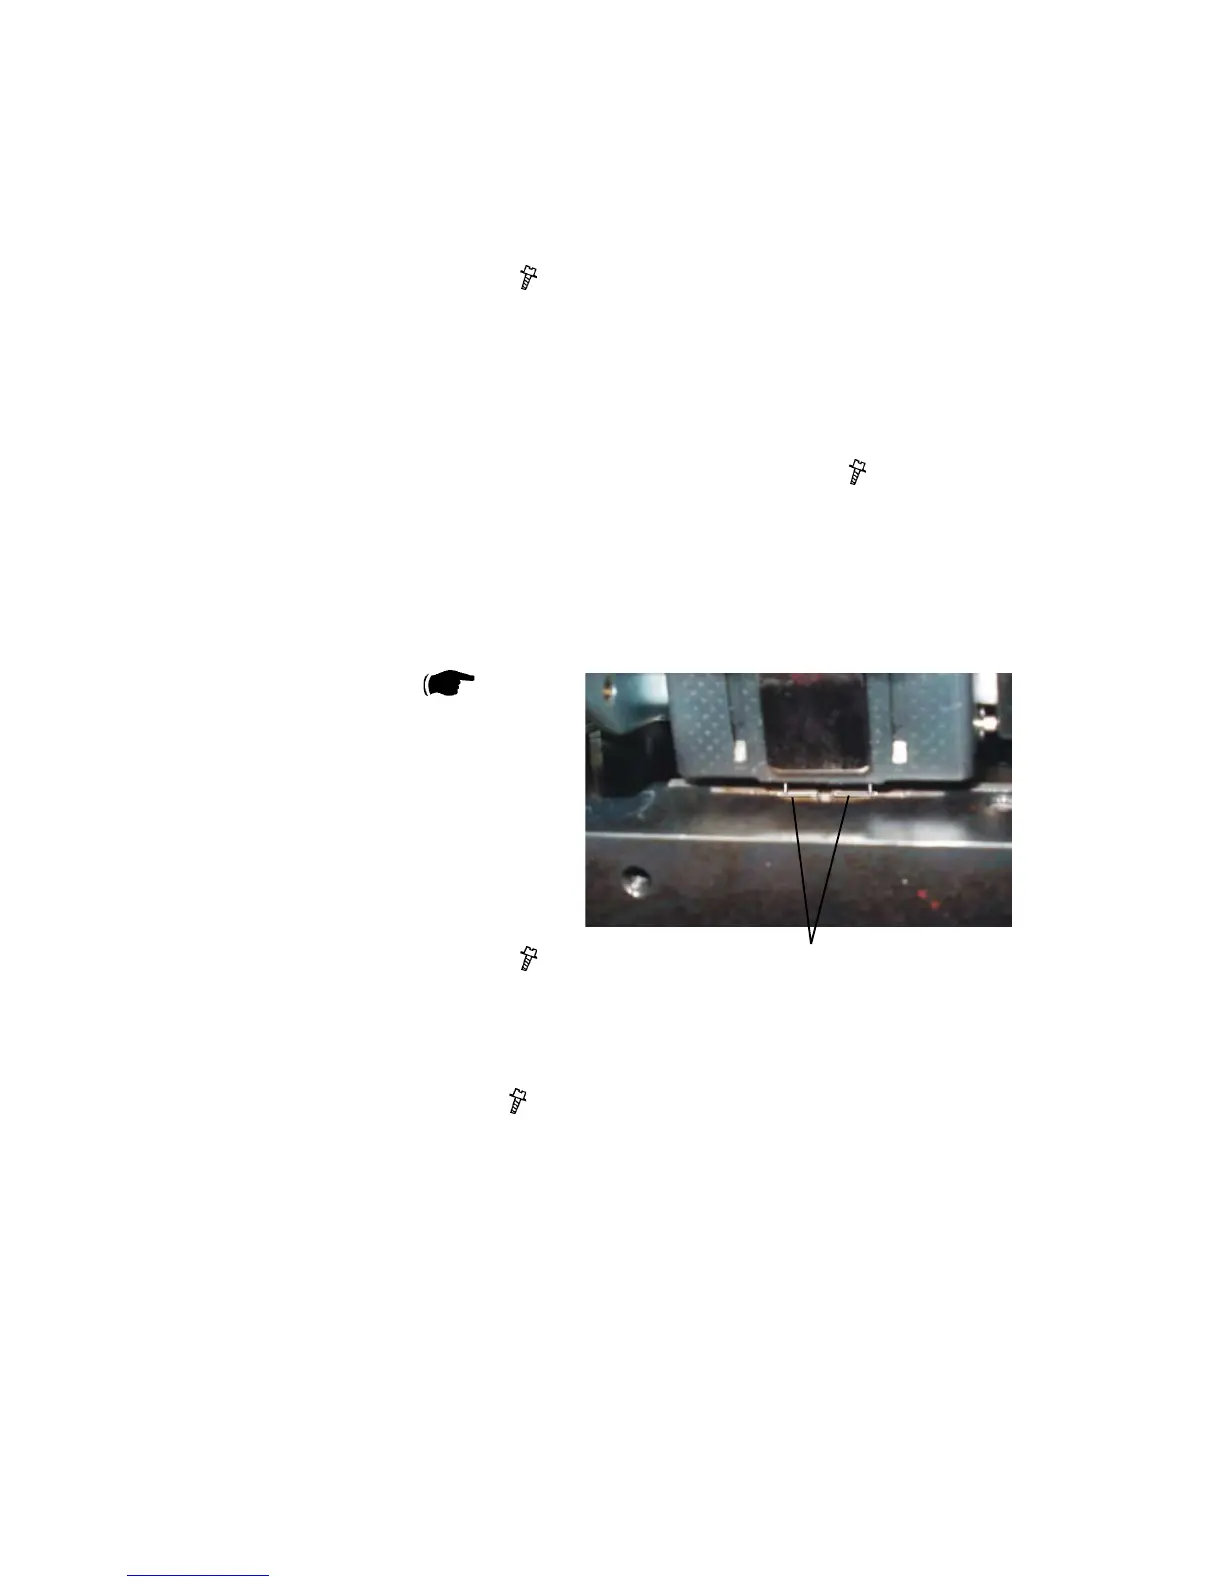
[K]
12. Push gently on plunger [C] and check if the staple legs are positioned in the
center of the clincher points [K]. Check both sidewise and lengthwise.
NOTE: Use a ash light to clearer see the alignment.
13. Loosens screws [B] and [F] (
x2).
14. For lengthwise adjustment, turn adjustment screw [H].
For sidewise adjustment, turn adjustment screw [A].
NOTE: Push Stapler head bracket against adjustment screw [A] while ad-
justing sidewise. Push Stapler head bracket upwards while adjusting
lengthwise.
15. When correct position is obtained, tighten screws [F] and [B] (
x2).
NOTE: First tighten screw [F] while pushing Stapler head bracket upwards.
Secondly tighten screw [B] while pushing Stapler head bracket against
screw [A].
16. Repeat procedure for the other Stapler head.
17. Remove Tool [I].
18. Reinstall Infeeder (
3.3.3).
19. Install new stapler heads.
20. Repeat
Checking Adjustment.
 Loading...