BOOKLET MAKER INSTALLATION
1. If installing a Rail unit, install it now.
NOTE: If the Rail unit is installed later the height adjustment of the Booklet
maker will be incorrect.
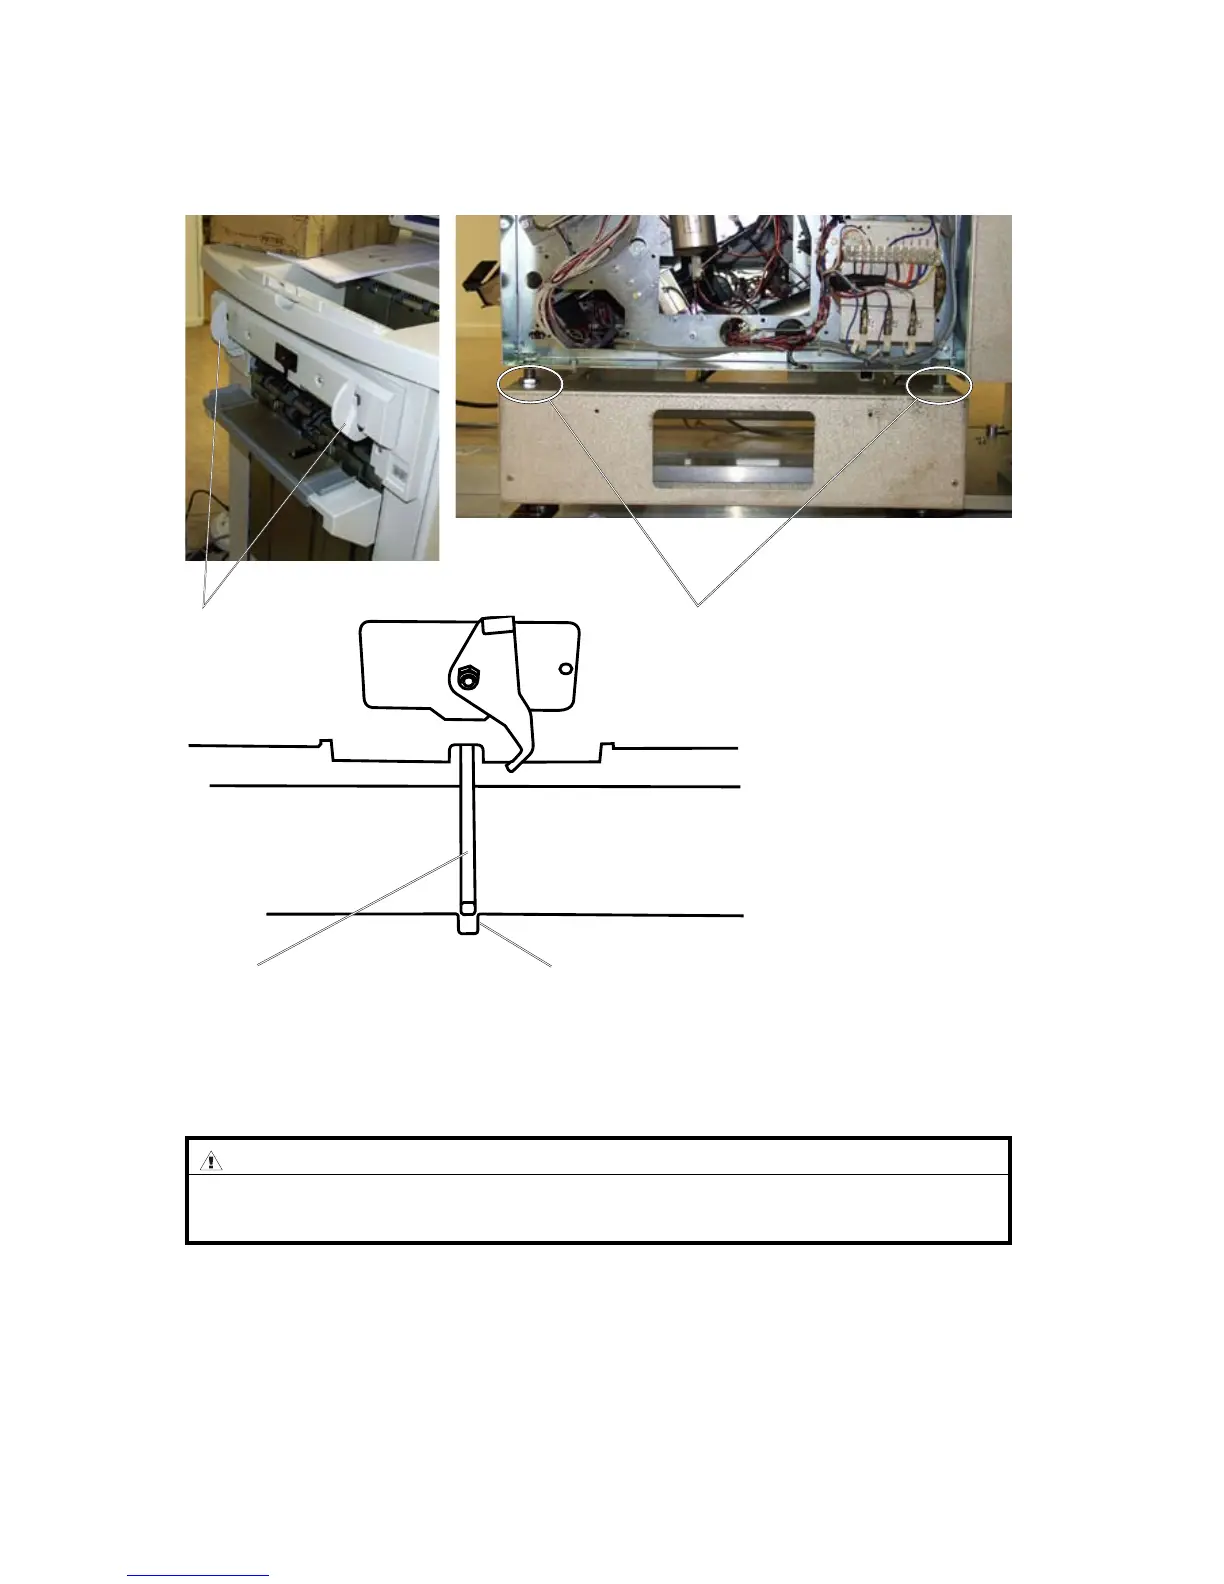
2. Dock the Booklet Maker to the Docking assembly.
[C]
[A]
[D]
[B]
Booklet Maker, front view
CAUTION
Before docking, make sure the Jogger Fence [A] is in the upper position. If
not,withcopierpoweredon-openandclosenisherdoor.
3. Unhook the Exit paper arm [B].
4. To align the Booklet Maker side to side, turn both front adjustment nuts [C] until
the Exit paper arm [B] ts in the cut-out [D] on the Booklet Maker.
NOTE: Turn both screws equal amount of turns.
NOTE: Do not adjust the machine sideways by moving the docking pins on
the docking bracket.
5. Hook up the Exit arm catcher to it’s upper position.



 To Next Page