USER MANUAL (Instruction for Use) SW 6.1
Service Procedures and Functions
Version 6.1.6 dated 2020-01-31 EN Page 124 of 201
To perform the Fluence Test the following steps must be performed:
1. Select the <Fluence Test>button in the Functions Menu and follow the messages on the
monitor.
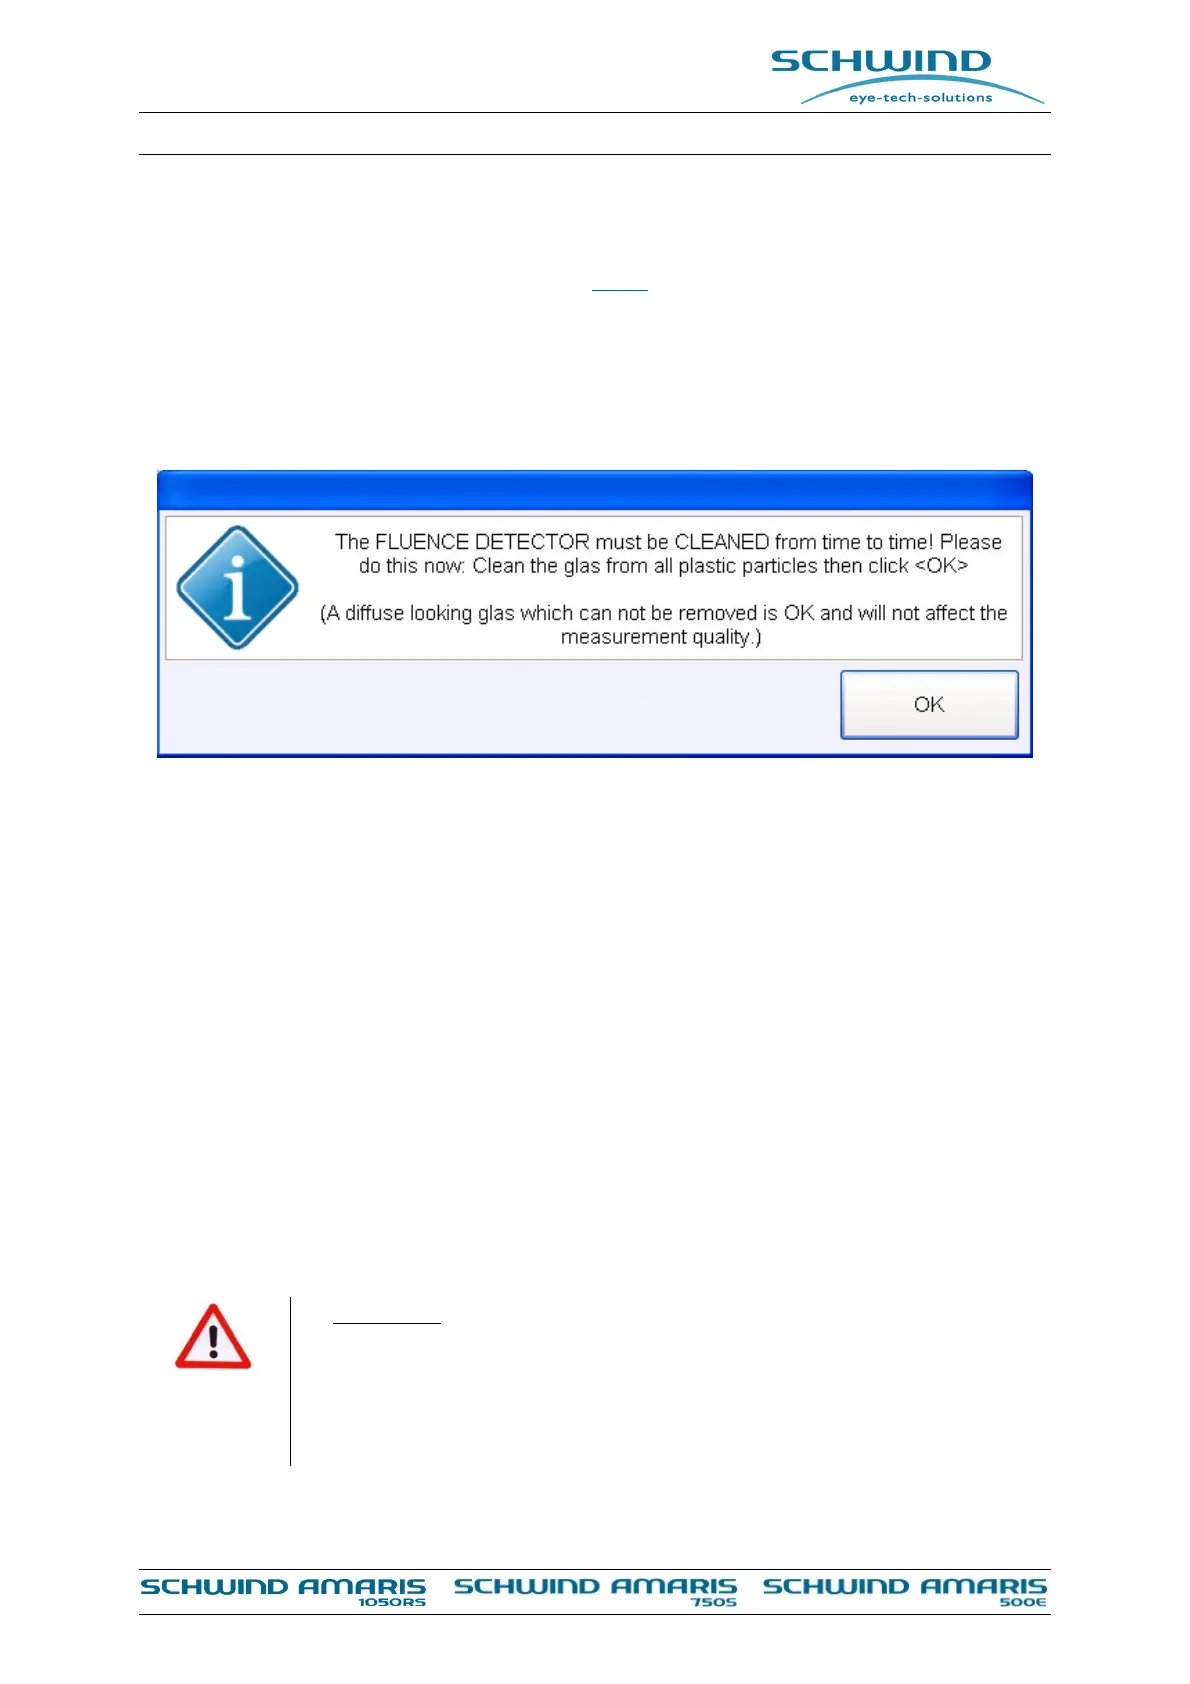
2. Every 15 fluence tests a message will appear which asks to clean the fluence detector with
a micro fibre tissue which is supplied with AMARIS.
Figure 7-18 : Fluence detector cleaning message
3. Reduce the light in the room. The surgery illumination will be switched off automatically
during the test. After having completed the fluence test the illumination will return back to
its initial value before starting the calibration.
4. Place the HS-foil under the clamp of the fluence detector.
5. Use both positioning slits to focus and center on the blue surface of the detector in order
to be in the correct plane roughly, then move the bed laterally in order to bring the HS-foil
into the ablation area as shown in Figure 7-17, confirm the correct ablation height with the
positioning slits while looking through the microscope and fine adjust (if needed).
6. or adjust the ablation height directly on the HS-foil, also using both positioning slits.
7. Check on the monitor that the adjusted position of the sensor is located in the center of the
camera picture (live video). Further follow the instruction of the SW. The place where the
high stability foil will be perforated during the fluence test is indicated by four green circles.
Take care that there is no previously perforated area of the foil at the indicated positions
for the new ablations.
WARNING!
Ensure that the sensor is correct positioned and the laser beam will not be
exposed onto the clamp of the sensor.
Reflective objects (like high-gloss polished metal surfaces) in the area of the
laser beam may lead to dangerous mirrored reflections.
 Loading...