Section 02 ENGINE
Subsection 10 (CYLINDER HEAD)
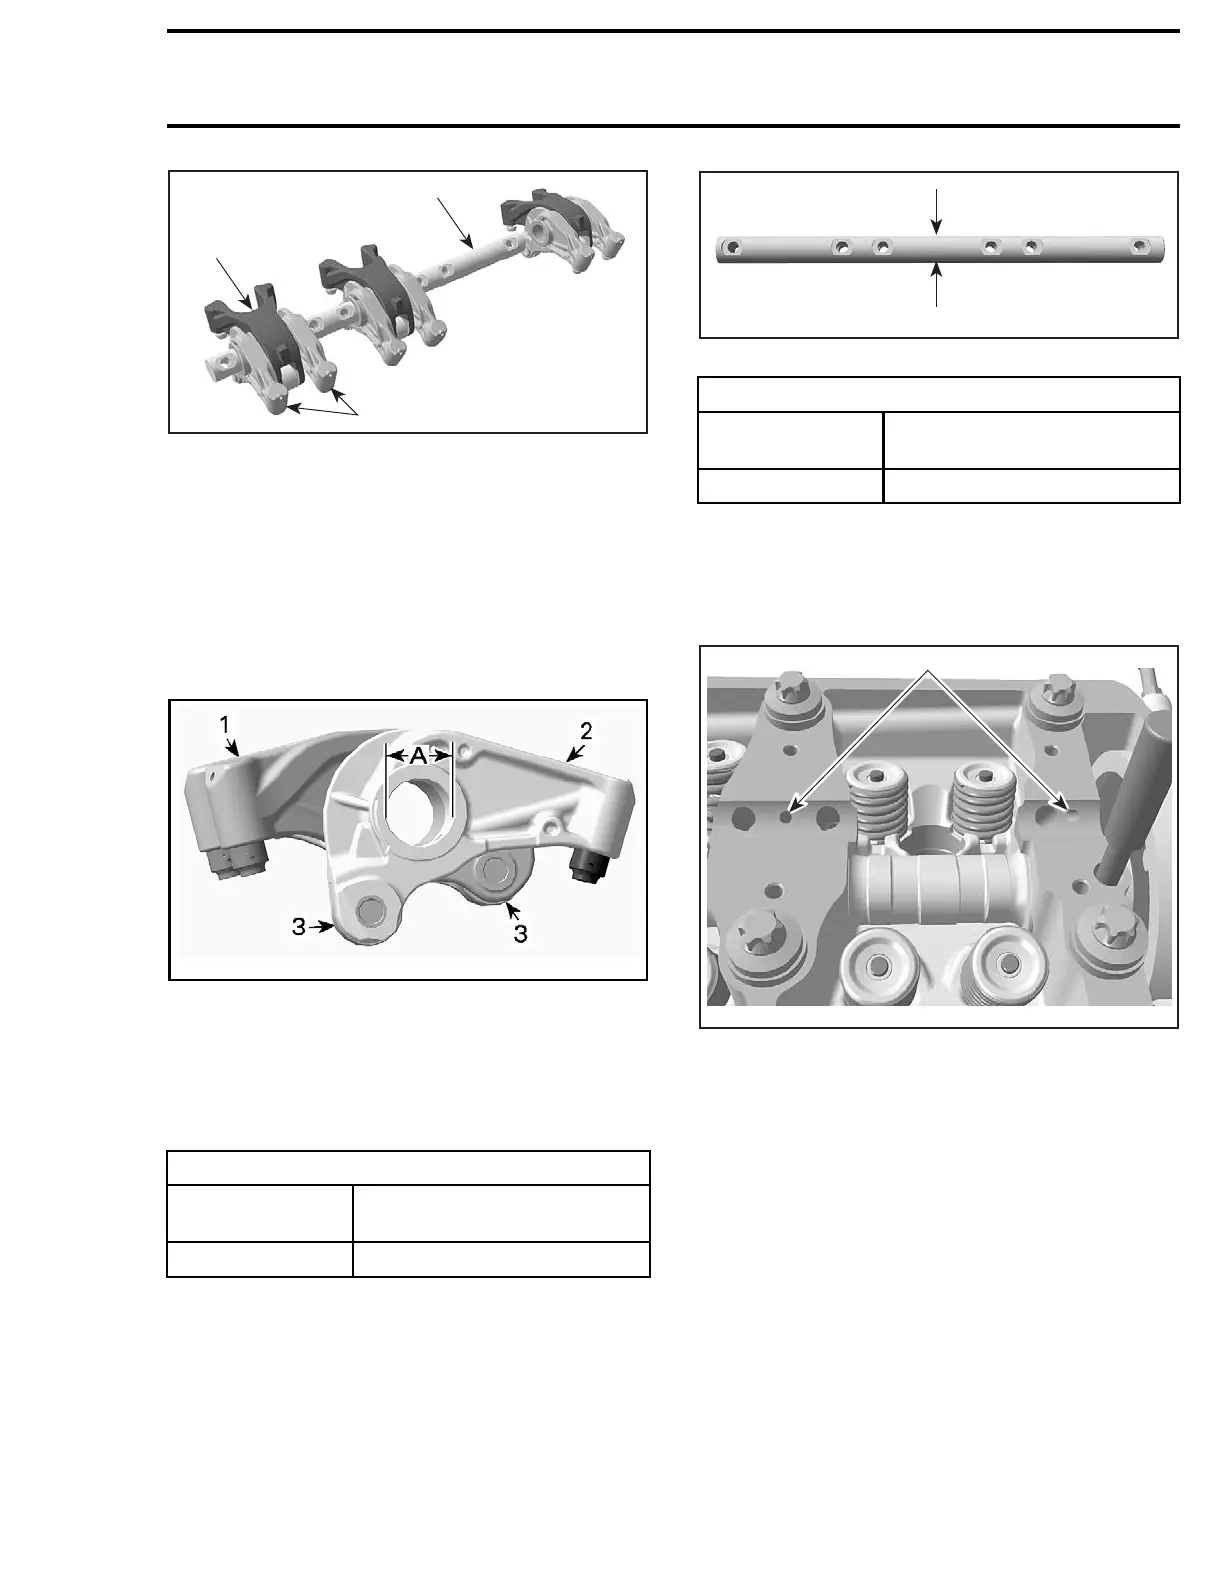
1
R1503motr84A
2
3
1. Rocker arm shaft
2. Rocker arms (exhaust side)
3. Rocker arm (intake side)
Rocker Arm Inspection
Inspect each rocker arm for cracks and scored fric-
tion surfaces. If so, replace rocker arm assembly.
Check the rocker arm rollers for free movement,
wear and excessive radial play. Replace rocker
arm assembly as necessary.
smr2008-017-006_a
1. Rocker
arm (intake side)
2. Rocker arm (exhaust side)
3. Rollers
A. Rocker
arm inside diameter
Measure rocker arm inside diameter. If diameter
is out of specification, change the rocker arm as-
sembly.
ROCKER ARM INSIDE DIAMETER
NEW
20.007 mm - 20.020 mm
(.7877in - .7882 in)
SERVICE LIMIT
20.035 mm (.7888 in)
Press the hydraulic lifter with your thumb. If the
hydraulic lifter can be fully pressed in, replace
rocker arm. Lifter must turn freely in rocker arm
bore. Otherwise, replace.
Rocker Arm Shaft
Chec
k for scored friction surfaces, if so, replace
part
s.
Measure rocker arm shaft diameter.
A
R1503motr90A
A. Measure rocker arm shaft diameter here
ROCKER ARM SHAFT DIAMETER
NEW
19.980 mm - 1
9.993 mm
(.7866in - .7871 in)
SERVICE LIMIT
19.965 mm (.786 in)
Any area worn excessively will require parts re-
placement.
Verify and clean oil orifices to ensure a good rocker
arm shaft lubrication.
1
R1503motr85A
1. Oil orifices from the camshaft to the rocker arm shaft, then to
the rocker arms and finally to the valve adjustment
Rocke
r Arm Installation
For installation, reverse the removal procedure.
Pay attention to the following details.
NOTE: The rocker arm shaft can only be installed
in one specific position. Therefore the camshaft
has to be positioned with its locking pin when the
piston of cylinder no. 3 is on ignition TDC.
1. Lock c
amshaft. Refer to
CAMSHAFT
in this
subse
ction.
2. Make sure the position lines on oil separator
cover are lined up as shown in the following il-
lustration.
smr2009-025 135

 Loading...