Section 07 BODY AND HULL
Subsection 03 (HULL)
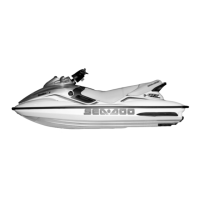
smr2009-043-020_a
1. Apply loctite 5900 here (underside of pump support)
3. Torque jet pump support screws as specified in
exploded view.
smr2009-043-019_a
1. Torque p
ump support screws (4x)
4. Remove any excess sealant from the right hand
forward ride plate mounting hole.
5. Reinst
all all removed parts in the reverse order
of remo
val. Refer to appropriate subsections
for pr
ocedures.
THRU-
HULL FITTING
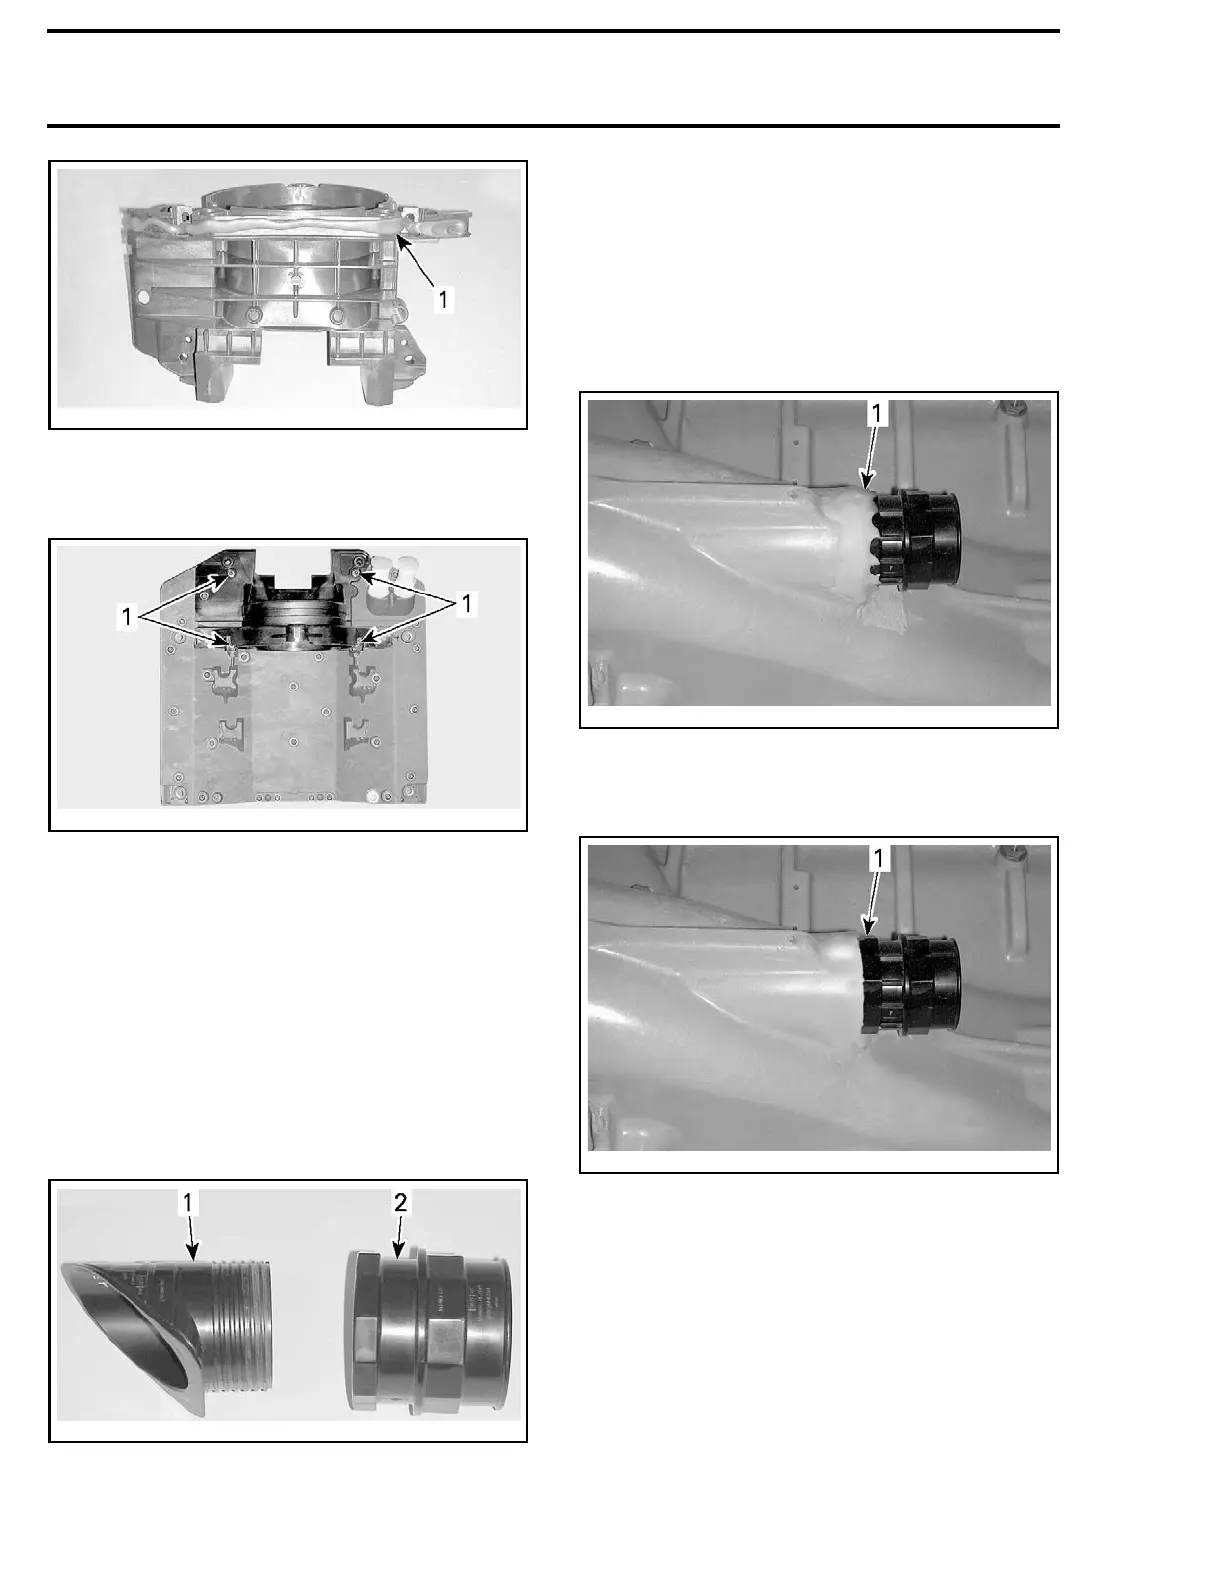
The thru-hull fitting is composed of 2 pieces, an
outer fitting, and an inner fitting that screws onto
the outer fitting after the outer fitting is inserted
in the hull.
smr2009-043-024_a
1. Outer fitting
2. Inner fitting
Thru-Hull Fitting Removal
Inner Fitting Removal
1. Remove drive shaft, refer to
DRIVE SHAFT
sub-
section.
2. Using a heat gun, heat the glue at the joint be-
tween the hull and the inner thru-hull fitting to
soften the glue applied.
smr2009-043-022_a
1. Heat here
3. Carefully remove overlapping glue from around
the inner fitting.
smr2009-043-031_a
1. Inner thru-hull fitting (overlapping glue removed)
4. Unscrew the inner fitting from the outer fitting
using a 65 mm (2.56 in) socket.
Outer Fitting Removal
1. Carefully cut sealant around the edge of the
outer fitting (jet pump side).
504 smr2009-042

 Loading...