Section 06 STEERING AND PROPULSION
Subsection 03 (JET PUMP)
smr2009-006-007
TYPICAL
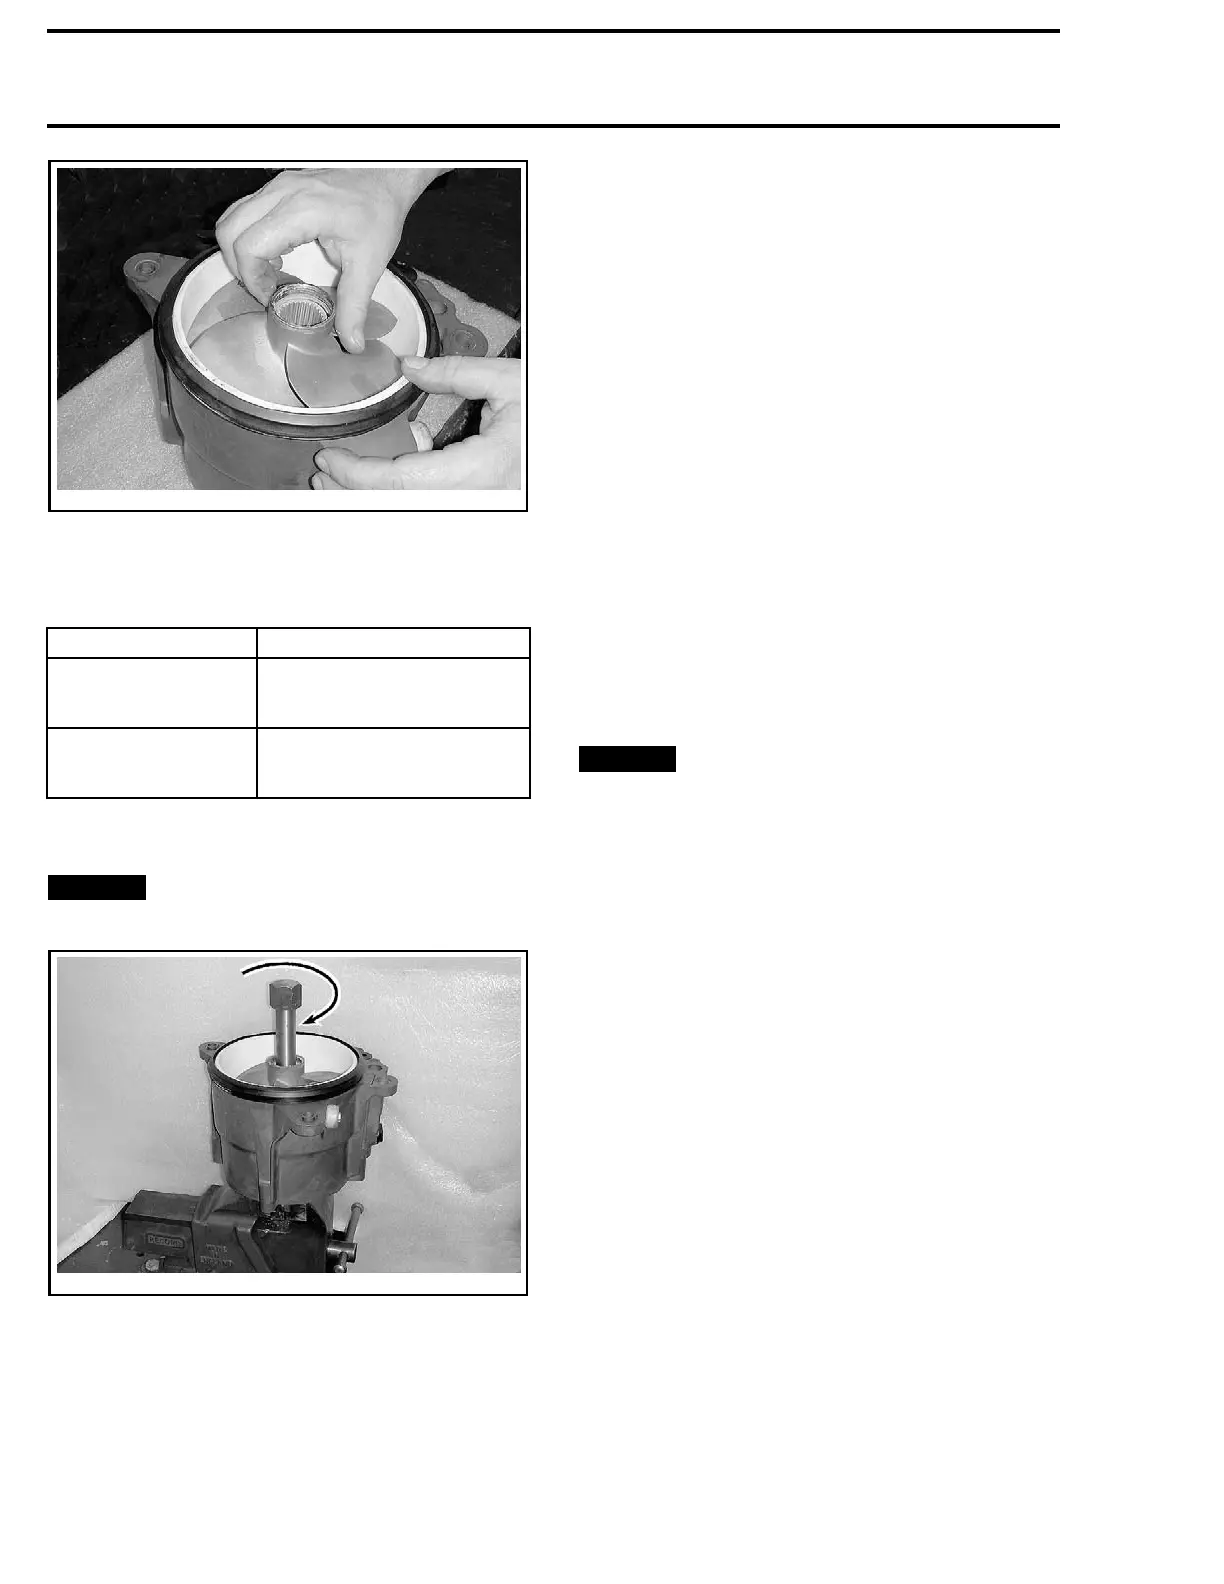
5. Mount in the impeller splines the appropriate
impeller remover/installer tool according to en-
gine type.
MODEL TOOL
130 and 15
5 engines
IMPELLER
REMOVER/
INSTALLER
(P/N 529 035 820)
215 and 255 engines
IMPELLER
REMOVER/INSTALLER
(P/N 529
035 956)
6. Torque
impeller to 125 N•m (92 lbf•ft), then re-
move to
ol.
NOTICE
Never use an impact wrench to
tighten impeller shaft.
smr2009-006-006_a
TYPI
CAL
7. ApplyLOCTITE 577 (THREAD SEALANT) (P/N 293
800 050)
on impeller boot threads.
8. App
ly
XPS SYNTHETIC GREASE (P/N 293 550 010)
ins
ide impeller boot.
9. Install impeller boot on impeller and tighten
counterclockwise.
WEAR RING
Wear Ring Inspection
Check wear ring for:
– Deep scratches
– Irregular surface
– Any apparent damage.
Check
IMPELLER/WEAR RING CLEARANCE
,see
procedure at the beginning of this subsection.
Wear Ring Removal
1. Remove the iBR gate, VTS trim ring and the
steering nozzle as an assembly. See procedure
in
IBR AND VTS
subsection.
2. Remove jet pump from watercraft. Refer to
JET PUMP HOUSING
in this subsection.
3. Remove impeller from jet pump housing, refer
to
IMPELLER
in this subsection.
4. Place jet pump housing in a vise with soft jaws.
It is best to clamp housing using a lower ear.
5. Cut wear ring at two places.
NOTICE
When cutting ring, be careful not to
damage jet pump housing.
NOTE: Wear ring can be cut using a jigsaw, a
small grinder or a low clearance hacksaw.
6. After cutting ring, insert a screwdriver blade be-
tween jet pump housing and ring outside diam-
eter.
7. Push ring so that it can collapse internally.
8. Pull ring out.
Wear Ring Installation
To install wear ring in housing, use a square steel
plate of approximately 180 x 180 mm x 6 mm thick
(7x7inx1/4in)andapress.
Manually engage ring in housing making sure it is
equally inserted all around. Press ring until it seats
into bottom of housing.
418 smr2009-039

 Loading...