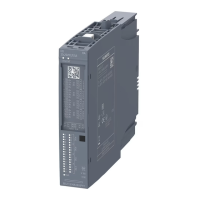
1PosInc/Analog
4.2 Brief Instructions on Commissioning the 1PosInc/Analog
ET 200S Positioning
118 Operating Instructions, 05/2007, A5E00124871-04
Test
Start inching mode, and monitor the associated feedback.
1. Use "Monitor/Modify Variables" to check the actual value and the status bits POS_ACK,
POS_ERR, POS_DONE, ERR_ENCODER.
2. Select the "Block" folder in your project. Choose the "Insert > S7 Block > Variable Table
menu command to insert the VAT 1 variable table, and then confirm with OK.
3. Open the VAT 1 variable table, and enter the following variables in the "Address" column:
– MD12 (actual value)
– M8.0 (POS_ACK)
– M8.1 (POS_ERR)
– M8.2 (POS_DONE)
– M8.7 (ERR_ENCODER)
– M30.0 (inching in plus direction)
– M30.1 (inching in minus direction)
– MW32 (speed for inching mode; as S7 analog value 0-7EFFH)
4. Choose "PLC > File Connect To > Configured CPU" to switch to online.
5. Choose "Variable > Monitor" to switch to monitoring.
6. Switch the CPU to RUN mode.
Result
The following table shows you which activity triggers which result.
Activity Result
Switch the CPU to RUN mode.
• The POS_ACK status bit is deleted
• The POS_ERR status bit is deleted
• The POS_DONE status bit is set
Check the encoder wiring
Check the feedback bit ERR_ENCODER
• If ERR_ENCODER = 1, correct the wiring of the encoder
Inching in the plus direction:
Start inching mode in the plus direction by setting memory
marker 30.0 ("Variable > Modify >")
The status bit POS_ERR = 0, the UP LED lights up
• The POS_ACK status bit is set
• The POS_DONE status bit is deleted
• The actual value is continuously updated
• The POS LED lights up
• The reversal of the direction of rotation you have
parameterized and the wiring of the encoder and drive
are correct
The status bit POS_ERR = 1, the DN LED lights up
Check the assigned parameter reversal of the direction of
rotation and directional adjustment, and the wiring of the
encoder and drive
 Loading...


