152 • HRVS-DN Communication (Profibus protocol)
_____________________________________________________________________________________________
Step 1: Find the register numbers
In this document, we will use a simple PROFIBUS master tool to demonstrate how to change parameters.
This tool is very simple and it allows you to modify the parameters only by writing the hex numbers.
Go to the table in section
17.7 page 157 and find the register number for each register. The tool used in our
example requires the hexadecimal value so we also need to convert the register number into its hex
equivalent.
The following table shows the register numbers for the registers used in our example.
Register name Decimal number Hex number
Logic Status 1
00 01
I1 5
00 02
I2 6
00 05
I3 7
00 07
Voltage 4
00 04
Ctrl-In 2
00 02
Ctrl_Out (relays) 3
00 03
Power 15
00 0F
Power Factor 17
00 11
Frequency 8
00 08
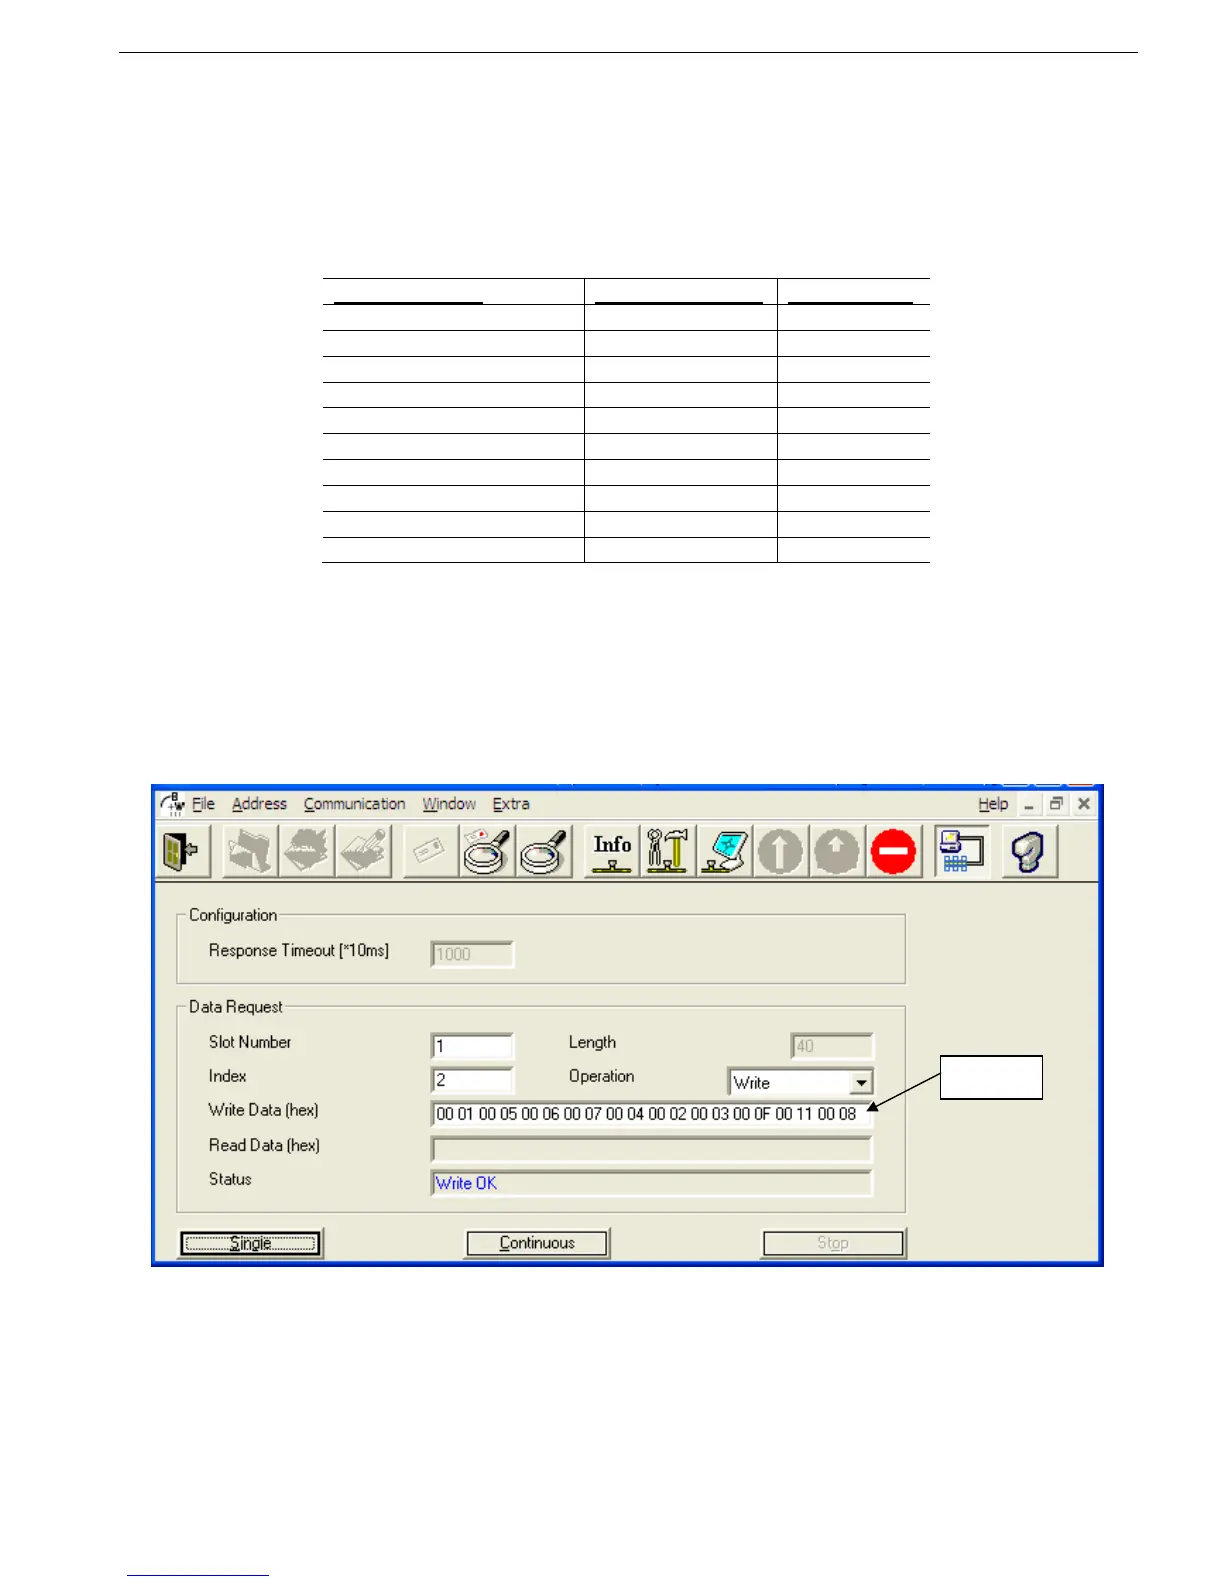
Step 2: Update the register numbers
In the Data Request area defines the following:
Slot Number = 1
Index = 2
Operation = Write
Write Data (hex) = the hex numbers in the table above
This updates the registers that are shown in DPV0.
Figure 52 – Updating the register number that will show at DPV0 (by Data Request)
Write