DC5 User’s Manual
Print&Cut 3-4
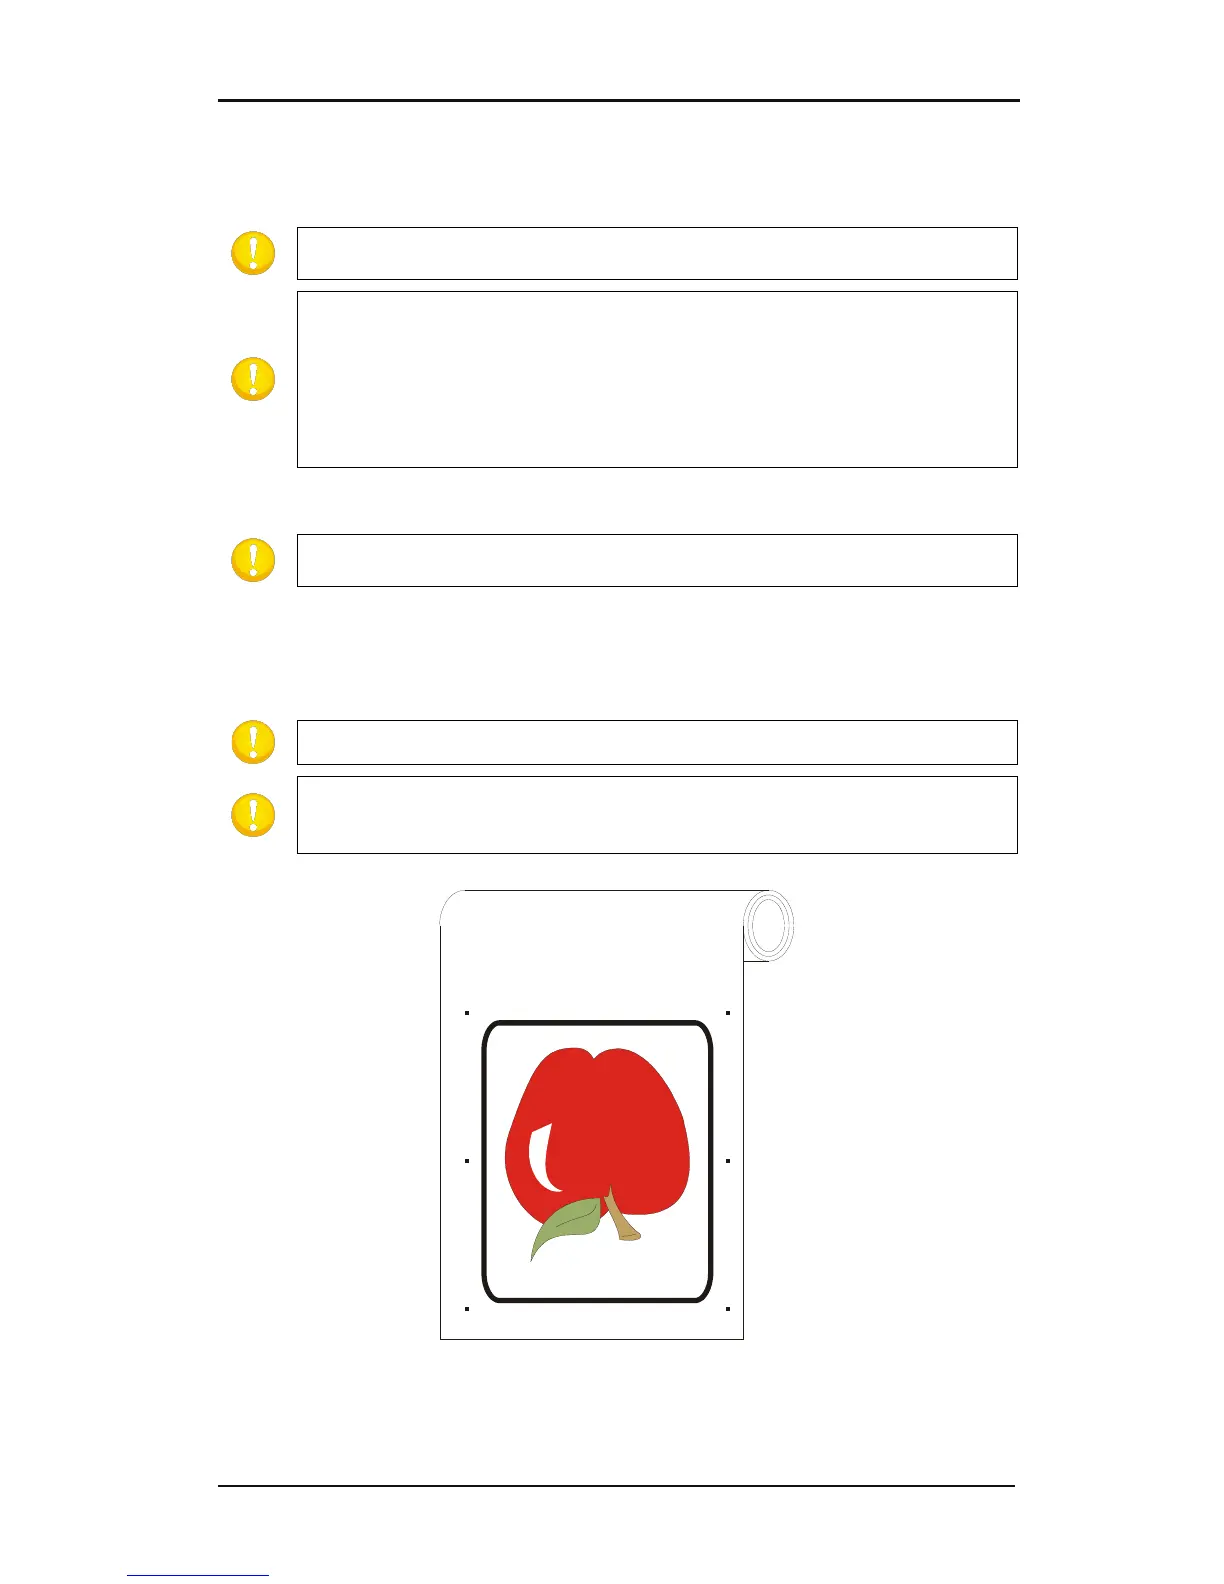
First place copies of the origin mark at a regular distance in the up/down direction. The
last mark at the bottom must be under all contours that need to be cut. This direction will
be referred to as the X-direction.
NOTE: Make sure there is enough white space around every mark. The distance
between the different marks must be the same.
NOTE: The advised X-distance (distance between two consecutive marks)
depends on several items. Normally 30 to 40 cm is a recommended distance.
If the mark size is smaller than 3mm, lower the X-distance.
If the white margin is critical, lower the X-distance.
The bigger the distance between the marks, the faster the registration of the
marks works. The smaller the distance between the ma
rks, the more accurate
OPOS works, however the influence on the accuracy is rather small
Make a copy of the row of marks and place them left to the design.
NOTE: Make sure the left row is not shifted in the up/down direction in reference
to the right row of marks.
Make the layer on which the contour lines are invisible and not printable.
Print the design together with the marks on the DC5(sx).
NOTE: Make sure not to scale or rotate the design in the RIP.
NOTE: It is advised to group the jobs on a roll because with each sheet there
needs to be a rear margin of 8cm. (see user manual for the Summa cutters for the
exact values according to type and model).
FIG 3-5
3-5 PRINTED DESIGN