S Class 3 User’s Manual
Setup 1-38
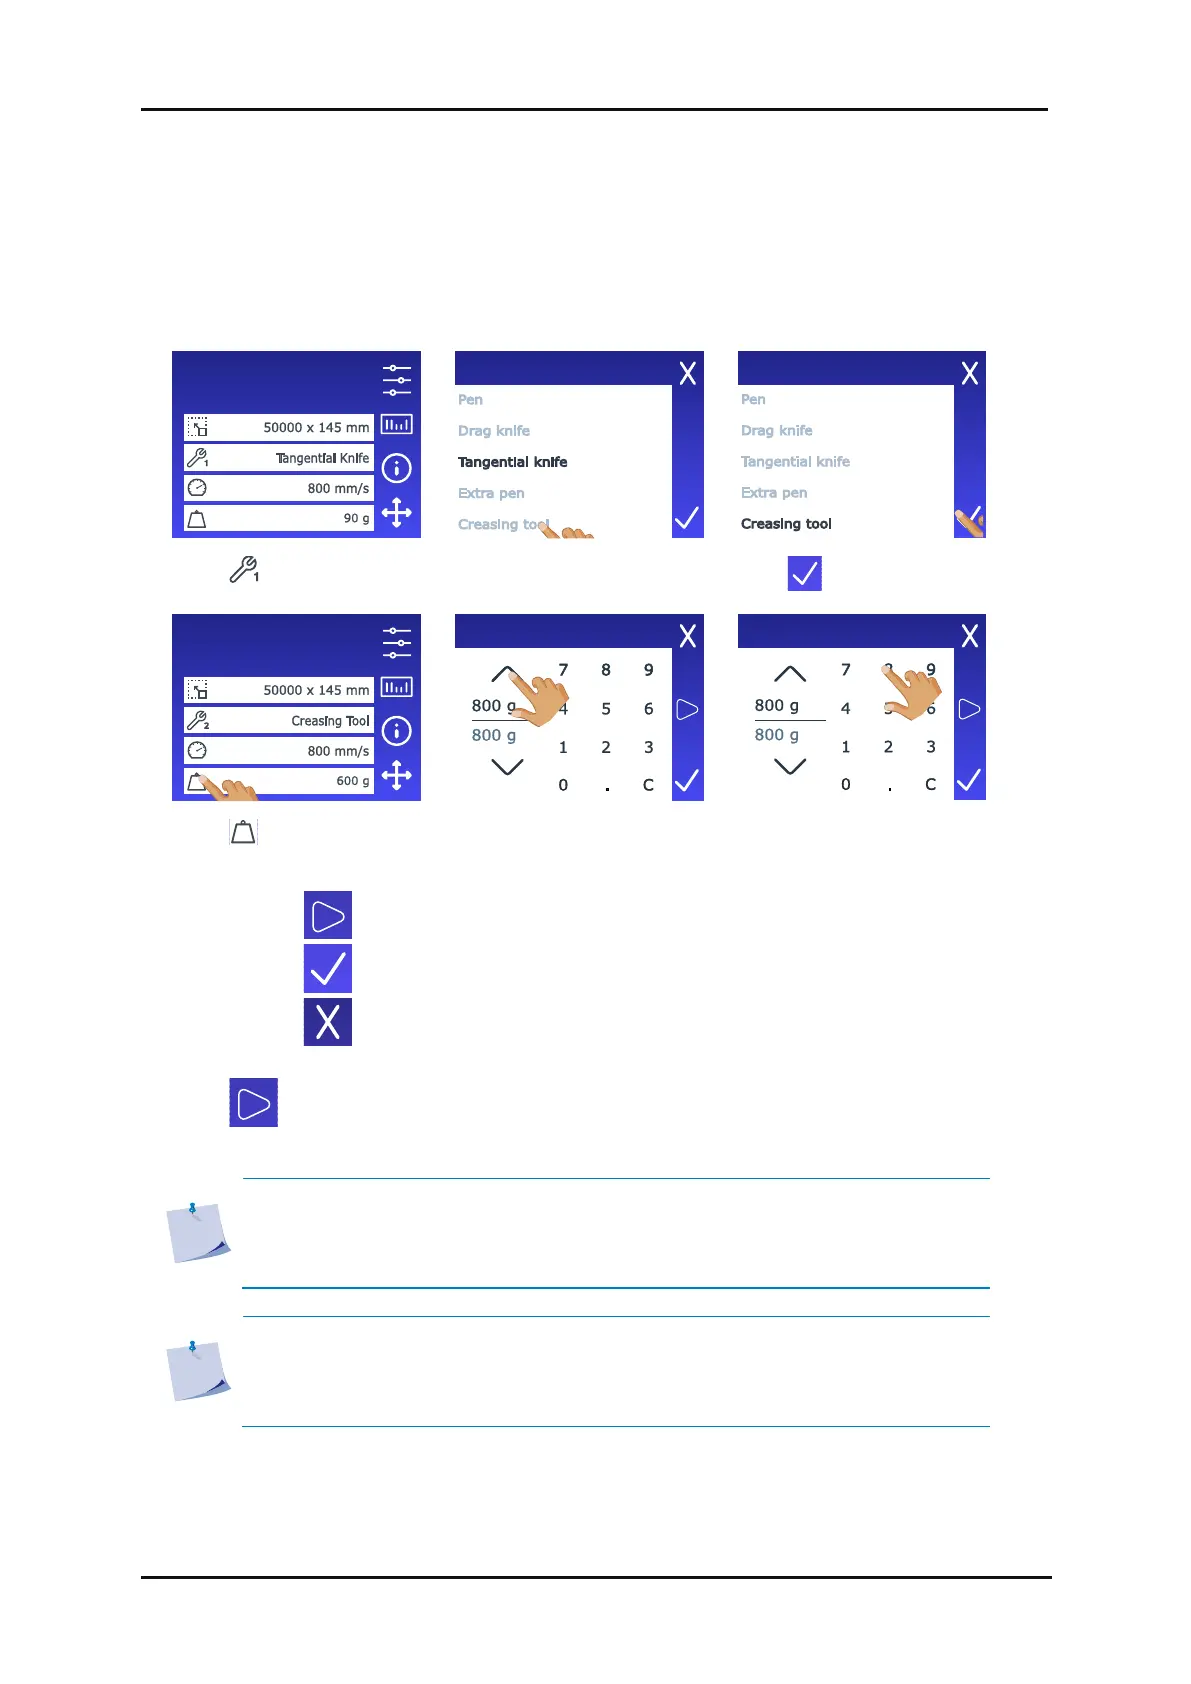
To set up a second tool in the front shaft do following:
1. Power on the cutter and load the media. The display will show the tool (along with its
corresponding tool shaft) that was last displayed before the cutter was powered off. The cutter
will not identify the tool in the other tool shaft. The pressure displayed on screen will be the stored
pressure for that tool. The cutter stores only one speed for both tools, and that speed will be the
one displayed.
3. Select the Creasing tool.
6. Use the arrows to change
the value…
7. or use the numbers to
enter the new value.
4. Tap to perform the internal creasing pressure test.
5. Tap to confirm the chosen creasing pressure.
6. Tap to leave the pressure unchanged.
Once is pressed, the current creasing pressure is automatically set to the new value and the
cutter will cut the creasing pressure test pattern.
NOTE: The speed for both tool 1 and tool 2 is the same. If there is a significant
difference in speed used during the job between the two tools, it is advisable to
temporarily adjust the speed for the pressure test. The actual job's speed will be
controlled by the software sending the job data.
NOTE: The head is not equipped with sensors to recognize mounted tools.
Therefore, when the machine is powered off and on again, the display will show
the same tool as before the machine was powered off. The cutter won't recognize
the tool in the other tool shaft and may request insertion if needed.
Configuration 1
LAN 192.168.10.2
Configuration 1
LAN 192.168.10.2