S Class 3 User’s Manual
Setup 1-7
FIG 1-3
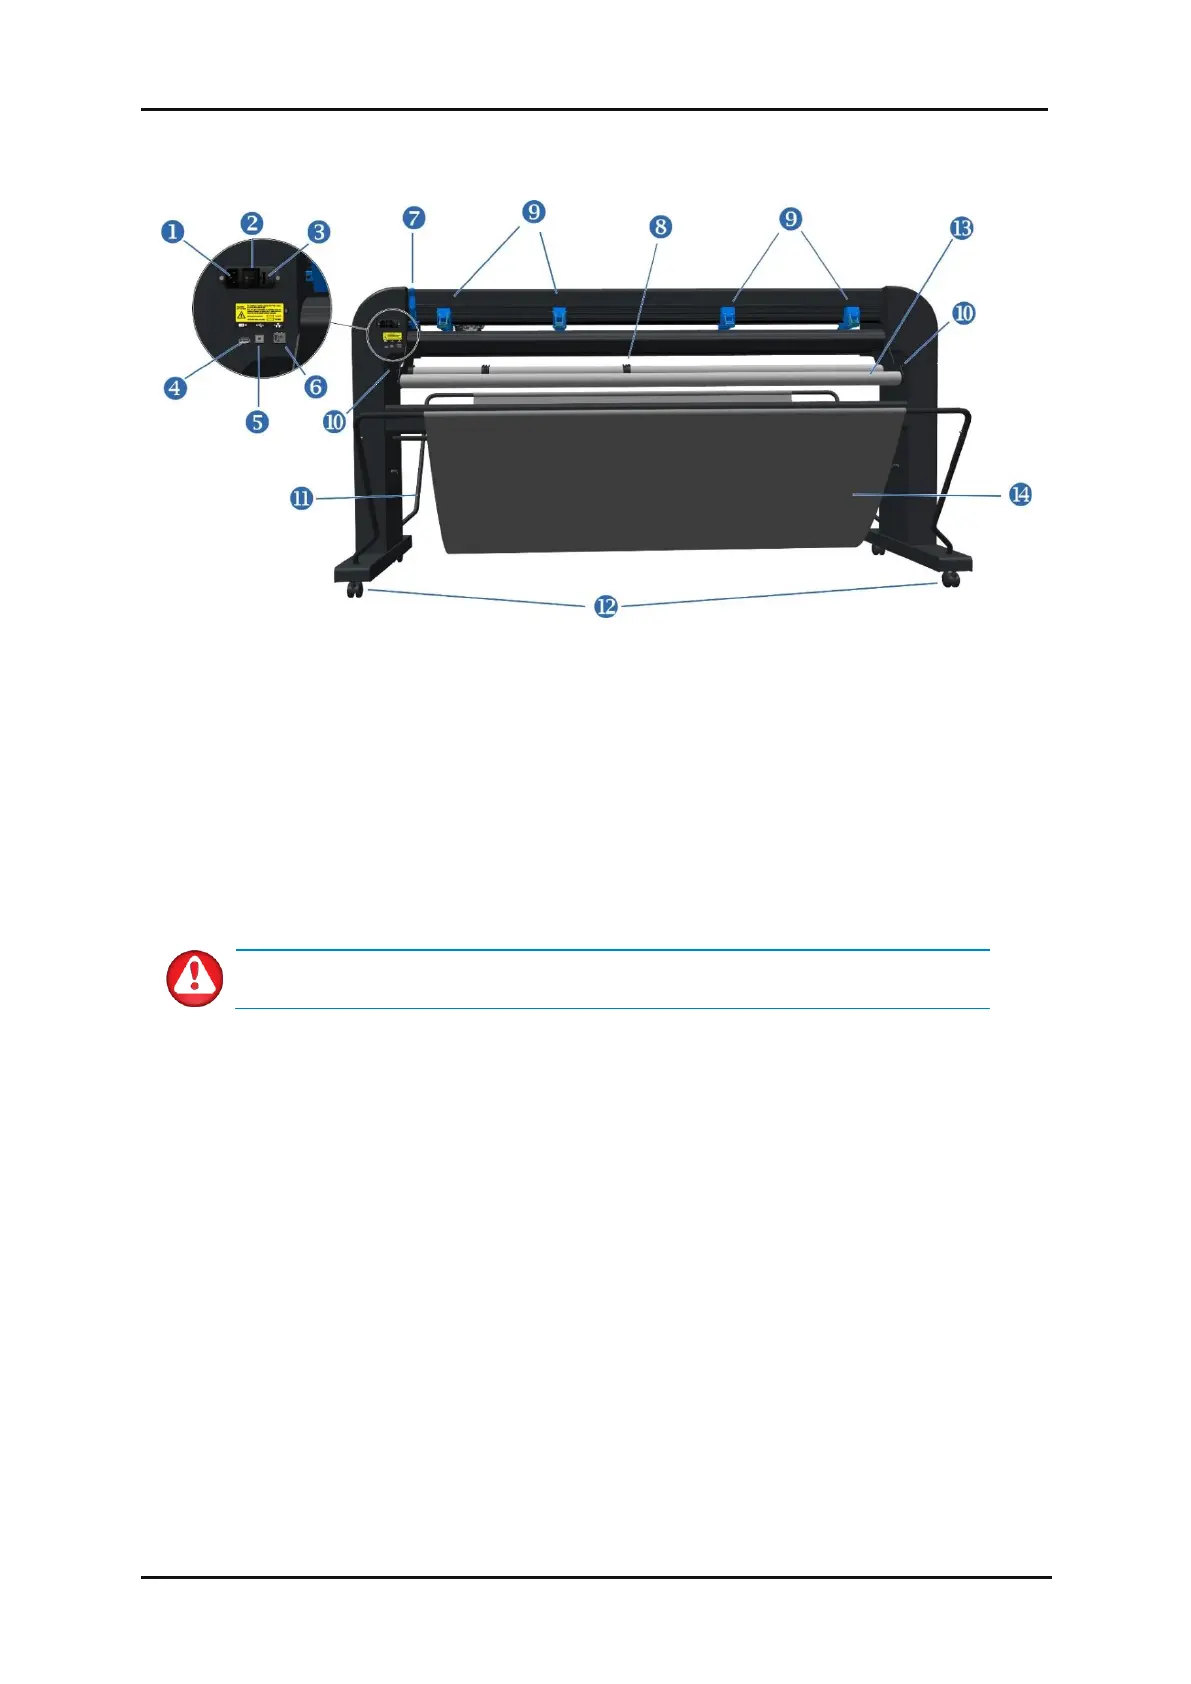
1-3 S CLASS 3 CUTTER REAR VIEW
1. AC power cord receptacle: It is located at the left-hand side of the power entry module. The
power-up procedure is explained in detail in section 1.3. Always use the power cord that is
delivered with your cutter.
2. Power On/Off switch: This rocker switch, located in the middle of the power entry module, sets
the cutter’s power on (“I”) or off (“O”).
3. Fuse: The fuse is located at the right side of the power entry module. Check the specification
section to see which fuse is used in the S Class 3 cutter.
WARNING: For continued protection against the risk of fire, replace only with the
same type and rating of fuses: T2AH 250V.
4. USB port type A female: For plugging in a USB stick.
5. Ethernet port RJ45: For connecting the cutter to the LAN.
6. USB port Type B female: This interface is based on the standards, specified in the Universal Serial
Bus Specifications Revision 1.1. It allows a high-speed bi-directional communication between the
host computer and the cutter.
7. Pinch roller lever: This lever is used to raise and lower the enabled pinch rollers for media loading.
8. Roll media guide bushes: The two guide bushes keep the media roll in place when media is pulled
from the roll.
1.2.2 The Cutter as viewed from the back
 Loading...