1K-5 Charging System:
Flywheel Removal and Installation
Z9J0111B06002
Removal
CAUTION
Prior to removing flywheel, disconnect
battery cables from battery.
1) Remove the ring gear cover.
Refer to “Ring Gear Cover Removal and Installation”
in Section 1D (Page 1D-2).
2) Loosen flywheel bolt 2 – 3 turns in clockwise
direction.
CAUTION
Flywheel bolt is LH thread.
NOTE
Do not remove flywheel bolt at this time.
This bolt prevents damage to the crankshaft
when using flywheel remover tools.
Special tool
(A): 09930–48720 (Flywheel holder)
3) Using special tools, loosen flywheel from crankshaft.
Special tool
(B): 09930–39411 (Flywheel remover)
(C): 09930–39420 (Flywheel remover bolt)
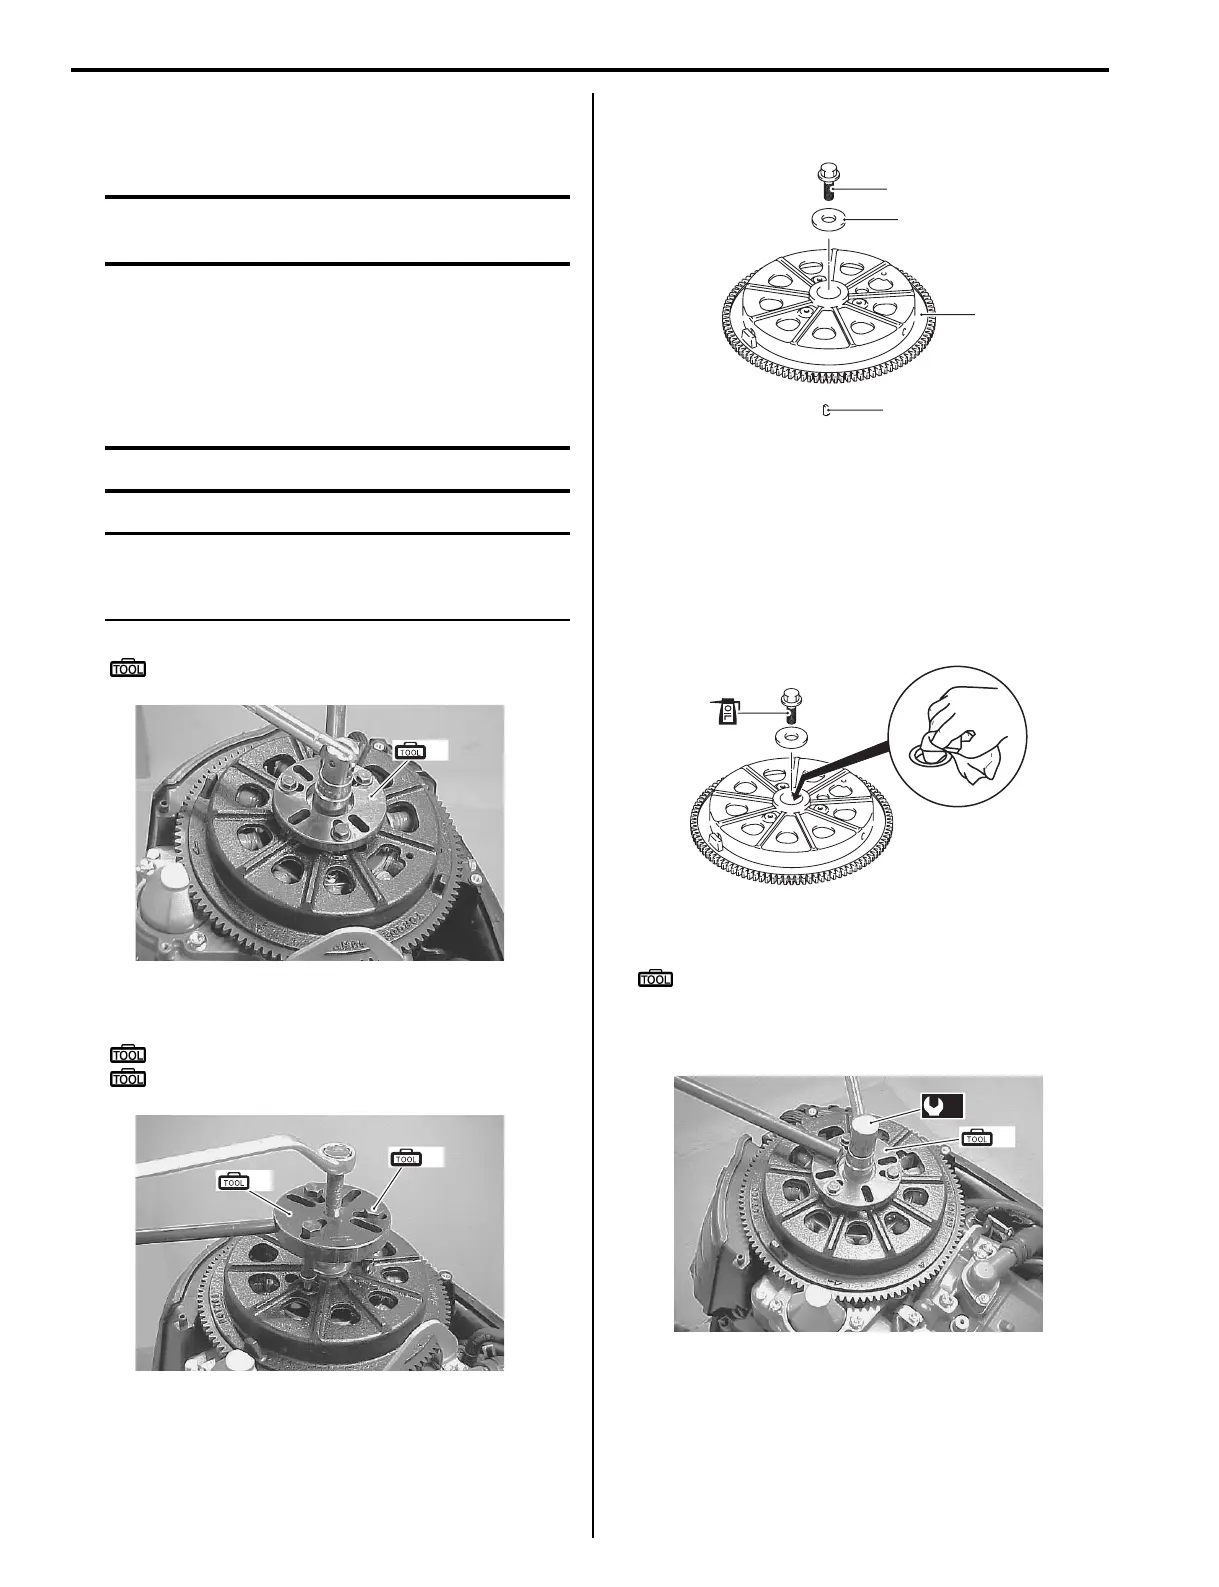
4) Remove the flywheel bolt (1), washer (2), flywheel
(3) and key (4).
Installation
Installation is reverse order of removal with special
attention to the following steps.
• Clean flywheel and crankshaft mating surfaces with
cleaning solvent.
• Apply engine oil lightly to flywheel bolt before
installing.
• Tighten flywheel bolt to specified torque.
Special tool
(A): 09930–48720 (Flywheel holder)
Tightening torque
Flywheel bolt (a): 196 N·m (19.7 kgf-m, 142 lbf-ft)
(A)
I9J0111B0009-01
(B)
(C)
I9J0111B0010-02
1
2
3
4
I9J0111B0011-01
I9J0111B0013-01
(a)
(A)
I9J0111B0014-01