Charging System: 1K-6
Battery Charge Coil Removal and Installation
Z9J0111B06003
Removal
CAUTION
Prior to removing electrical parts, disconnect
battery cables from battery.
1) Remove flywheel.
Refer to “Flywheel Removal and Installation”
(Page 1K-5).
2) Disconnect battery charge coil lead wire connector
(1) at rectifier/regulator.
3) Disconnect the charge output (red) lead wire
connector.
4) Remove the bolt securing rectifier GND lead wire.
5) Remove three screws (2) securing the battery
charge coil (3).
6) Remove the bolts securing lead wire clamp (4).
7) Remove the battery charge coil (3).
Installation
Installation is reverse order of removal with special
attention to the following steps.
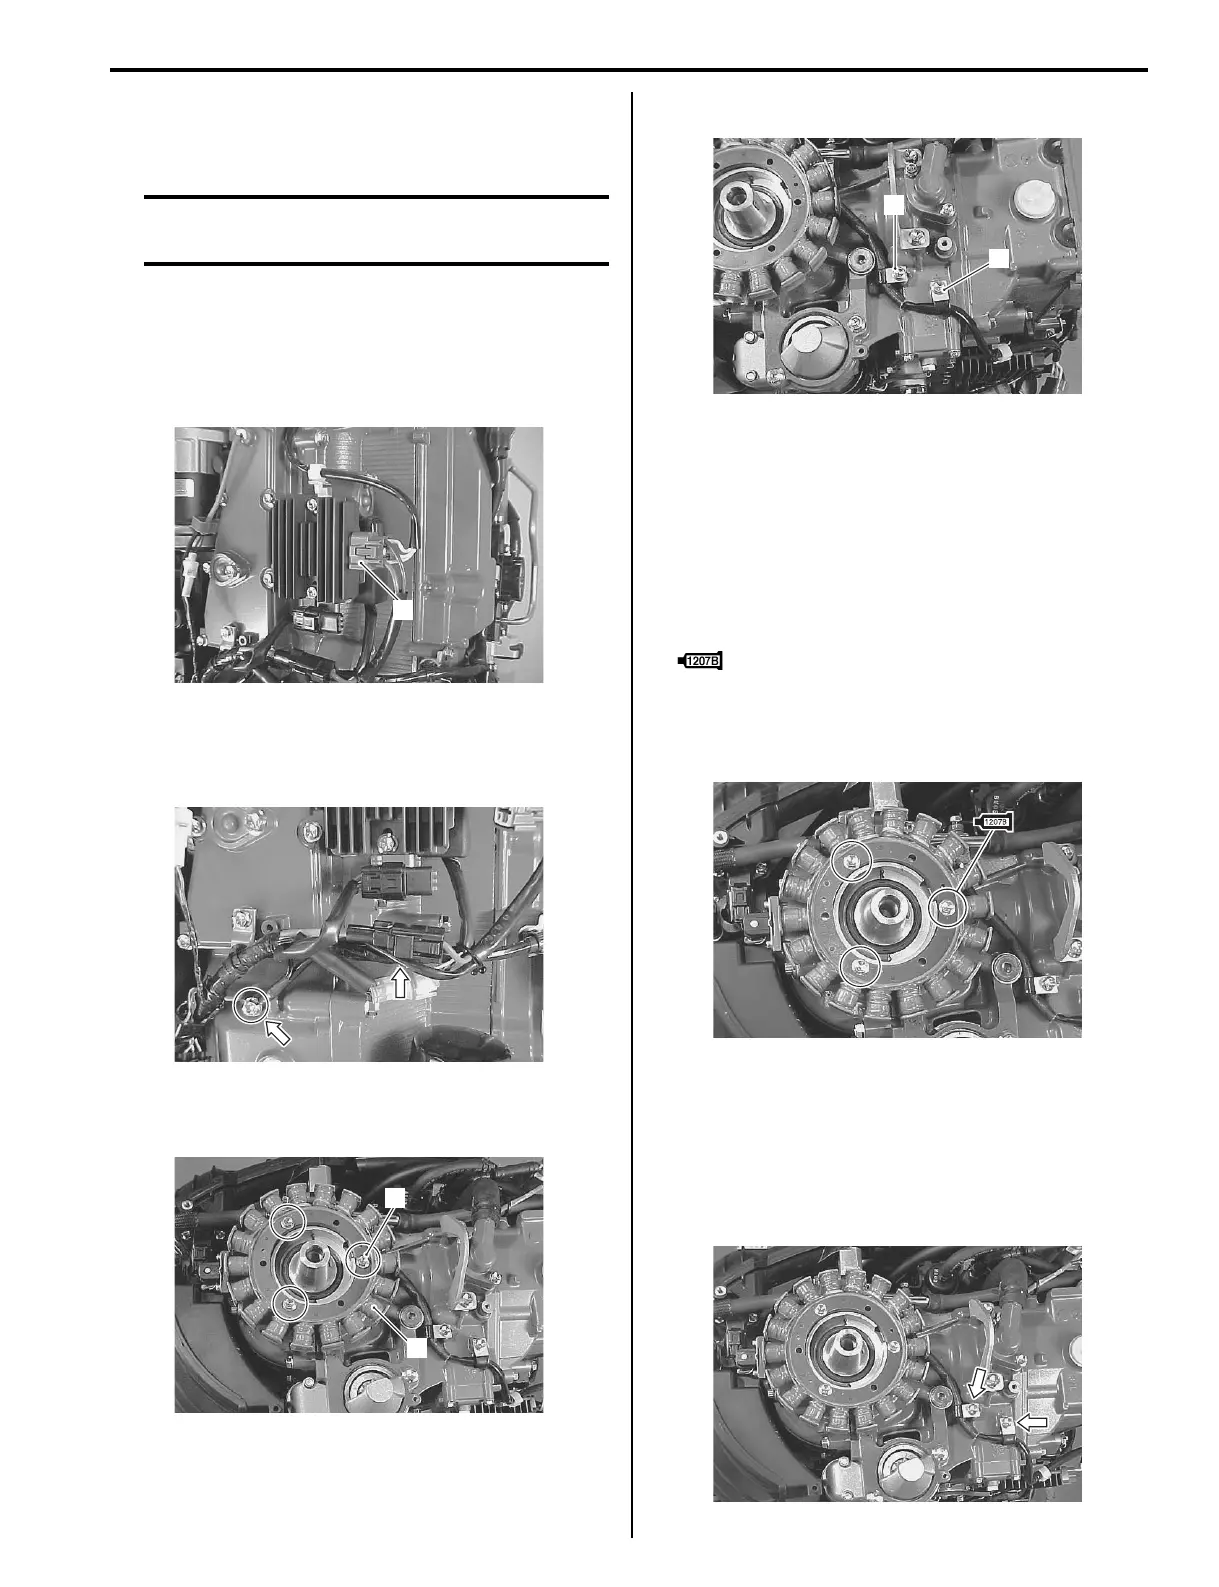
Battery charge coil
• Apply suzuki bond No. 1207B to the coil securing
screws.
: Sealant 99000–31140 (SUZUKI Bond
1207B (100 g))
• Install battery charge coil, then tighten coil screws
securely.
Wire routing
Secure coil lead wire with lead wire clamps, then check
that coil lead wire is routed properly and away from hot
or rotating parts.
For wire routing, refer to “Wiring Harness Routing
Diagram” in Section 4A (Page 4A-3).
1
I9J0111B0015-01
I9J0111B0016-01
2
3
I9J0111B0017-01
4
4
I9J0111B0018-01
I9J0111B0019-02
I9J0111B0020-01