Wheels and Tires: 2D-18
Bearing
Inspect the play of the wheel bearings by hand while
they are in the wheel. Rotate the inner race by hand to
inspect for abnormal noise and smooth rotation. Replace
the bearing if there is anything unusual. Refer to “Rear
Wheel Dust Seal / Bearing Removal and Installation
(Page 2D-18)”.
Rear Wheel Speed Sensor Rotor (GSF1250A/SA)
Refer to “Wheel Speed Sensor and Sensor Rotor
Inspection in Section 4E (Page 4E-74)”.
Rear Wheel Dust Seal / Bearing Removal and
Installation
B718H12406010
Removal
1) Remove the rear wheel assembly. Refer to “Rear
Wheel Assembly Removal and Installation
(Page 2D-16)”.
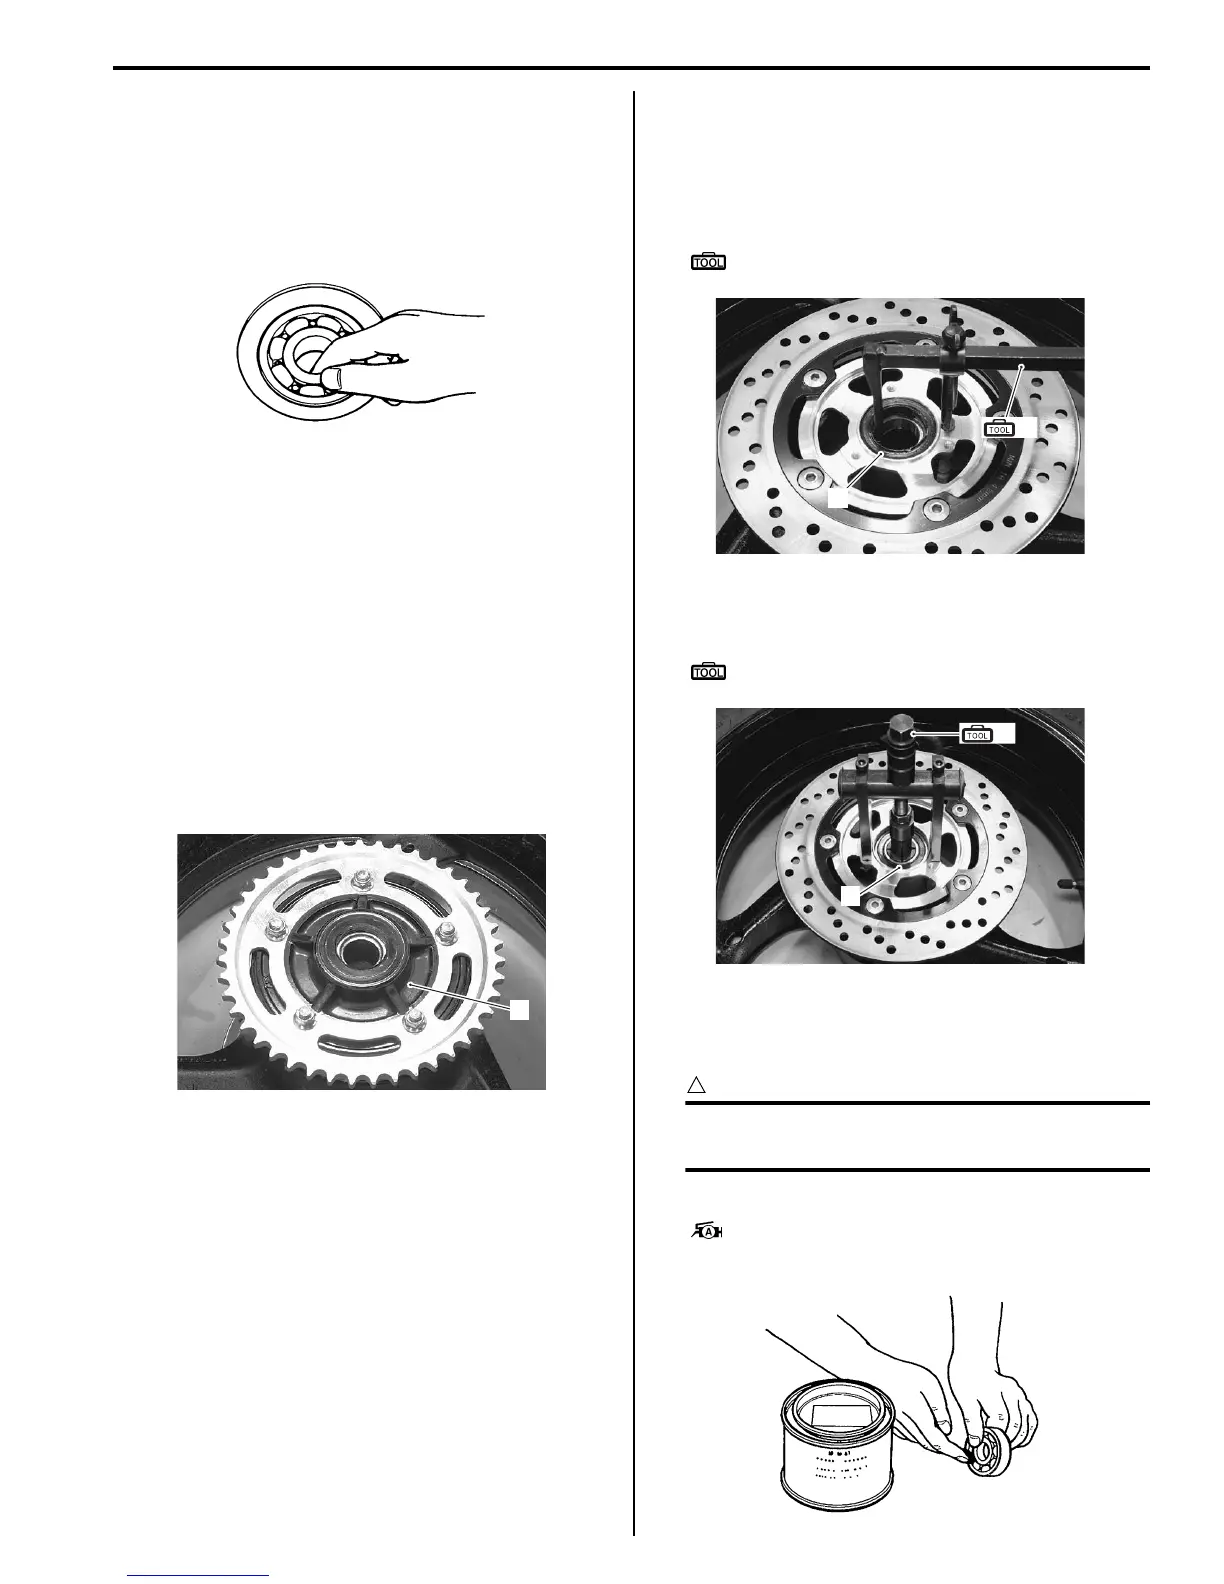
2) Remove the rear sprocket mounting drum assembly
(1) from the rear wheel.
3) Remove the rear wheel speed sensor rotor by
removing the mounting bolts. (GSF1250A/SA) Refer
to “Rear Wheel Speed Sensor Rotor Removal and
Installation in Section 4E (Page 4E-73)”.
4) Remove the dust seal (2).
Special tool
(A): 09913–50121 (Oil seal remover)
5) Remove the bearings (3) on both sides using the
special tool.
Special tool
(B): 09921–20240 (Bearing remover set)
6) Remove the spacer.
Installation
CAUTION
!
The removed dust seals and bearings must
be replaced with new ones.
1) Apply grease to the wheel bearings.
: Grease 99000–25010 (SUZUKI SUPER
GREASE A or equivalent)
I649G1240015-02
1
I718H1240052-02
2
(A)
I718H1240038-04
(B)
3
I718H1240040-03
I649G1240019-02

 Loading...


