Lab 8: Servicing the ADC with DMA
TMS320F2837xD Microcontroller Workshop - Direct Memory Access 8 - 17
7. Modify the end of Dma.c to do the following:
- Enable the “DMA_CH1” interrupt in the PIE (Hint: use the PieCtrlRegs structure)
- Enable the appropriate core interrupt in the IER register
8. Open and inspect DefaultIsr_8.c. Notice that this file contains the DMA interrupt
service routine. Save all modified files.
Build and Load
9. Click the “Build” button and watch the tools run in the Console window. Check for
errors in the Problems window.
10. Click the “Debug” button (green bug). A Launching Debug Session window will open.
Select only CPU1 to load the program on (i.e. uncheck CPU2), and then click OK. Then
the CCS Debug perspective view should open, the program will load automatically, and
you should now be at the start of main(). If the device has been power cycled since the
last lab exercise, be sure to configure the boot mode to EMU_BOOT_SARAM using the
Scripts menu.
Run the Code – Test the DMA Operation
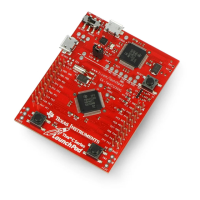
Note: For the next step, check to be sure that the jumper wire connecting PWM1A (header J4,
pin #40) to ADCINA0 (header J3, pin #30) is in place on the LaunchPad.
11. Run the code in real-time mode using the Script function: Scripts Realtime
Emulation Control Run_Realtime_with_Reset. Open and watch the
memory browser update. Verify that the ADC result buffer contains updated values.
12. Open and setup a graph to plot a 50-point window of the ADC results buffer.
Click: Tools Graph Single Time and set the following values:
Acquisition Buffer Size 50
DSP Data Type 16-bit unsigned integer
Sampling Rate (Hz) 50000
Start Address AdcBuf
Display Data Size 50
Time Display Unit
µs
Select OK to save the graph options.
13. The graphical display should show the generated 2 kHz, 25% duty cycle symmetric PWM
waveform. Notice that the results match the previous lab exercise.
14. Fully halt the CPU (real-time mode) by using the Script function: Scripts
Realtime Emulation Control Full_Halt.

 Loading...