4-70 4262930-Rev A
ELECTRICAL
4
Bail Potentiometer
Removal and Installation
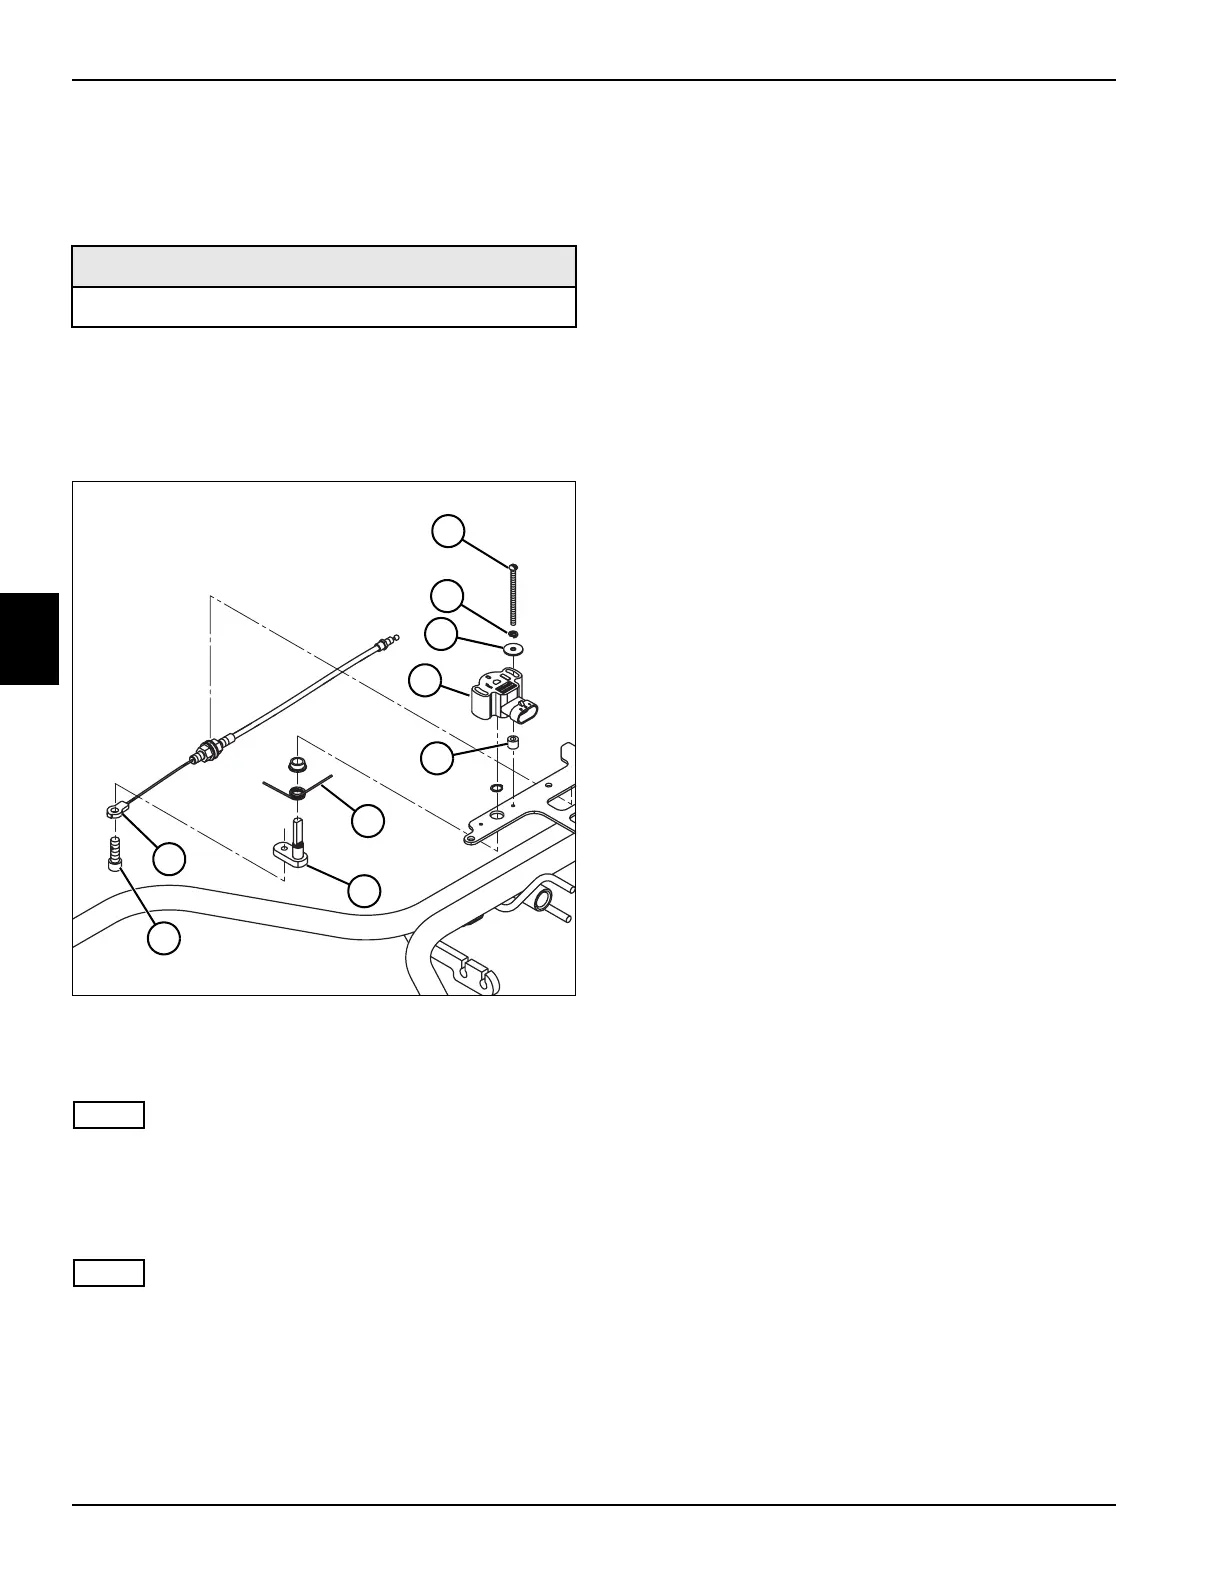
See Figure 4-71.
1. Park the mower safely. (See “Park Mower Safely” on
page 1-5.)
2. Remove handle cover. (See “Handle Cover” on
page 6-4.)
Figure 4-71
3. Remove screw (8) and OPC cable end (9) from pivot
arm (7).
NOTE
Label all wires before disconnecting to ensure correct
installation.
4. Disconnect wire harness connector from bail
potentiometer (4).
NOTE
Note orientation and position of torsion spring (6) before
removing pivot arm from bail potentiometer.
5. Using a punch, carefully drive pivot arm (7) out of bail
potentiometer (4).
6. Remove two screws (1), lock washers (2), flat
washers (3), spacers (5), and bail potentiometer (4).
Installation Notes
• Install bail potentiometer by reversing the order of
removal.
• Apply dielectric grease (Jacobsen PN 365422) to any
connectors removed.
• Be sure bail potentiometer is not binding before
tightening fasteners. Check for free range of
movement after tightening.
• Calibrate bail lever. (See “Bail Lever Calibration” on
page 4-43.)
Required Materials
Dielectric Grease (Jacobsen PN 365422)
TN4438
8
9
7
1
2
3
4
5
6