8-20 4262930-Rev A
CUTTING UNIT
8
Repair
Cutting Unit
Removal and Installation
See Figures 8-22 through 8-24.
1. Park the mower safely. (See “Park Mower Safely” on
page 1-5.)
2. Retract the kickstand and allow the mower to rest on
the traction roller or transport wheels.
3. Remove light kit assembly (if equipped). (See “Light
Kit Assembly” on page 10-8.)
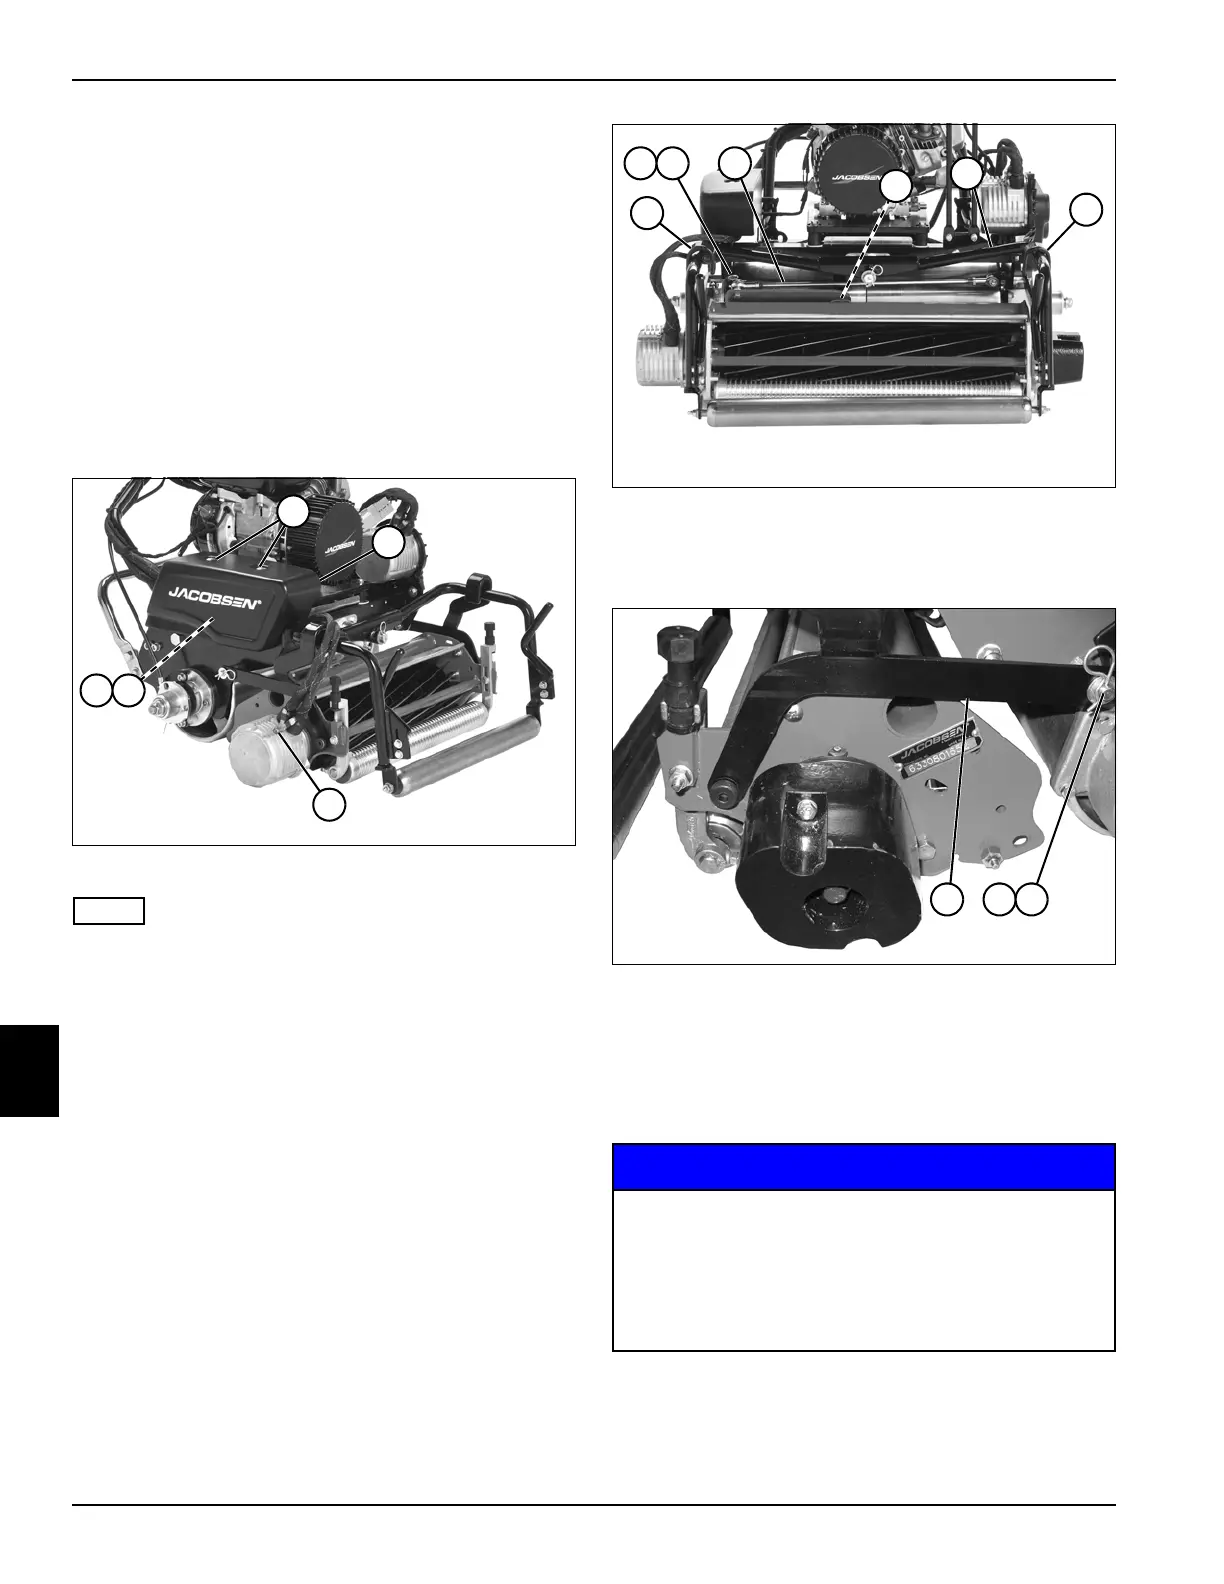
Figure 8-22
NOTE
Label wire connectors before disconnecting to ensure
correct installation.
4. Remove screws (1) and motor controller cover (2),
and disconnect reel motor wire harness connectors
(3 and 4) at the motor controller.
5. Disconnect ground lead terminal (5).
Figure 8-23
6. Remove clip (6) and washer (7).
7. Disconnect rod (8).
Figure 8-24
8. Remove clips (14) and washers (15) from each side
of the mower.
9. Disconnect arms (13) from each side of the mower.
10. Disconnect arms (11 and 12) from roller mount (10).
NOTICE
11. Push the limit bracket (9) in and tip mower back on
the traction drum or tires. Support the mower to
prevent it from tipping.
TN4429
5
1
2
3 4
Gen-Set Models: Before tipping mower back for
service, the fuel lever must be moved to the OFF
position to prevent fuel from leaking into the
crankcase. Do not leave the mower tipped back
for an extended length of time or oil may migrate
into the combustion chamber.
TN4425
86 7
12
11
10
9
TN0895
13 14 15