4-86 4203780 First Edition
ELECTRICAL
4
Repair
Battery and Battery Tray
Removal and Installation
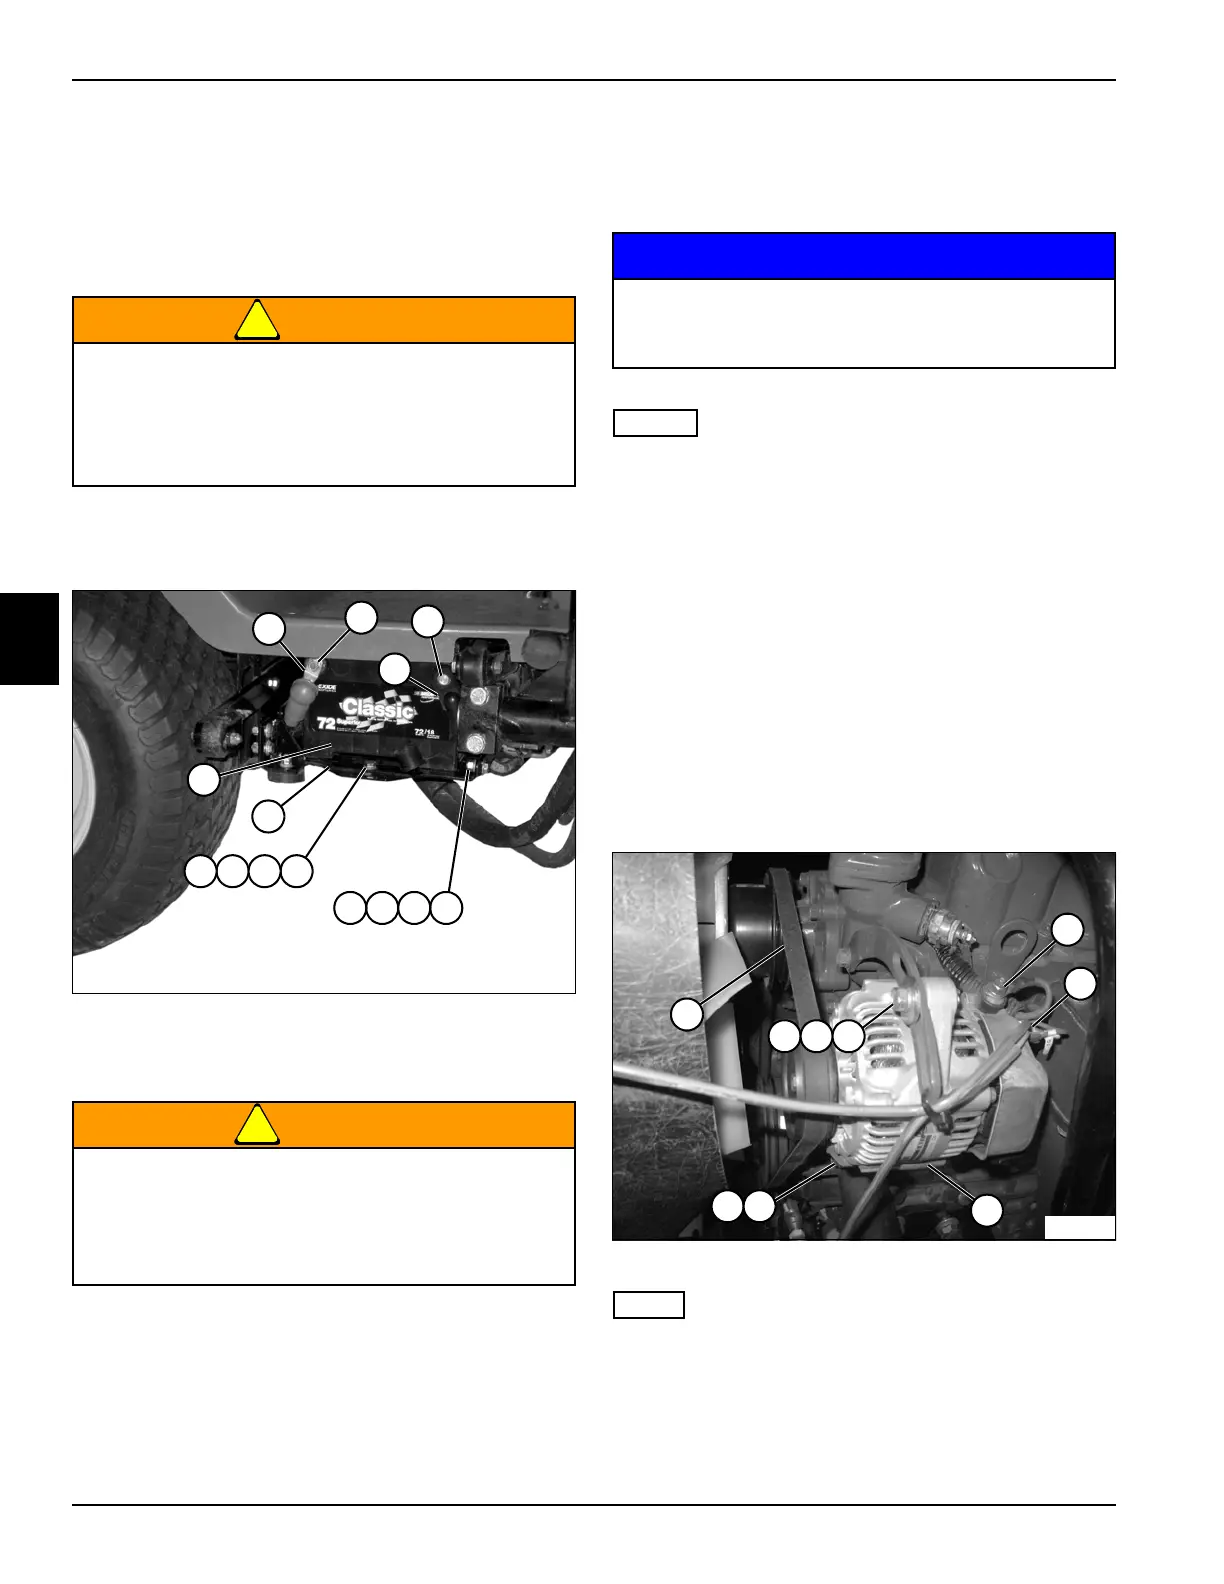
See Figures 4-57.
!
WARNING
1. Park the mower safely. (See “Park Mower Safely” on
page 1-6.)
Figure 4-57
2. Raise cutting deck and engage the deck latch.
3. Support battery tray (13) with floor jack.
!
WARNING
4. Remove screw (3) and disconnect the negative (–)
battery cable (4).
5. Remove screw (2), and disconnect the positive (+)
battery cable (1).
6. Remove four nuts (5), lock washers (6), flat washers
(7), and screws (8).
7. Lower battery (14) and battery tray (13) with floor
jack.
8. Remove nut (9), lock washer (10), flat washer (11),
and screw (12). Remove battery and battery tray.
NOTICE
NOTES
• Install the battery and battery tray by reversing the
order of removal.
• Route battery cables between the battery and battery
tray to avoid pinch points.
Alternator
Removal and Installation
See Figure 4-58.
1. Park the mower safely. (See “Park Mower Safely” on
page 1-6.)
2. Raise the hood.
3. Disconnect the negative (–) battery cable at the
battery.
Figure 4-58
NOTE
Label all wires before disconnecting to ensure correct
installation.
4. Disconnect wire connectors (1 and 2).
5. Loosen screw (8) and push the alternator (3) toward
the engine.
• Battery posts, terminals, and related
accessories contain lead and lead
compounds. Wash your hands after handling.
• Always wear eye protection when servicing
battery.
Always disconnect the negative terminal first and
positive terminal last. Connect positive terminal
first and negative terminal last. Use care when
testing live circuits to prevent arcing. Arcing
could result in death or serious injury.
TN1896
2
3
4
1
10 12119
6 875
13
14
Never place used batteries in the garbage.
Dispose of used batteries in accordance with all
applicable regulations.
1
TN1782
9
3
8 7 6
5 4
2

 Loading...


