6-58 4203780 First Edition
HYDRAULICS
6
Repair
Hydraulic Oil Tank—Drain Procedure
See Figure 6-61.
1. Park the mower safely. (See “Park Mower Safely” on
page 1-6.)
2. Block both sides of rear wheels using suitable wheel
blocks.
3. Raise and support front of mower with jackstands.
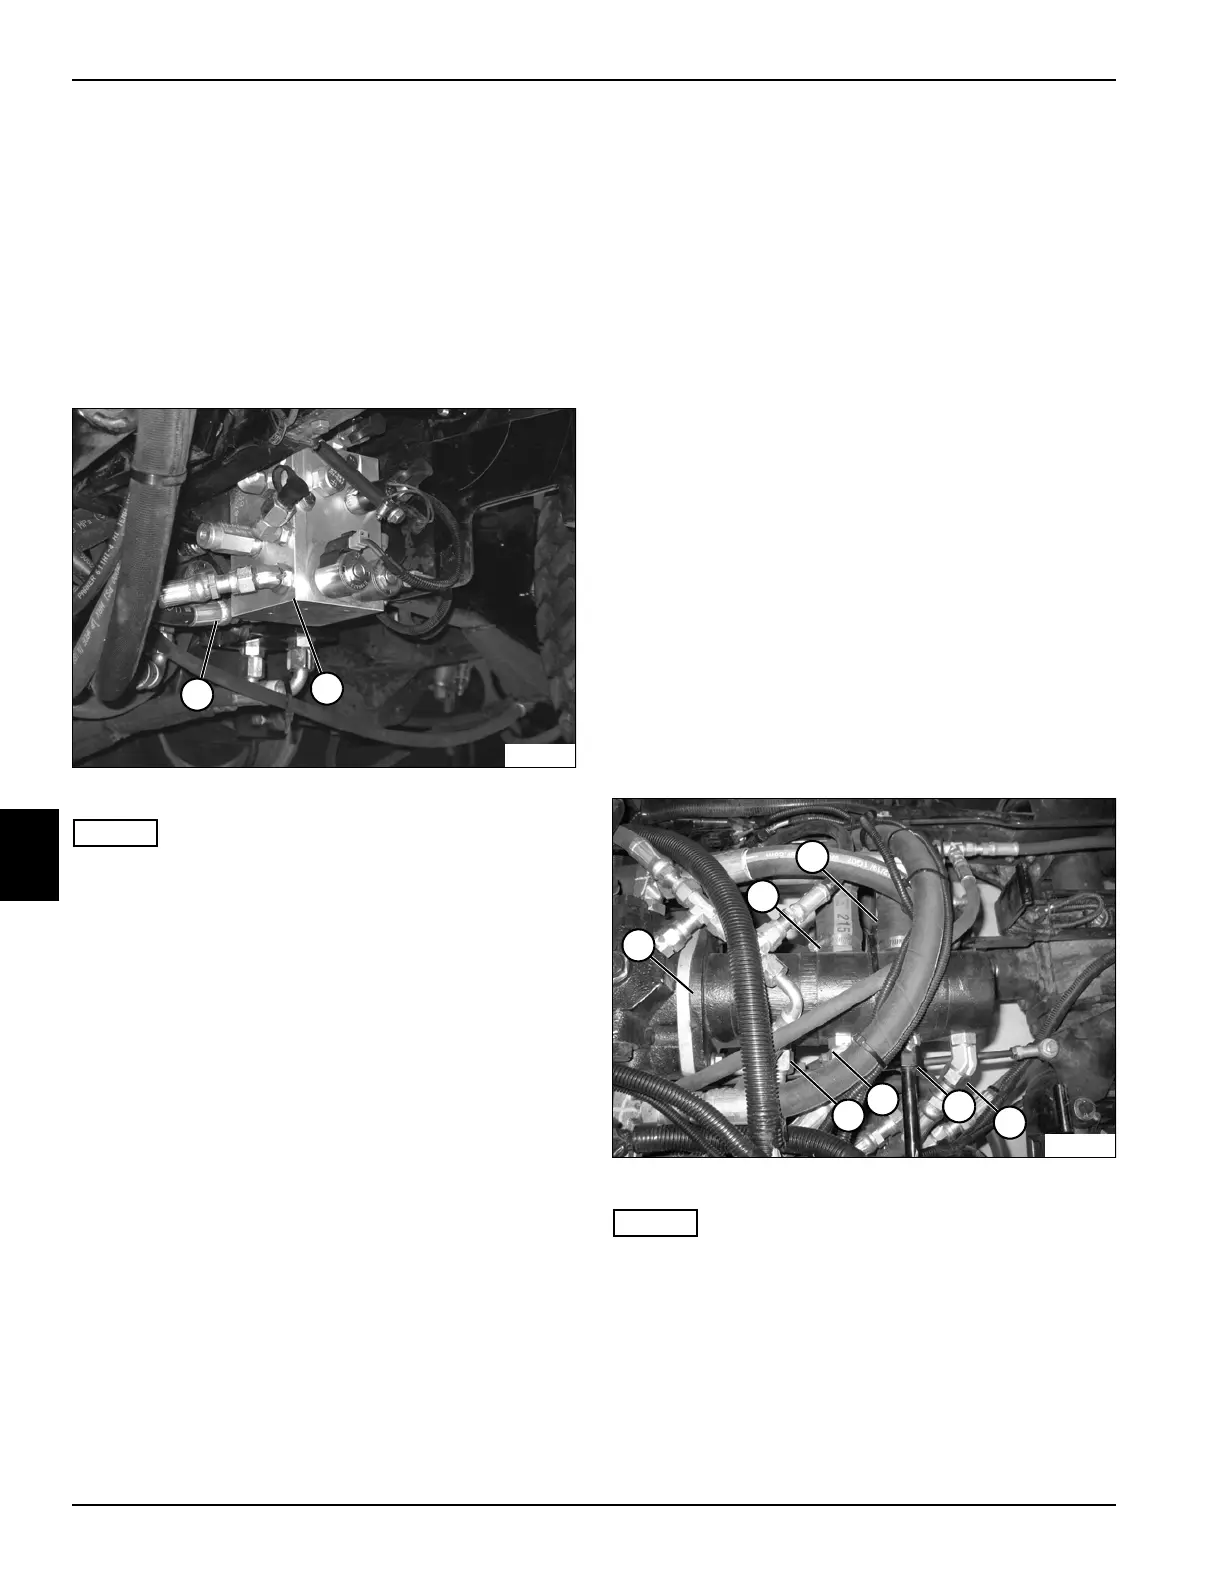
Figure 6-61
NOTES
• Label all hydraulic hoses and tubes before
disconnecting to aid in installation.
• Close all openings with caps or plugs to prevent
contamination.
• Have a #8 cap available to seal the 90° control valve
fitting.
• The hydraulic oil tank capacity is 17 gallons (64.3
liters). Use appropriate containers when draining
hydraulic oil.
4. Place a suitable container underneath control valve
(2) and hose (1).
5. Disconnect hose (1) and plug the 90° control valve
fitting.
6. Loosen the hydraulic oil tank cap to provide a vent for
draining oil.
Installation Notes
• Ensure new O-ring is in place before installing hose
on fitting.
• Connect hose (1).
• Replace hydraulic oil return filter. (See “Hydraulic Oil
Return Filter” on page 6-67.)
• Replace charge pressure filter. (See “Charge
Pressure Filter” on page 6-68.)
• Refill hydraulic tank. (Refer to “Safety, Operation, and
Maintenance Manual” for oil specifications.)
• Start engine. Check hydraulic system for leaks.
Repair as necessary.
Check hydraulic oil level and add if necessary.
Gear Pump
Removal and Installation
See Figures 6-62 and 6-63.
1. Park the mower safely. (See “Park Mower Safely” on
page 1-6.)
2. Remove the seat and mount plate. (See “Seat and
Seat Platform” on page 9-13.)
3. Drain hydraulic oil tank. (See “Hydraulic Oil Tank—
Drain Procedure” on page 6-58.)
Figure 6-62
NOTES
• Label all hydraulic hoses and tubes before
disconnecting to aid in installation.
• Close all openings with caps or plugs to prevent
contamination.
4. Disconnect hoses (1 and 2).
5. Disconnect hoses (3, 5, and 6).
6. Disconnect tube (4).
7. Support gear pump (7).
TN2053
1
2
TN1862
1
2
3
4
6
5
7

 Loading...


