3-6 4203780 First Edition
ENGINE
3
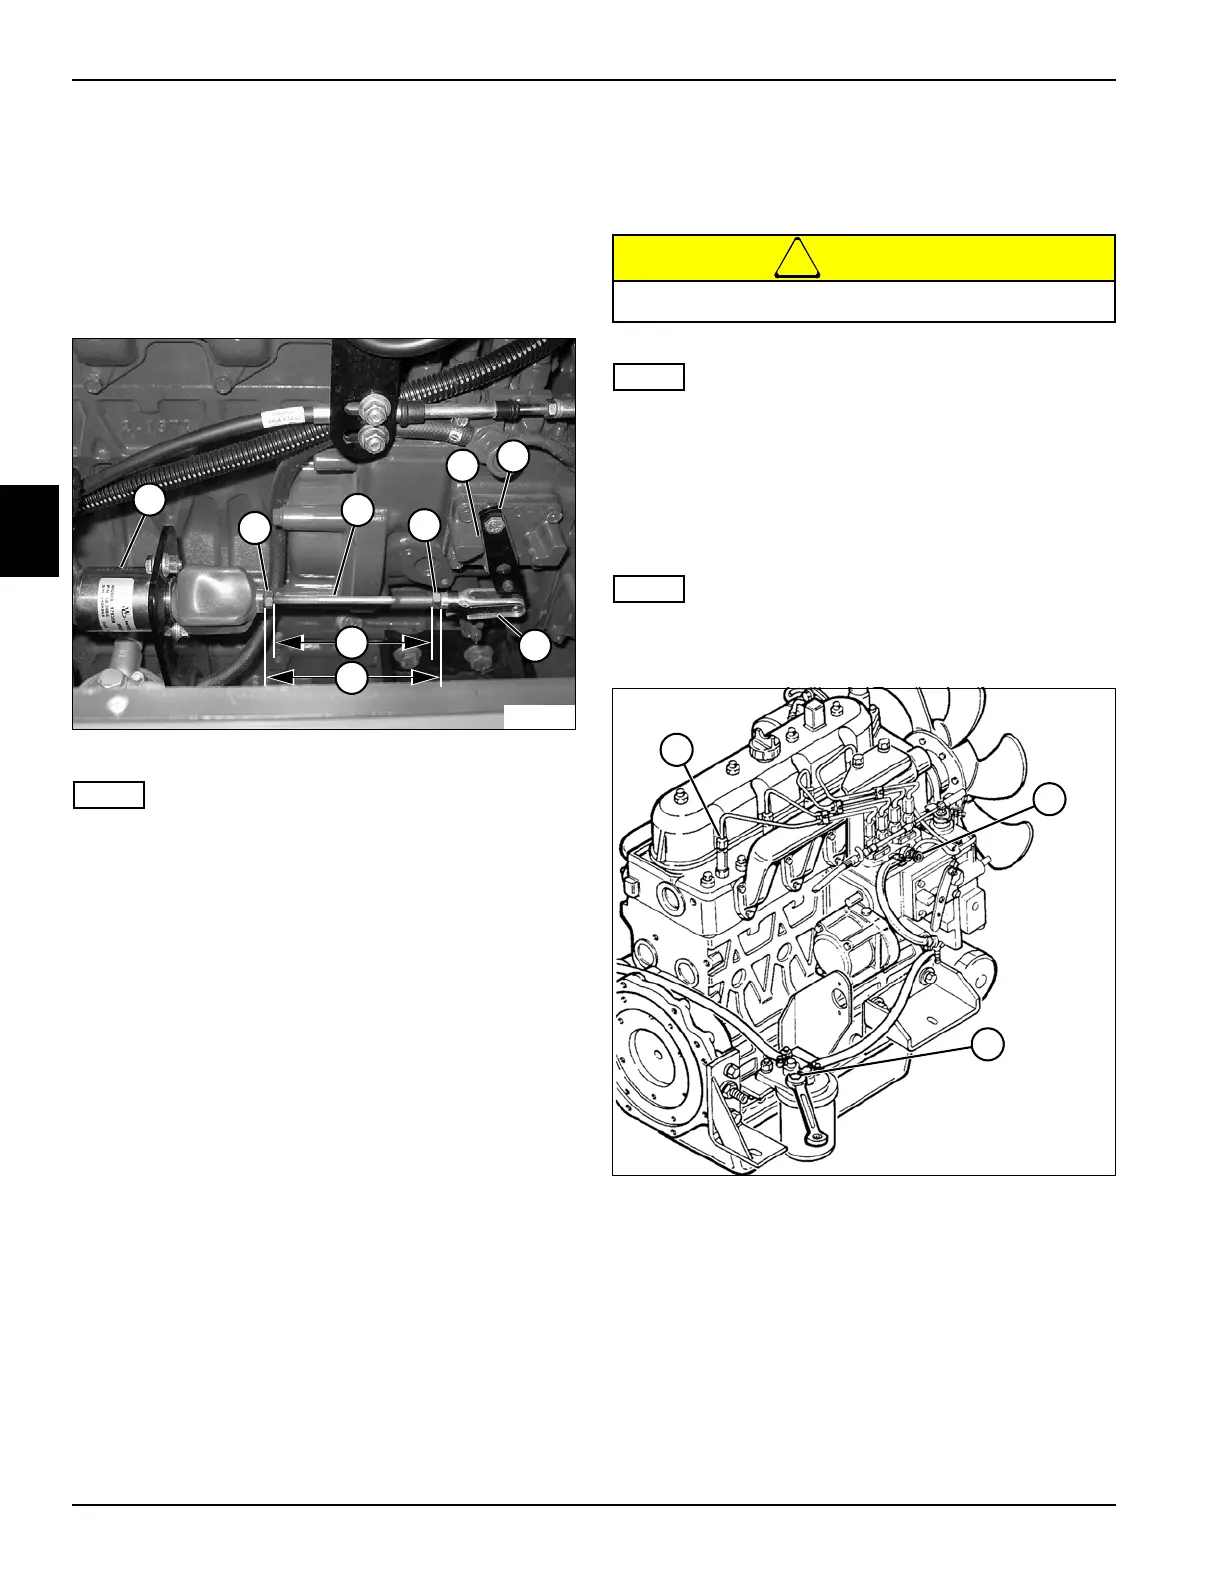
Fuel Solenoid Rod
Adjustment
See Figure 3-6.
1. Park the mower safely. (See “Park Mower Safely” on
page 1-6.)
2. Raise the hood.
Figure 3-6
NOTE
The fuel solenoid (1) will not activate without the parking
brake engaged and PTO switch disengaged. Turn key to
start position only long enough to activate solenoid. Do
not start engine without operator in seat.
3. Measure fuel solenoid rod (3) at points (8 and 9).
4. The distance at point (8) should be 4.30 in.
(110.50 mm), and the distance at point (9) should be
4.70 in. (119.40 mm).
5. Loosen nuts (2 and 4) and disconnect solenoid clevis
(7) from fuel solenoid bracket (6). Turn solenoid
clevis either clockwise to decrease distance or
counterclockwise to increase distance. Tighten nuts
(2 and 4) and measure distance again. Connect
solenoid clevis to fuel solenoid bracket.
6. A distance of 0.03125–0.0625 in. (0.8–1.8 mm) must
be maintained between fuel solenoid bracket (6) and
casting boss (5) when the ignition key is in the off
position.
Purging the Fuel System
Adjustment
See Figure 3-7.
!
CAUTION
NOTE
Whenever the fuel filter or fuel lines are removed, the fuel
tank is completely emptied, or the engine has not been
used for an extended time, purge the system of air.
1. Park the mower safely. (See “Park Mower Safely” on
page 1-6.)
2. Raise the hood.
NOTE
Be sure the fuel tank is filled with clean, fresh diesel fuel
before performing a purge of the fuel system.
Figure 3-7
3. Loosen the air vent screw (3) at the top of the filter by
turning it counterclockwise two turns. Place a
suitable container under the filter to catch the fuel
that will flow from the screw hole.
4. Turn the ignition switch to the on position to allow the
fuel pump to operate.
5. When the bubbles disappear from fuel coming out of
the air vent screw hole, tighten air vent screw and
turn ignition switch to the off position.
6. Open the air vent plug (2) on the fuel injection pump.
3
1
4
TN2012
5
2
8
9
6
7
Do not purge fuel system when engine is hot.
3
TN1994
2
1

 Loading...


