ENGINE
4203780 First Edition 3-15
3
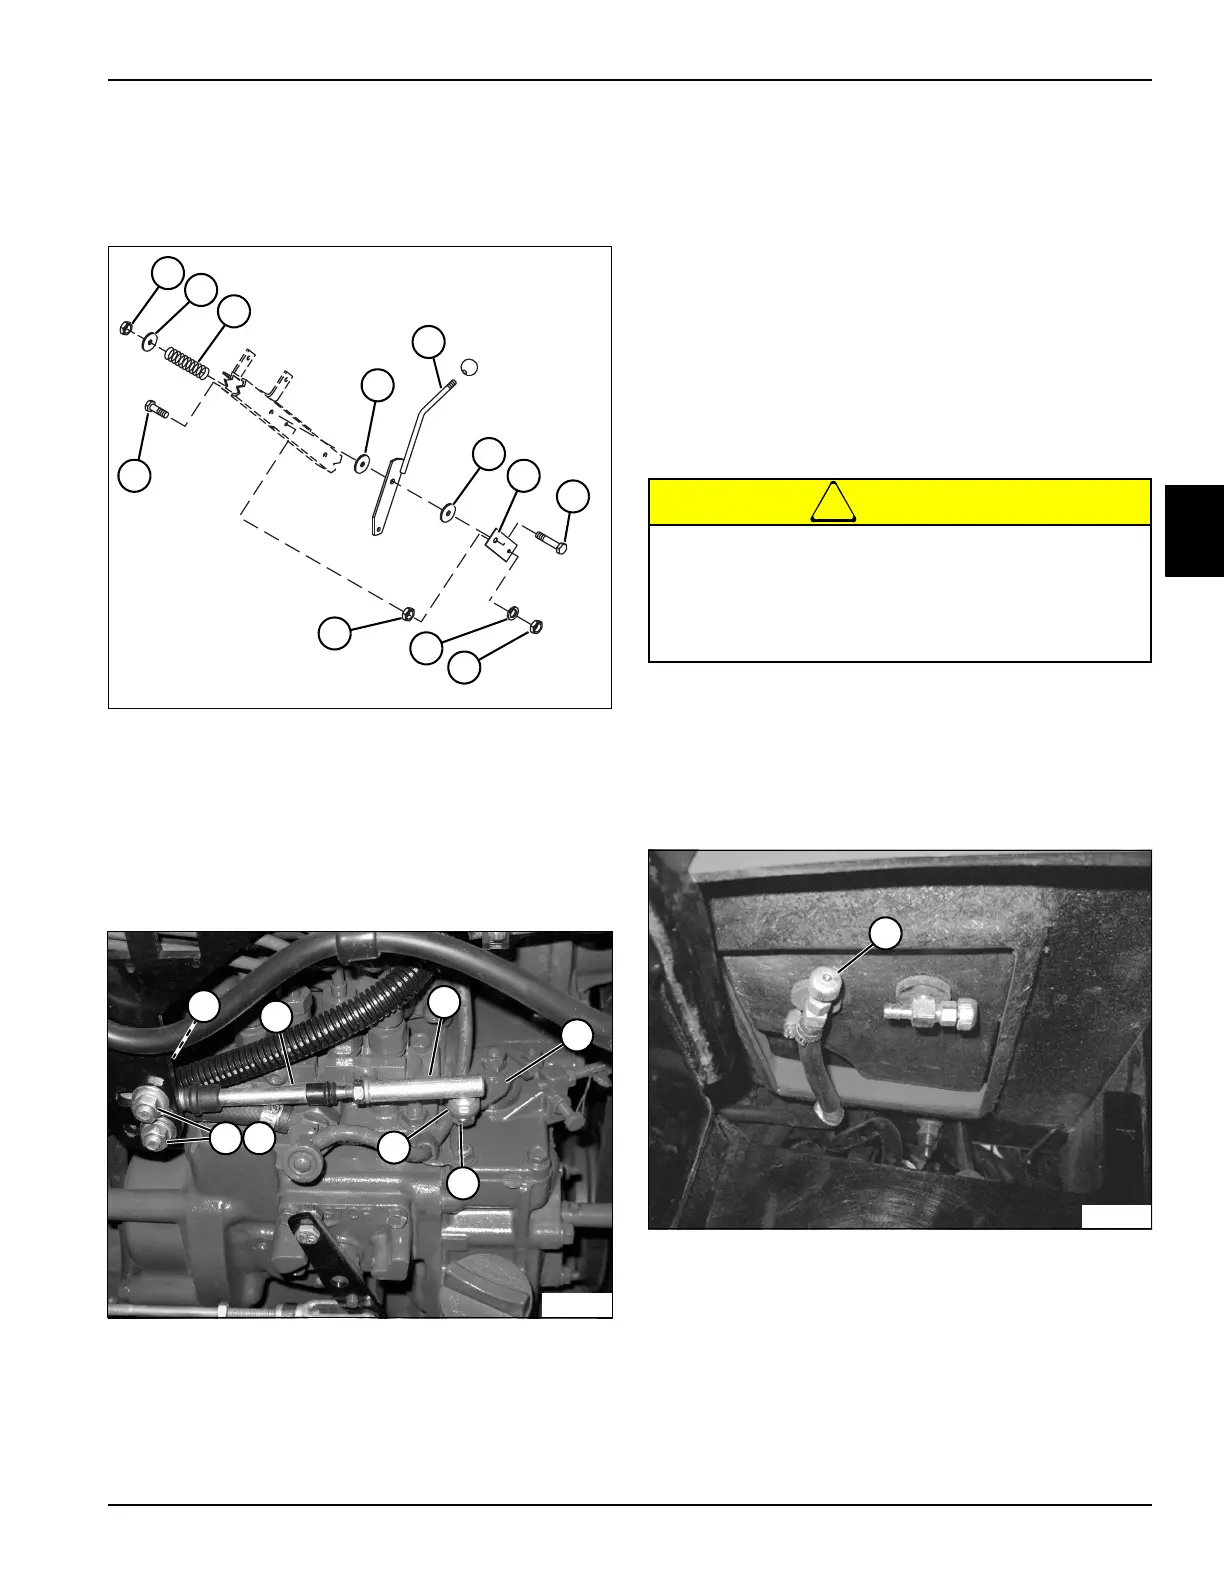
4. Disconnect and remove ball joint (10) from throttle
lever control (7) and throttle cable (9).
5. Remove nut (8) and slide throttle cable through
frame.
Figure 3-24
6. Remove lock nut (11), washer (12), and compression
spring (13).
7. Remove nuts (19), lock washer (20), and screw (14).
8. Remove throttle control lever (16), and disassemble
friction discs (15), throttle plate (17), and screw (18)
from lever.
Figure 3-25
9. Remove nut (24) and washer (25) to disconnect the
ball joint (22) from the governor throttle lever (23).
10. Remove clamp nuts (26), washers (27), and clamp
(28). Remove throttle cable assembly.
Installation Notes
• Install the throttle cable and control lever by reversing
the order of removal.
• When replacing a worn or broken throttle cable, route
the same as the old cable.
• Secure using existing cable clamps.
• After replacing, follow the adjustment procedure.
(See “Throttle Cable” on page 3-5.)
Fuel Filter
Removal and Installation
See Figures 3-26 and 3-27.
!
CAUTION
1. Park the mower safely. (See “Park Mower Safely” on
page 1-6.)
2. Allow the engine to cool completely before servicing.
3. Disconnect the battery negative (–) cable at the
battery.
Figure 3-26
4. Turn the fuel outlet hose shutoff valve (1) clockwise
until valve bottoms lightly. Valve is located on the
bottom of the fuel tank.
5. Thoroughly clean the fuel filter cover and area
surrounding the fuel filter.
15
11
12
13
14
16
15
19
17
18
19
20
TN1999
26
25
24
22
27
21
28
23
TN2011
Diesel fuel is highly flammable. Handle with care.
Use an approved container with a spout that will
fit inside the fuel filler neck. Avoid using
unapproved containers to transport fuel. Keep all
fuel containers clean and closed when not in use.
TN1788
1

 Loading...


