ENGINE
4203780 First Edition 3-17
3
Engine
Removal and Installation
See Figures 3-29 through 3-34.
1. Park the mower safely. (See “Park Mower Safely” on
page 1-6.)
2. Allow the engine to cool completely before
attempting to service the engine.
3. Disconnect the negative (–) battery cable first, then
disconnect the positive (+) cable. Remove the battery
hold-down clamp and battery.
NOTE
Label all wires before disconnecting to ensure correct
installation.
4. Tag and disconnect the wiring harness at the starter,
oil sender, engine coolant temp switch, and
alternator. Remove the harness hold-down clamps.
Move the wiring harness away from the engine.
5. Remove the muffler and exhaust assembly. (See
“Muffler” on page 3-9.)
6. Remove the radiator. (See “Radiator/Hydraulic Oil
Cooler” on page 3-11.)
7. Remove 4WD valve. (See “4WD Valve” on
page 5-53.)
8. Turn the fuel outlet hose shutoff valve clockwise until
valve bottoms lightly. Valve is located on the bottom
of the fuel tank.
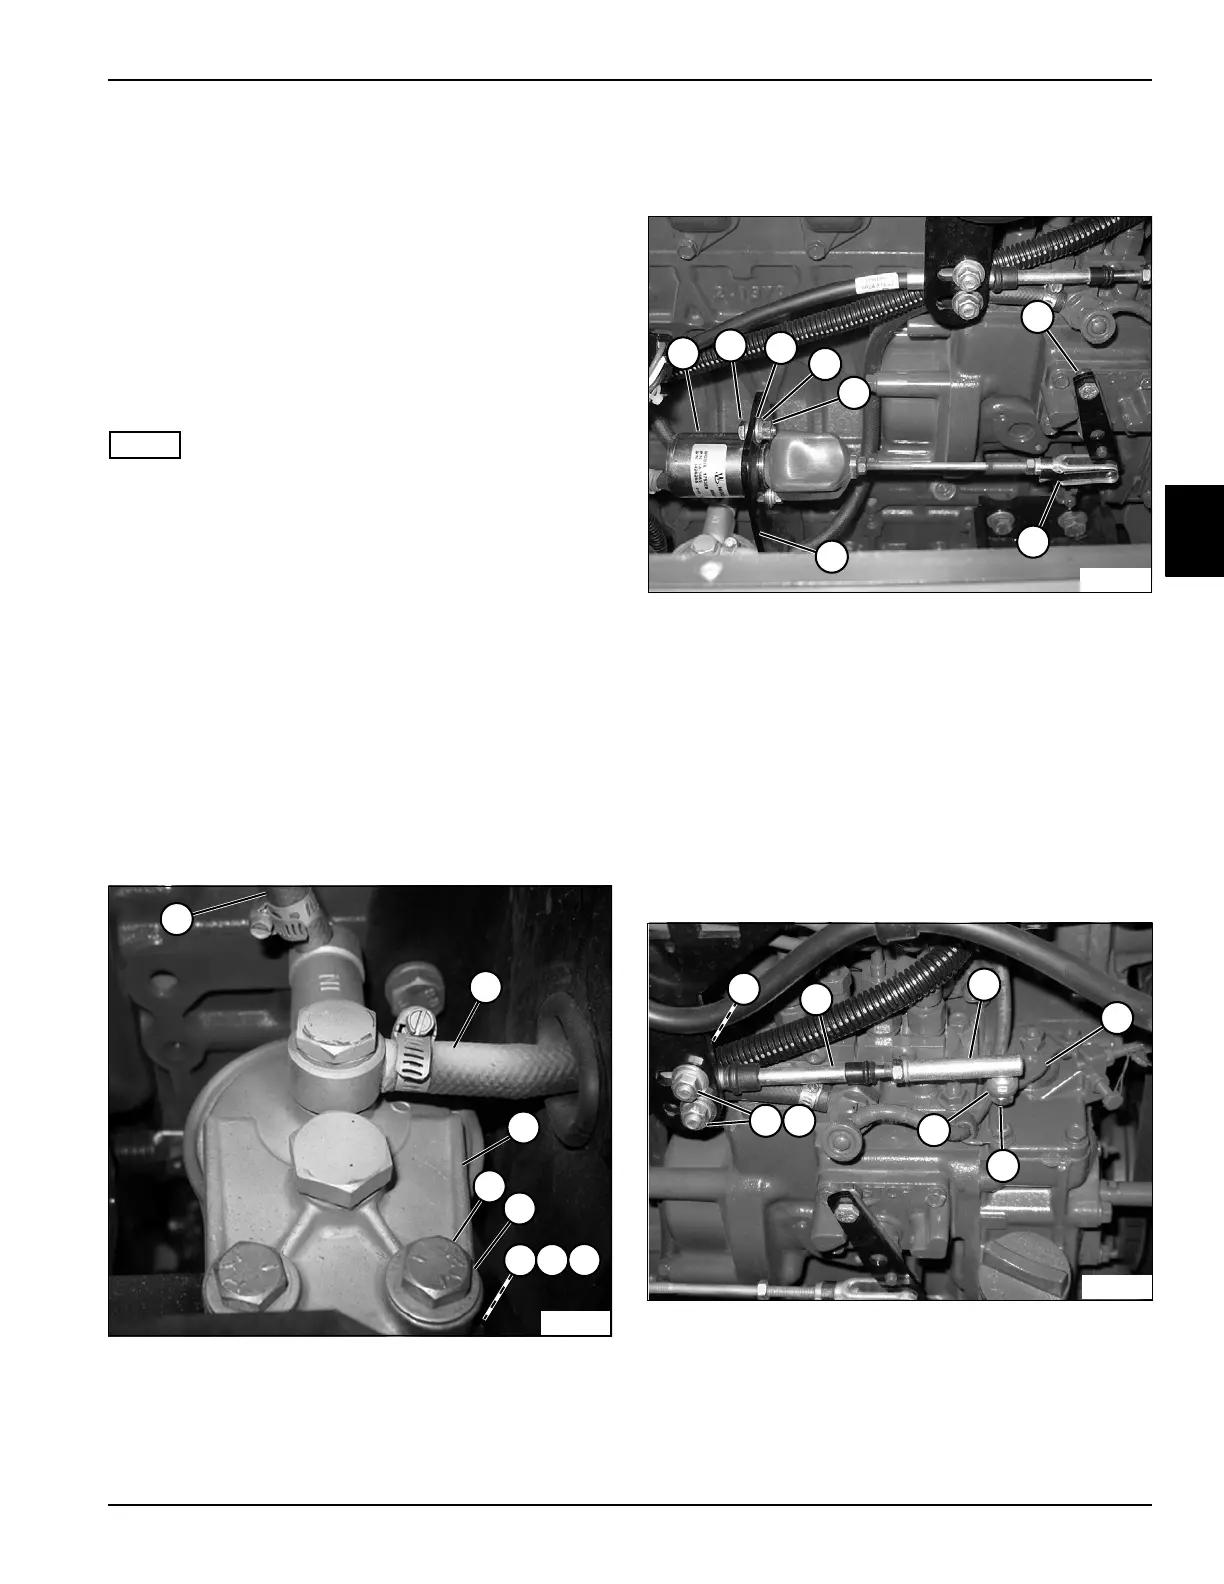
Figure 3-29
9. Disconnect and remove fuel hose (1) from inlet of
fuel filter (3) and from fuel pump.
10. Disconnect and remove fuel hose (2) from outlet of
fuel filter and from injection pump.
11. Remove two nuts (7), two lock washers (6), four
washers (5), and two screws (4) to remove fuel filter
assembly.
Figure 3-30
12. Disconnect solenoid clevis (14) from fuel solenoid
bracket (13).
13. Tag and disconnect fuel solenoid (8) wiring harness
connector from the wiring harness.
14. Remove two nuts (12), two lock washers (11), four
washers (10), and two screws (9).
15. Remove fuel solenoid assembly from fuel solenoid
bracket (15).
16. Disconnect and remove fuel solenoid bracket from
engine.
Figure 3-31
17. Remove nut (19) and washer (20) to disconnect the
ball joint (17) from the governor throttle lever (18).
18. Remove clamp nuts (21), washers (22), and clamp
(23). Remove throttle cable assembly.
3
2
1
TN2020
3
6 7
5
4
5
8
TN2012
13
14
9
10
12
11
15
21
20
19
17
22
16
23
18
TN2011

 Loading...


