83
Choose the menu VLAN→VLAN VPN→VLAN Mapping to load the following page.
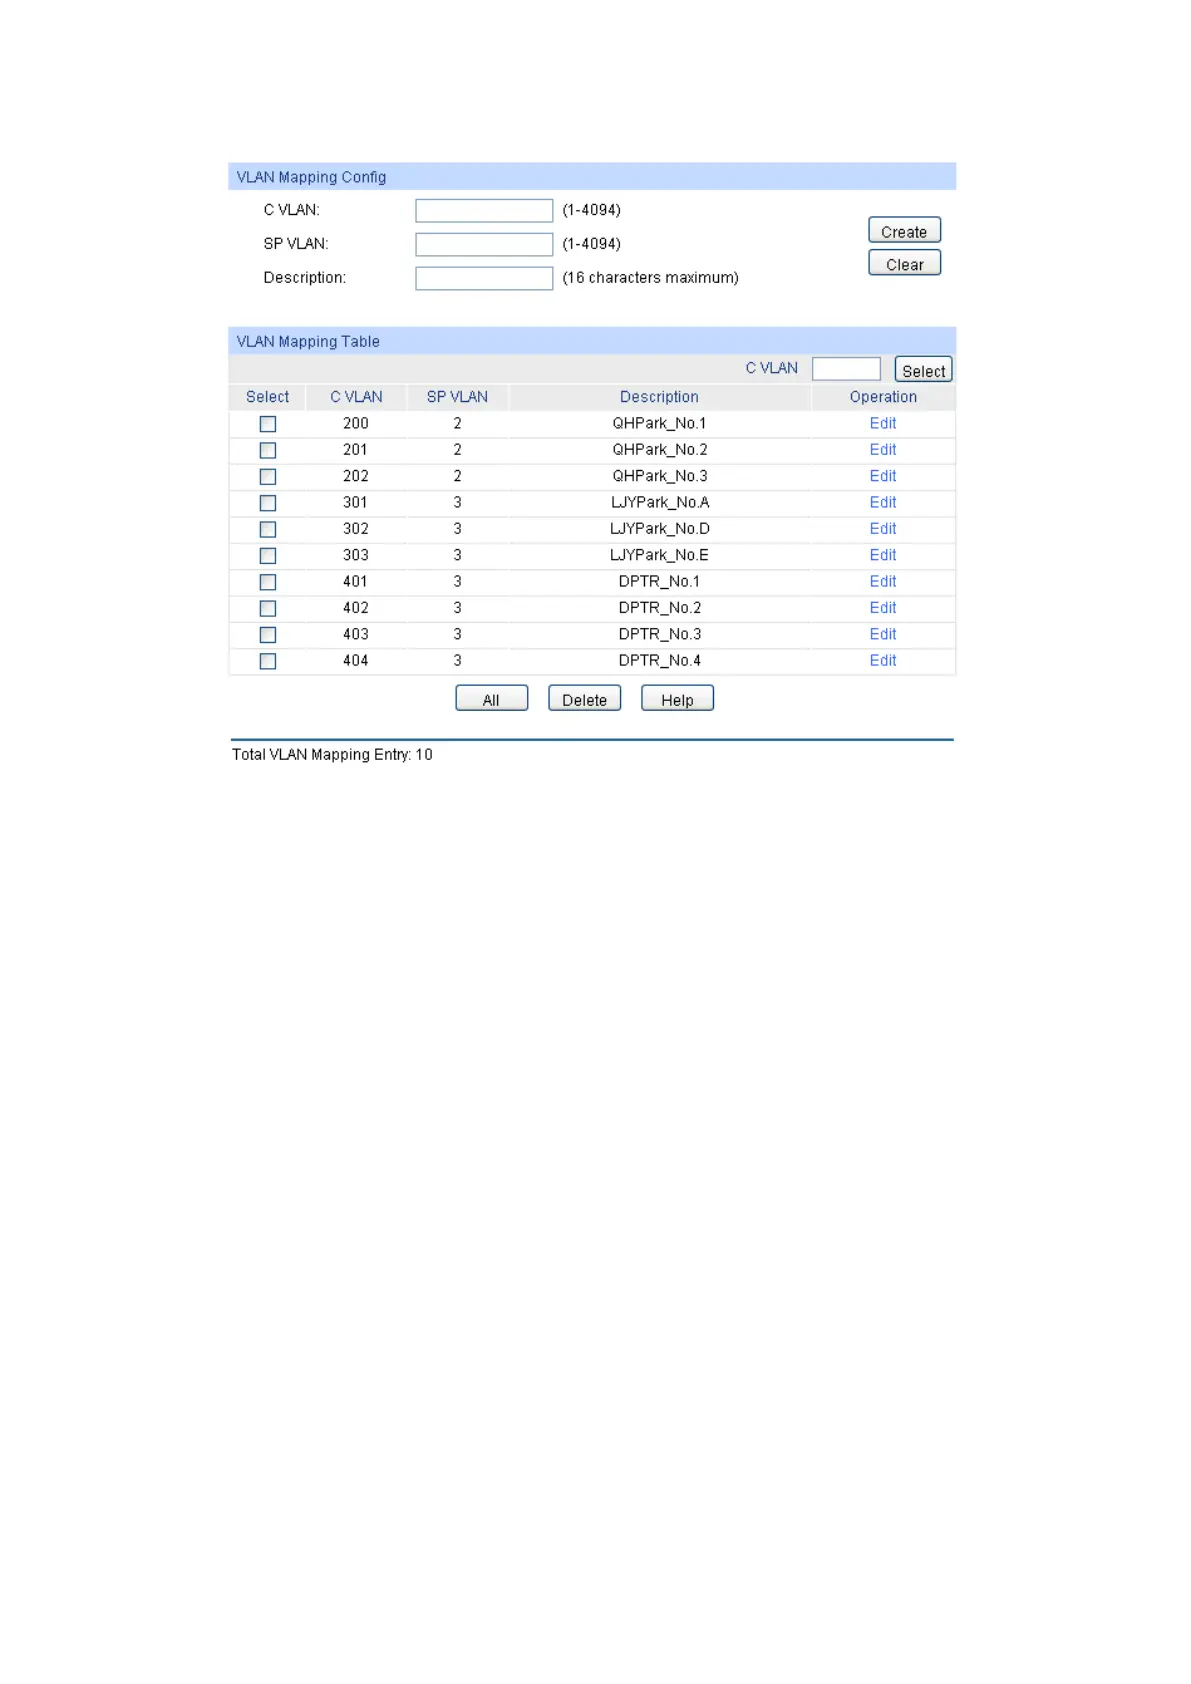
Figure 6-13 Create VLAN Mapping Entry
The following entries are displayed on this screen:
VLAN Mapping Config
C VLAN: Enter the ID number of the Customer V
LAN. C VLAN refers to the
VLAN to which the packet received by switch belongs.
SP VLAN: Enter the ID number of the Service Provider VLAN.
Description: Give a description to the VLAN Mapping entry or leave it blank.
VLAN Mapping Table
C VLAN Select: Click the Select button to quick-
select the corresponding entry
based on the C VLAN ID you entered.
Select:
Select the desired entry to delete the corresponding VLAN
Mapping entry. It is multi-optional.
Operation: Click the Edit button to modify the sett
ings of the entry and click
the Modify button to apply.
6.7.3 Port Enable
On this page, you can enable the port for the VLAN Mapping function. Only the port is enabled,
can the configured VLAN Mapping function take effect.