06/2014
9-6
WC 5022/5024
9.1.1 Installation of Main Unit
Version 1.0
Installation/Removal
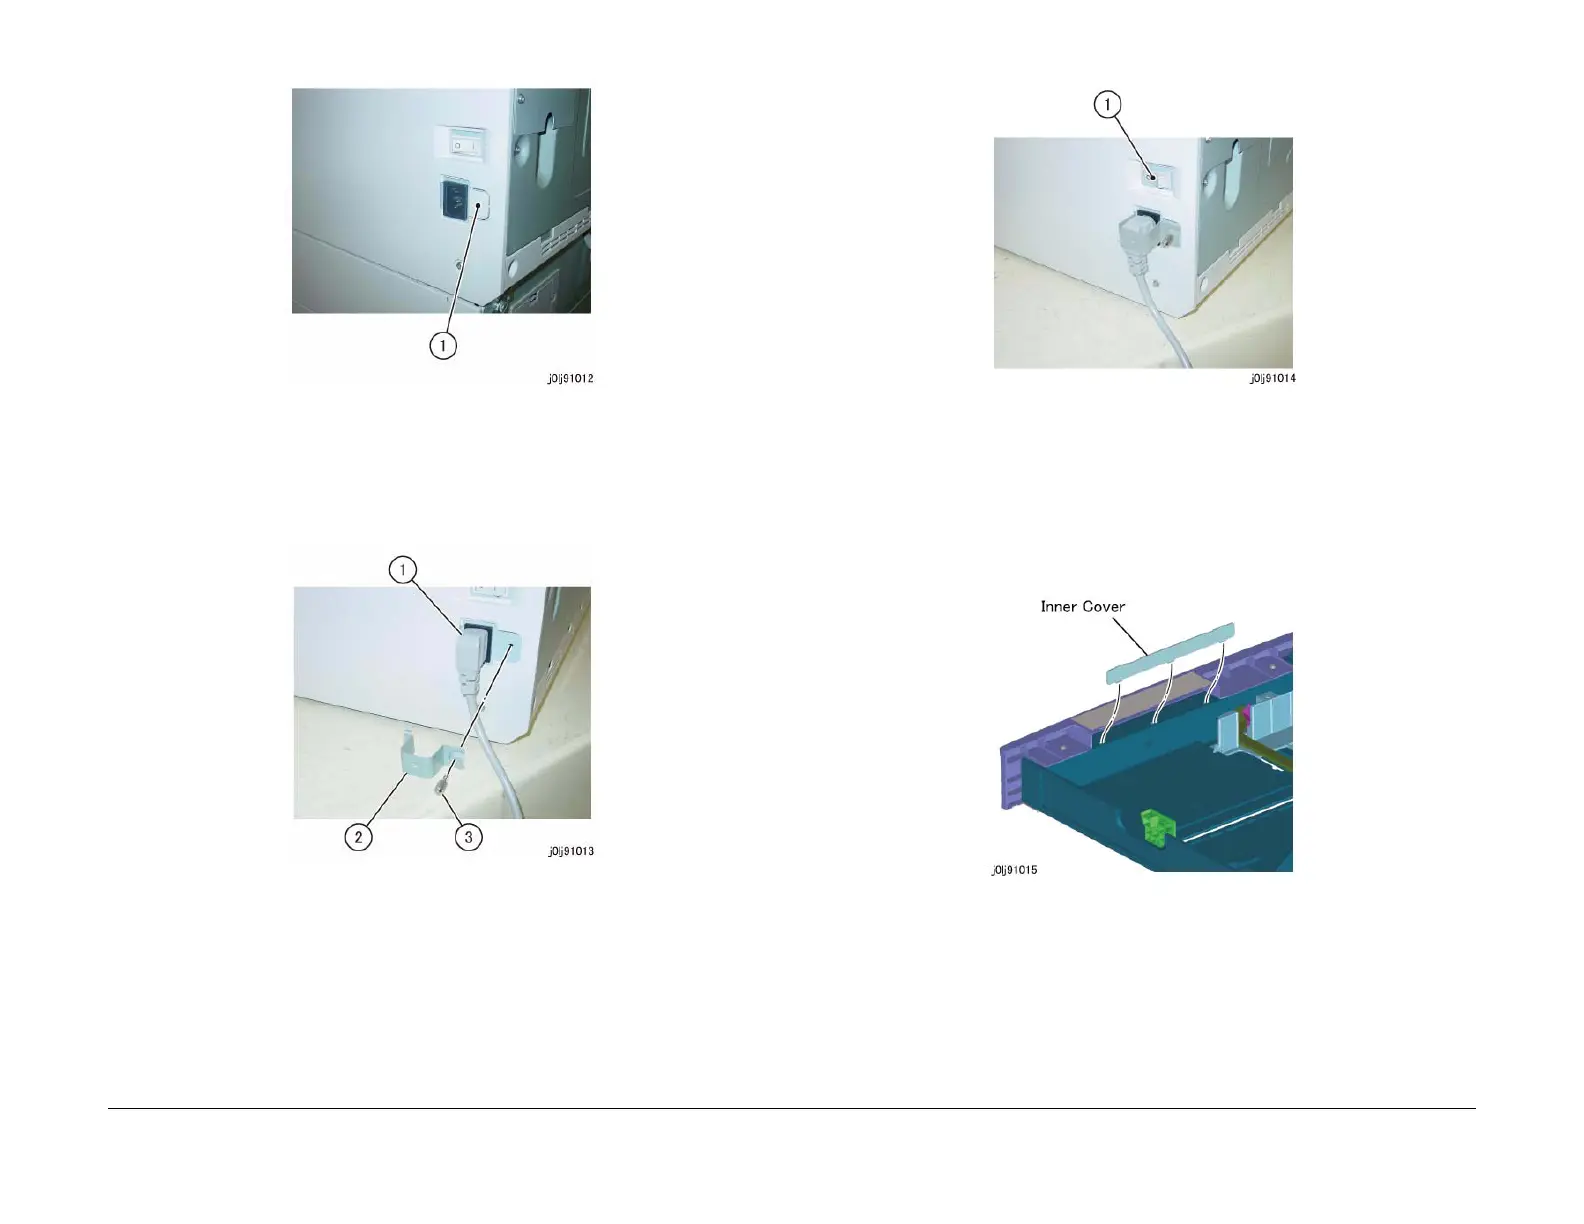
Figure 11 j0lj91012
18. Connect the Power Cord. (Figure 12)
a. Connect the Power Cord.
b. Install the Stopper Bracket.
c. Secure it by using the Thumbscrew.
Figure 12 j0lj91013
19. Turn ON the Power Switch. (Figure 13)
a. Turn ON the Power Switch.
• "Ready to Copy" is displayed approx. 30 s later.
Figure 13 j0lj91014
20. Check the operation.
21. Turn OFF the power.
22. Pull out Tray 1.
23. Remove the Inner Cover of Tray 1 slightly and store the NVM List and Engineers History
List. (Figure 14)
Figure 14 j0lj91015
24. Reinstall the Inner Cover and push in Tray 1.
25. Explain to the customer how to operate the machine where necessary.
 Loading...


