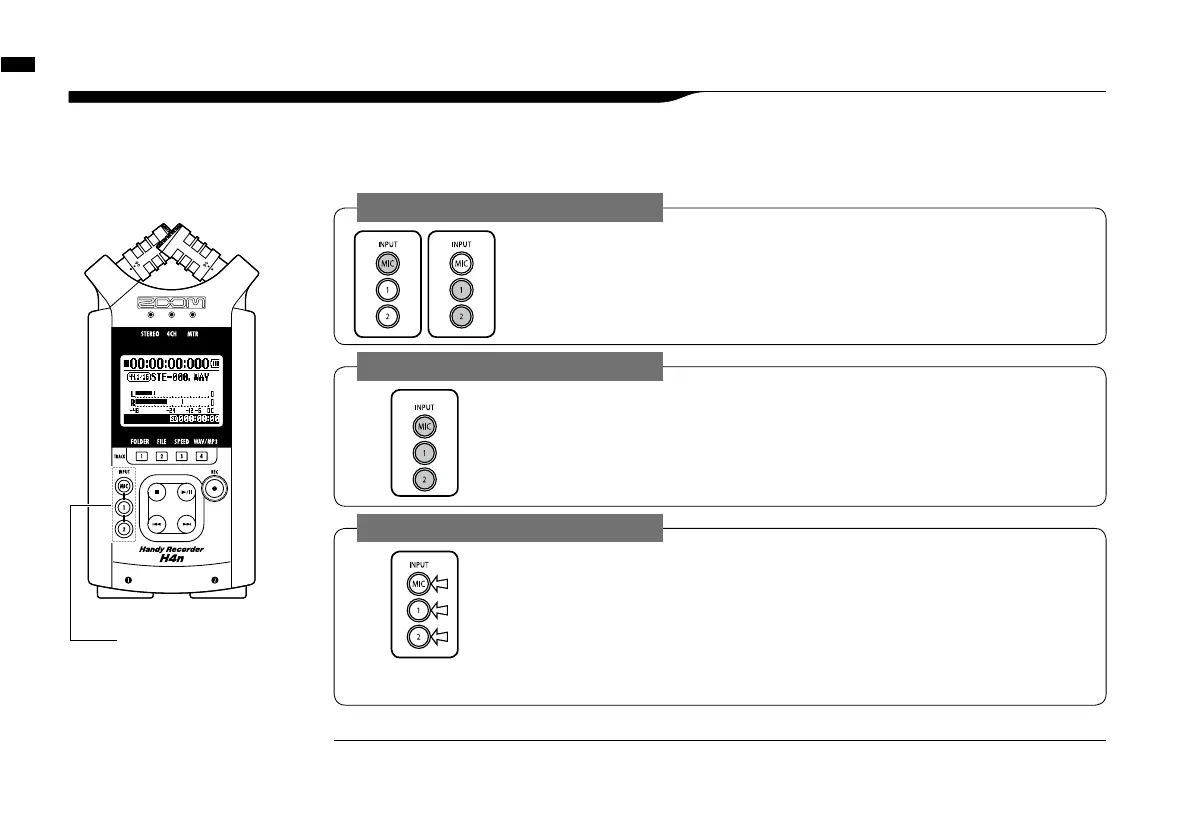
How to use the input [MIC], [1] and [2] buttons
023
4-4 How to use the input [MIC], [1] and [2] buttons
These buttons have different functions depending on the various modes.
[FRONT PANEL]
INPUT [1] & [2]
buttons
STEREO/STAMINA MODE
Select INPUT [MIC] or INPUT [1] [2] and the corresponding button lights up.
Whether you select the INPUT [1] or INPUT [2] button, they will both respond the same
Both buttons light up after the selection. (Once lighted the buttons do not respond)
Any other settings about input sources like [REC LEVEL, should be made to the lighted target.
* When the presently selected input clips its button will blink.
4CH MODE
Use all input sources like [MIC], [1] and [2] = All [MIC], [1] and [2] light on.
When you switch to 4CH, H4n will receive 2- system stereo inputs from [MIC] and [1] [2]
altogether. When you press the lighted button, each shows its input level and you can make
adjustment to recording level operating [REC LEVEL].
* When the input clips the corresponding button blinks.
MTR MODE
Select [MIC], [1] and [2] individually and the corresponding button lights up.
You can select individually INPUT [MIC], [1] and [2]
• When you use built-in and the external stereo microphones, select INPUT [MIC].
• When you make stereo input using the external input jack, select both INPUT [1] and [2].
You press either INPUT [1] or [2] button and then press another button.
*
When the selected input clips its button blinks.
What is clipping?
HINT:
The input level reaches up to the maximum which the H4n can record, that is 0 dB.
In this case the recording sound can be distorted and need adjustment of recording level.