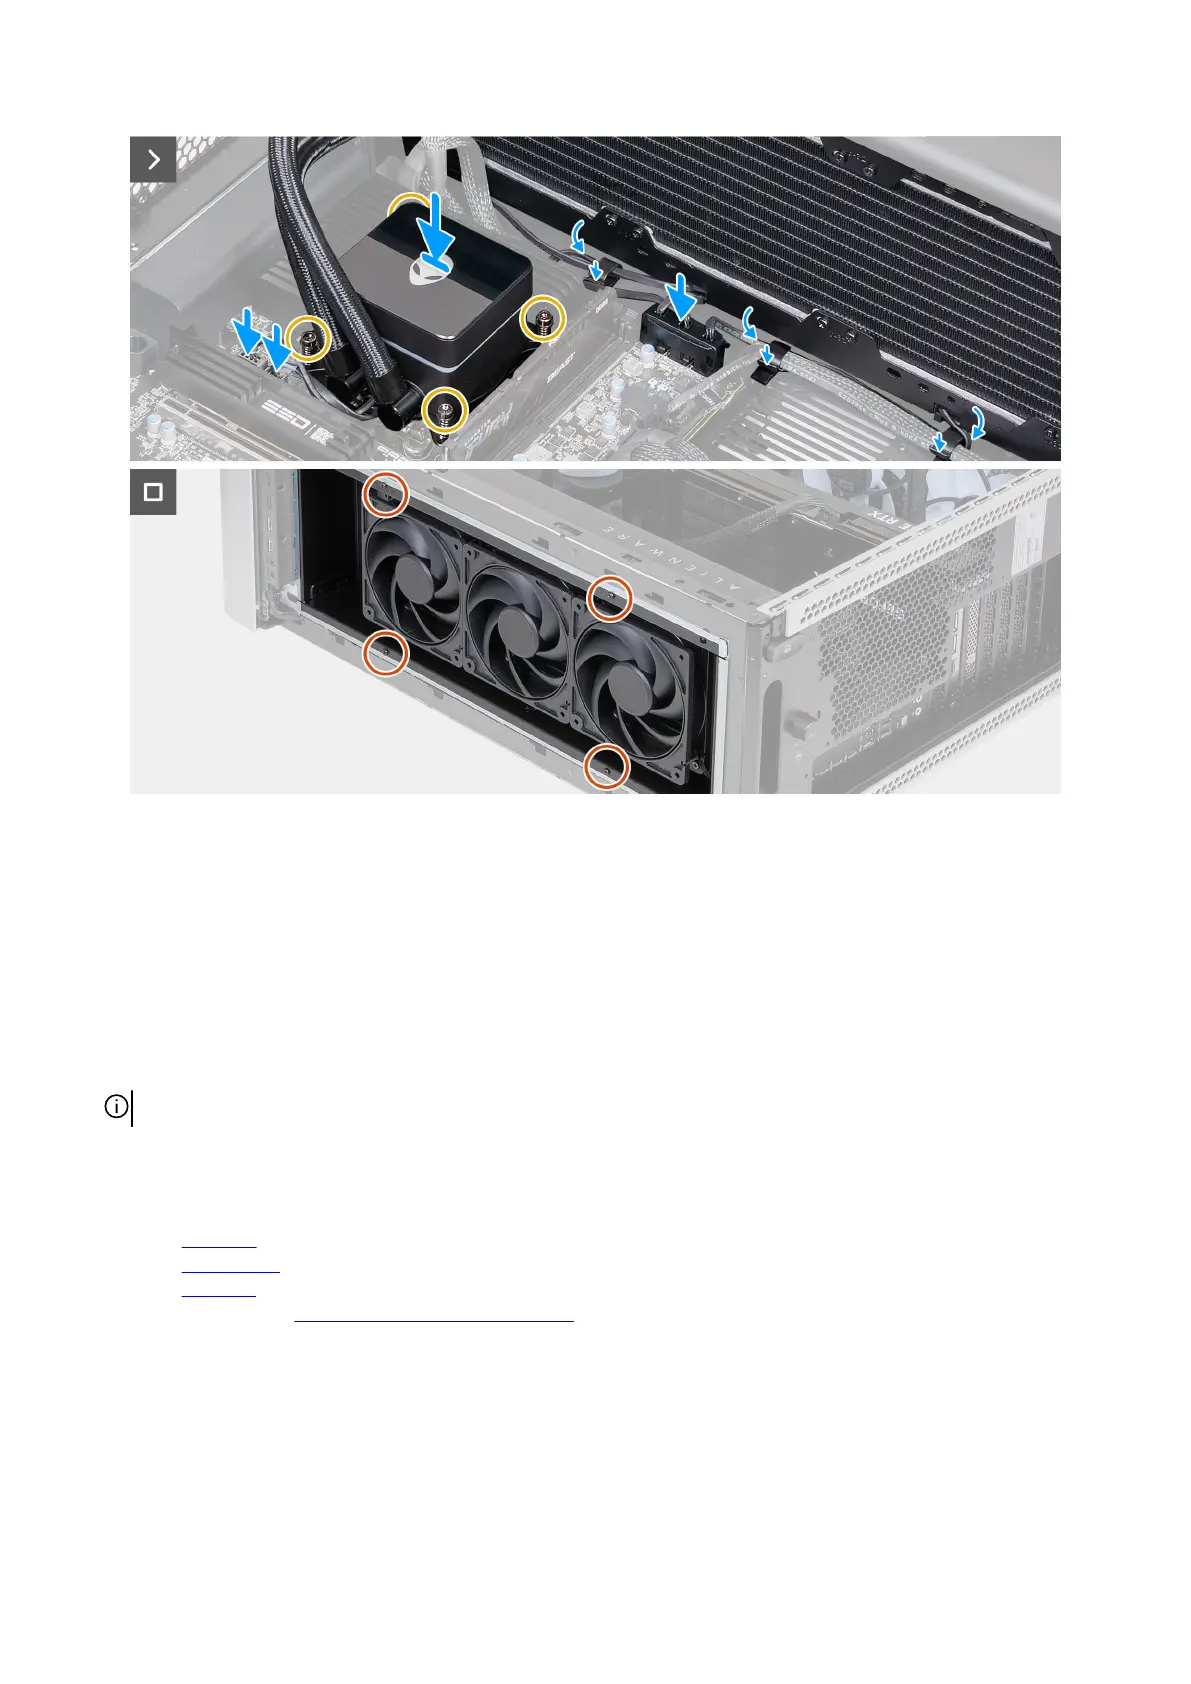
Figure 99. Installing the processor liquid-cooling assembly
Steps
1. Insert the top-fan assembly, along with the processor liquid-cooling assembly and cables, into the chassis.
2. Align the screw hole on the top-fan assembly with the screw hole on the chassis.
3. Align the screw holes on the processor liquid-cooling assembly with the screw holes on the system board.
4. In the sequential order, tighten the four captive screws that secure the processor liquid-cooling assembly to the system board.
5. Connect the processor liquid-cooling assembly cables to the connectors (LED PUMP and PWR PUMP) on the system board.
6. Insert the top-fan assembly cables into the securing clip to secure the cable.
7. Connect the top-fan assembly cables to the fan connectors (FAN1, FAN2, and FAN3) on the system board.
NOTE: Depending on the configuration ordered, the number of fan connectors may vary.
8. Replace the four screws (M3x5) that secures the top-fan assembly to the chassis.
Next steps
1. Install the top cover.
2. Install the top fan filter.
3. Install the left cover.
4. Follow the procedure in After working inside your computer.
Removing and installing Field Replaceable Units (FRUs) 113