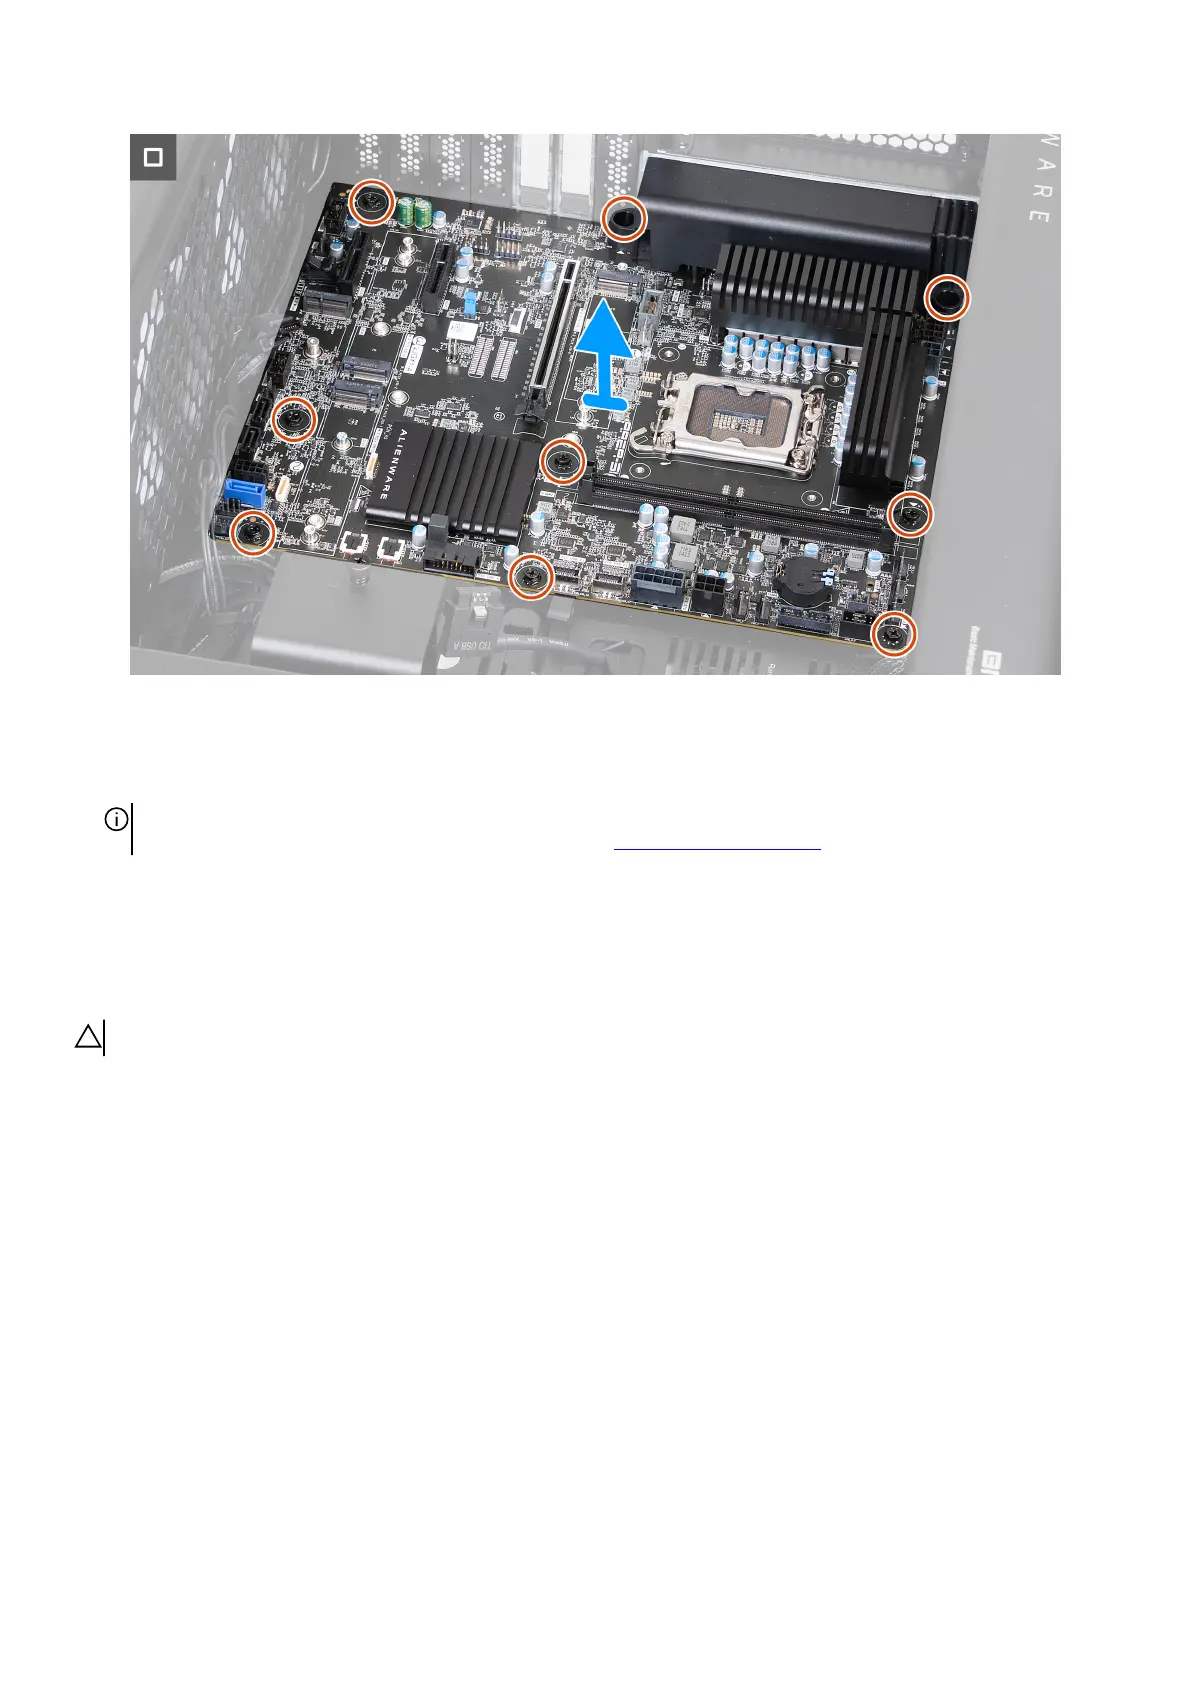
Figure 122. Removing the system board
Steps
1. Disconnect all the cables that are connected to the system board.
NOTE: Note the routing of all cables as you remove them so that you can route them correctly when replacing the system
board. For information about system-board connectors, see "system-board components".
2. Remove the nine screws (#6-32) that secure the system board to the chassis.
3. Slide and lift the system board off the chassis at an angle and remove the system board off the chassis.
Installing the system board
CAUTION: The information in this installation section is intended for authorized service technicians only.
Prerequisites
If you are replacing a component, remove the existing component before performing the installation procedure.
About this task
The following image indicates the connectors on your system board.
136 Removing and installing Field Replaceable Units (FRUs)