2. Remove the power-supply unit holder from the respective slots on the chassis.
NOTE: The location of the slots on the chassis varies depending on the power-supply unit configuration. Make a note of the
slots before you remove the power-supply unit holder.
3. Remove the four screws (#6-32) at the rear chassis that secure the power-supply unit to the chassis.
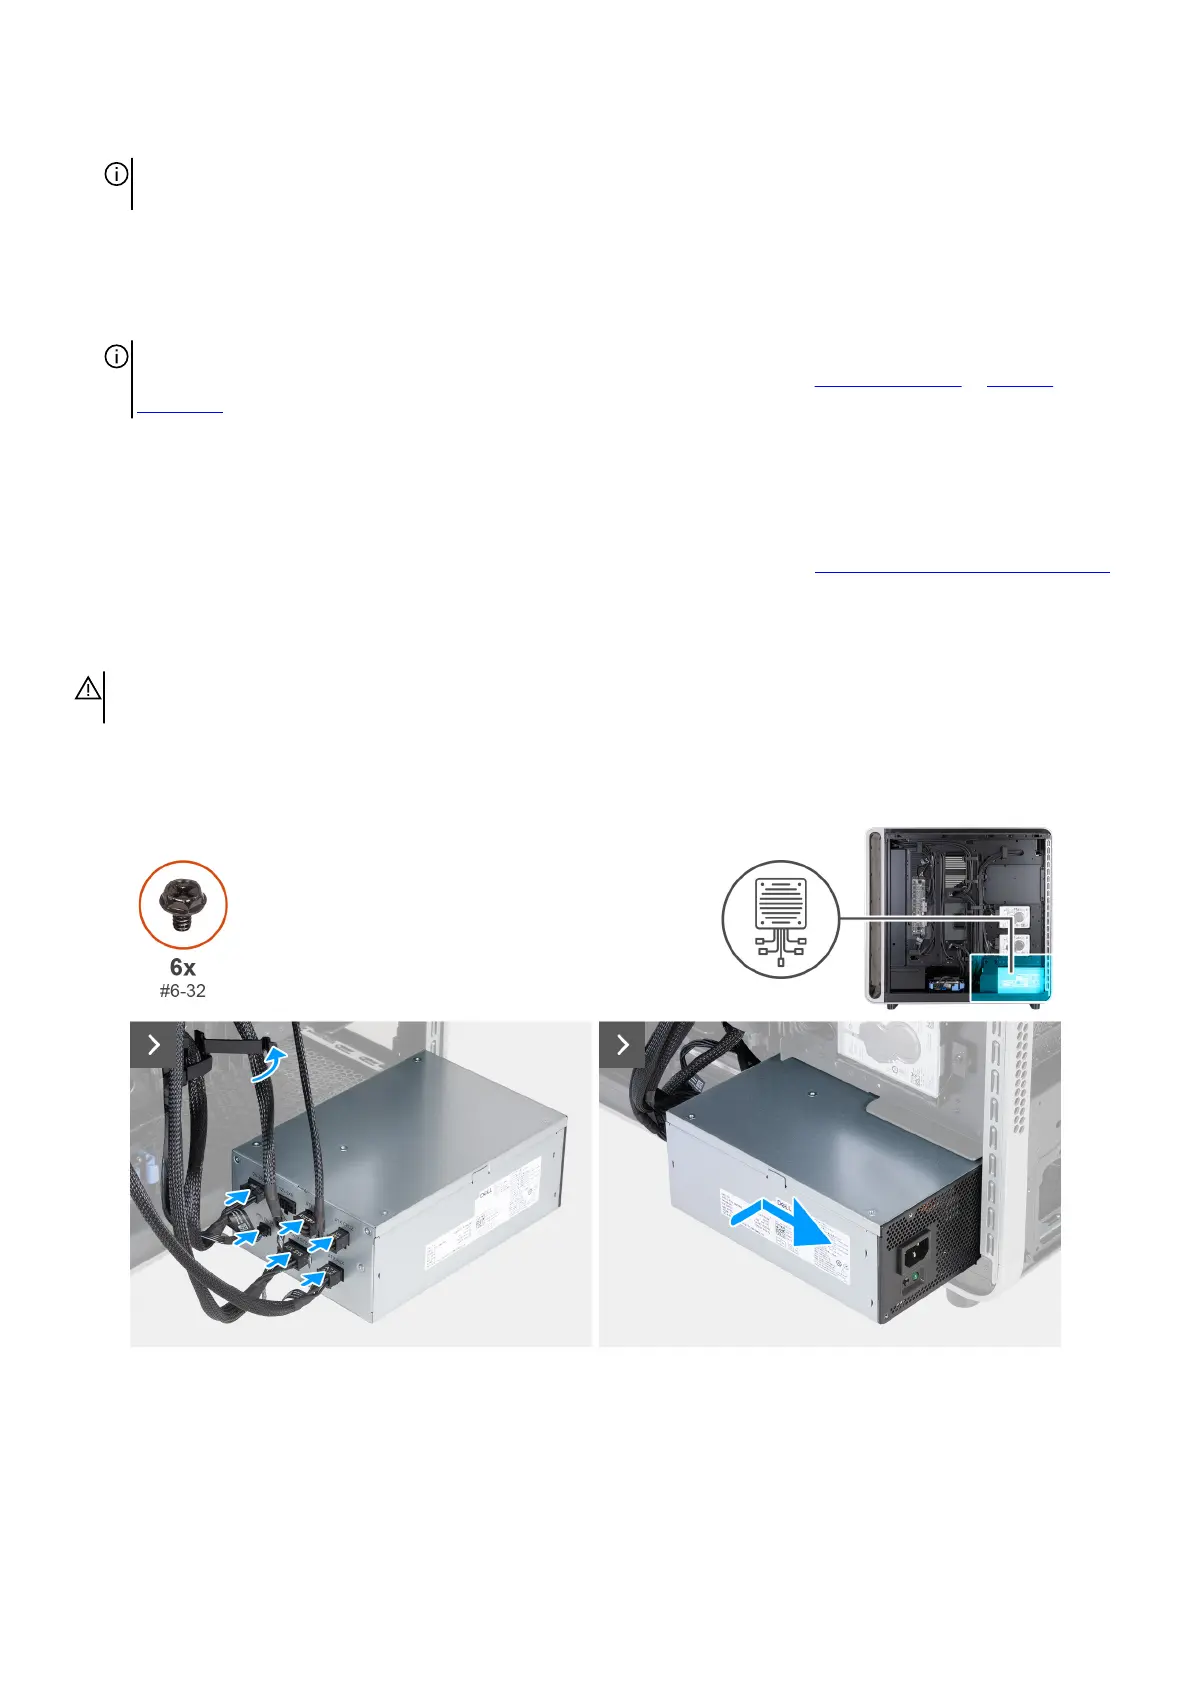
4. Unlock the securing clip and remove the power-supply unit cables from the securing clip.
5. Push the power-supply unit to release it from the power-supply unit chamber on the chassis.
6. Slide and remove the power-supply unit, along with the cables, from the chassis.
NOTE: Note the routing of all cables as you remove them so that you can route them correctly after you replace the
power-supply unit. For more information about the power-supply unit connectors, see 850 W connectors or 1500 W
connectors.
7. Disconnect the power cables that are connected to the power-supply unit.
Installing the power-supply unit
You can view the video to remove and install the power-supply unit. For more information, see QR code for power-supply unit video.
Prerequisites
If you are replacing a component, remove the existing component before performing the installation procedure.
WARNING: Ensure that you plug in the cable to the correct port. Failure to do so may result in damaging the power-supply
unit and/or computer components.
About this task
The following images indicate the location of the power-supply unit and provide a visual representation of the installation procedure.
Figure 74. Installing the power-supply unit
88 Removing and installing Customer Replaceable Units (CRUs)