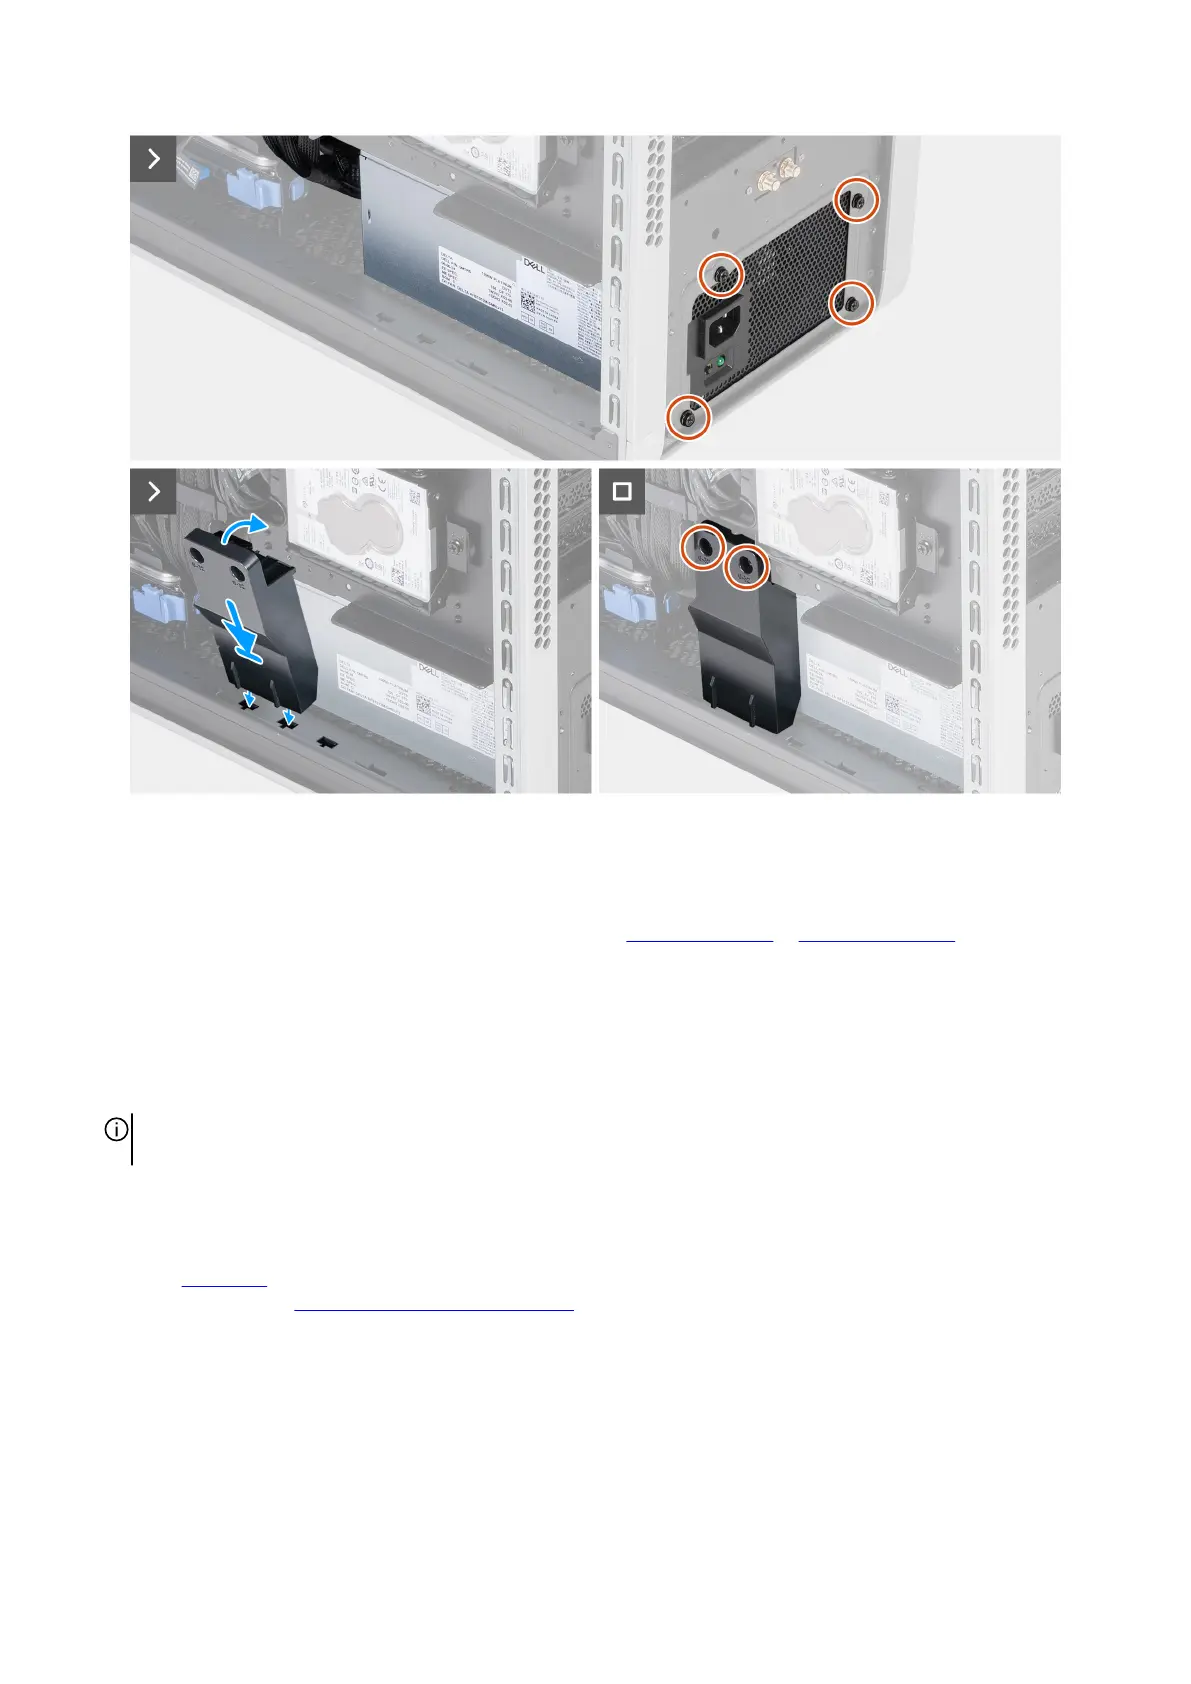
Figure 75. Installing the power-supply unit
Steps
1. Connect all the power cables to the respective connectors on the power-supply unit.
For more information about the power-supply unit connectors, see 850 W connectors or 1500 W connectors.
2. Slide and push the power-supply unit to the chassis.
3. Insert the power-supply unit cables into the securing clip and lock the securing clip to secure the power-supply unit cables.
4. Slide and push the power-supply unit into the power-supply unit chamber towards the rear side of the chassis.
5. Replace the four screws (#6-32) at the rear chassis that secure the power-supply unit to the chassis.
6. Align the power-supply unit holder tabs to the slots on the chassis and install the power-supply unit holder into the respective
slots on the chassis.
NOTE: The location of the slots on the chassis varies depending on the power-supply unit configuration. Install the power-
supply unit holder to the same slot from where it was removed.
7. Replace the two screws (#6-32) that secure the power-supply unit holder to the chassis.
Next steps
1. Install the right cover.
2. Follow the procedure in After working inside your computer.
Removing and installing Customer Replaceable Units (CRUs) 89