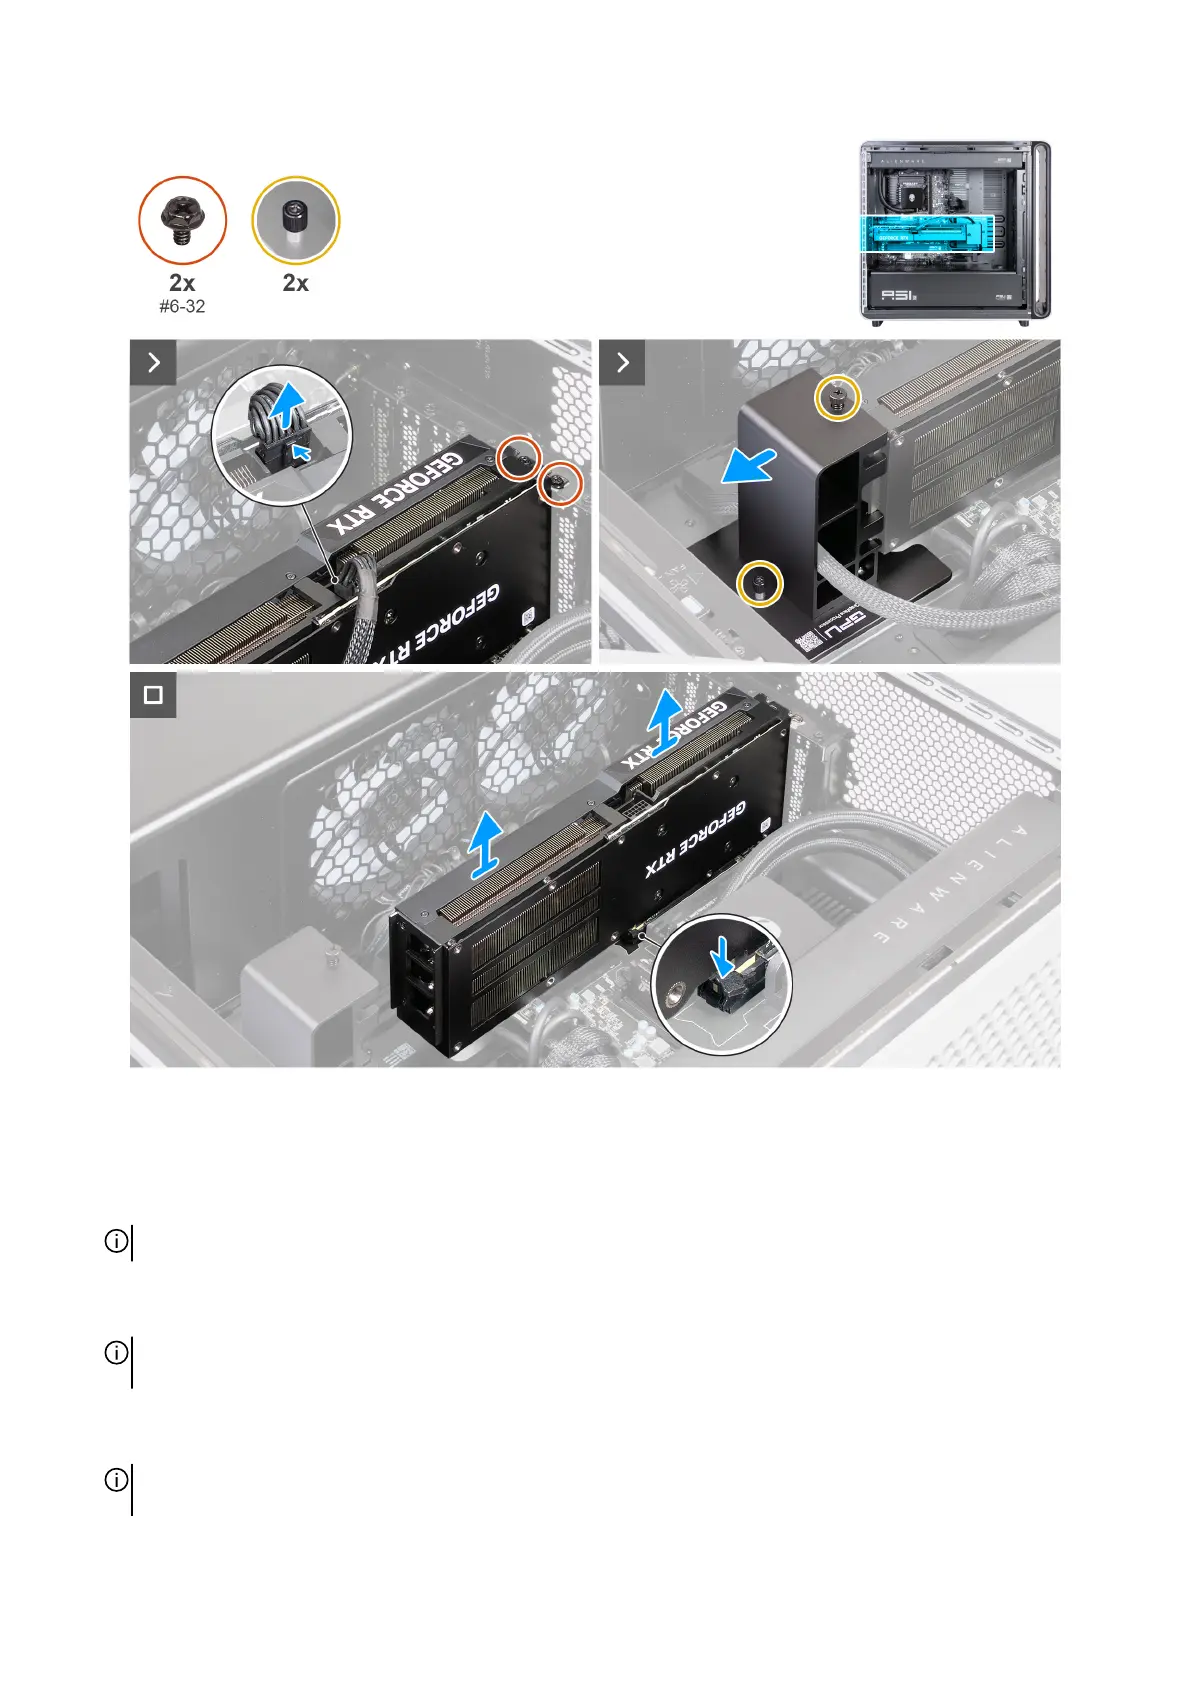
Figure 53. Removing the single-graphics card
Steps
1. Lay the computer on the right side.
2. Press the clip on the graphics-card power connector and disconnect the cable from the graphics card.
NOTE: The type of connector on your graphics card varies depending on the configuration ordered.
3. Remove the two screws (#6-32) that secure the graphics card to the rear wall of the chassis.
4. Loosen the captive screw that secures the end holder to the chassis and slide the holder away from the graphics card.
NOTE: Depending on the configuration of graphics card you have ordered, there might be an additional captive screw that
must be loosened.
5. Push the securing tab on the PCIe slot away from the graphics card.
6. Grasp the card by its top corner, and ease it out of the slot.
NOTE: When handling the graphics card, position your hands at the top of the module and make sure not to put pressure on
the fan blades.
68 Removing and installing Customer Replaceable Units (CRUs)