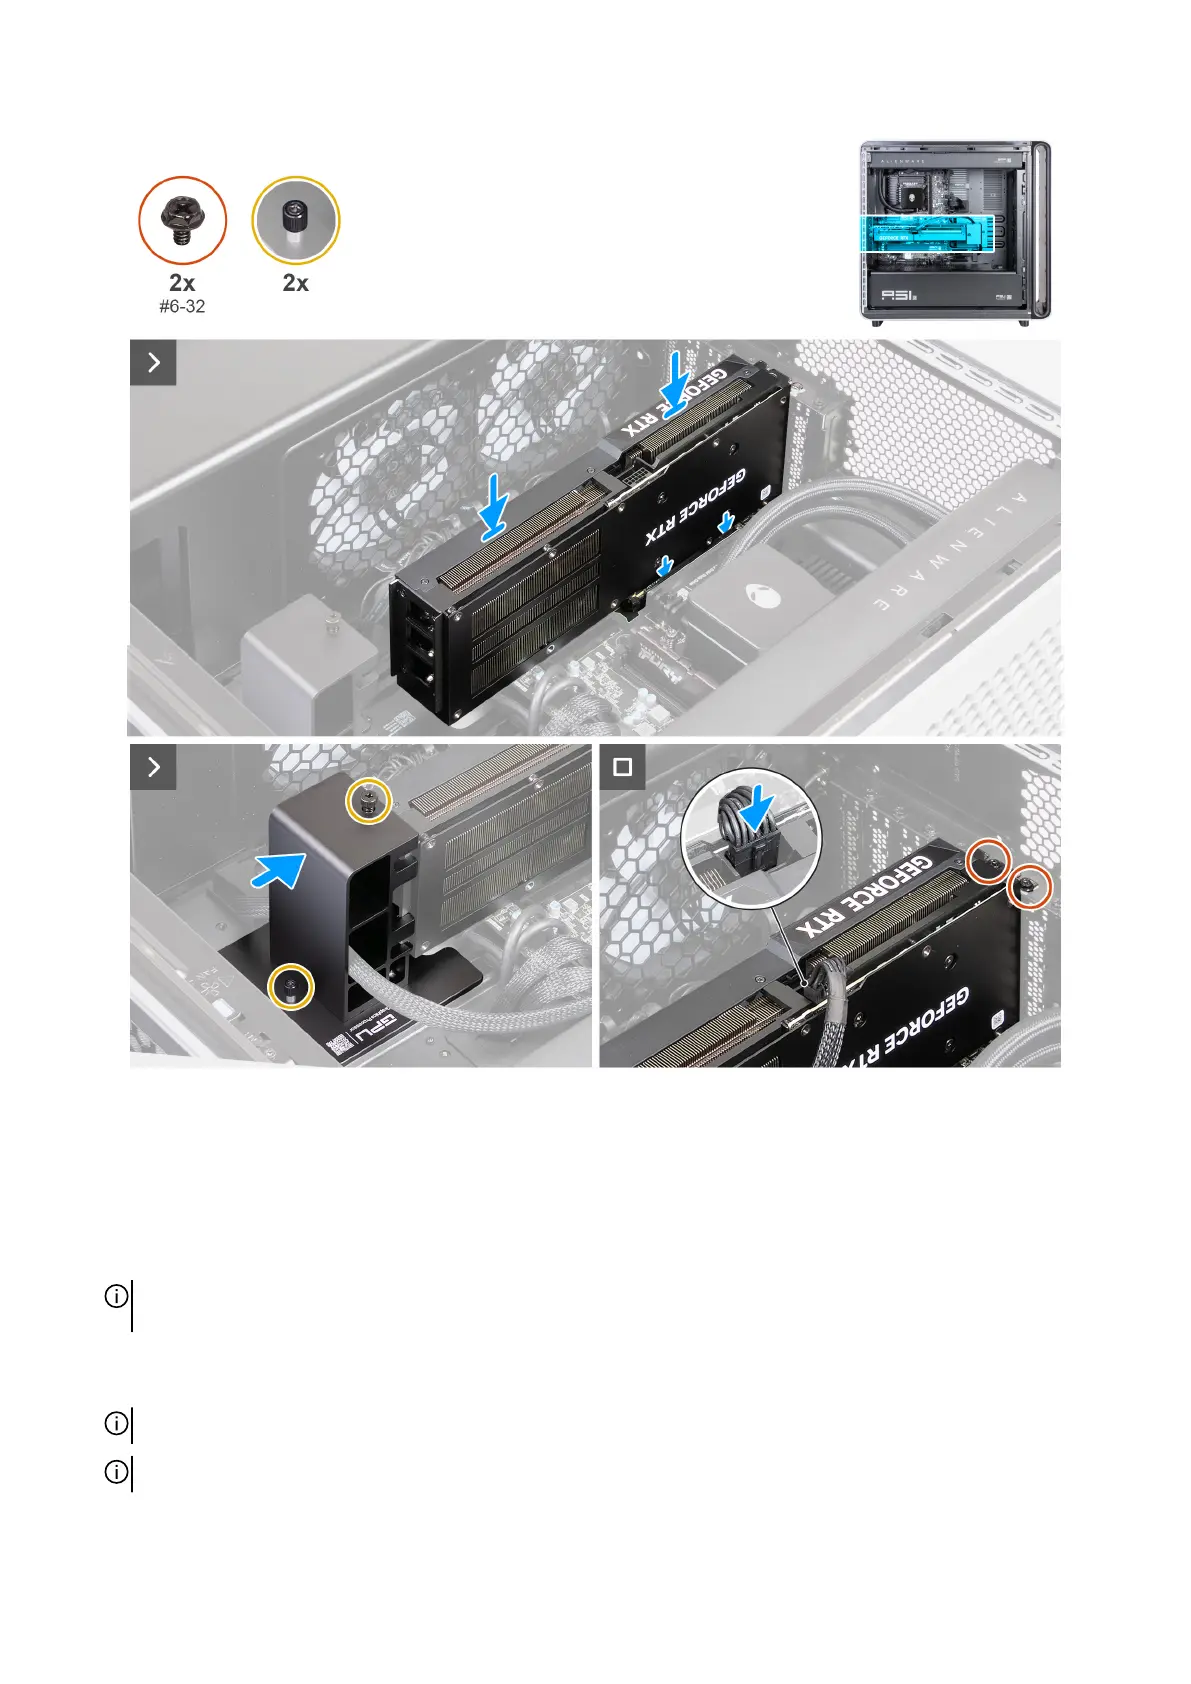
Figure 55. Installing the single-graphics card
Steps
1. Align the notch on the graphics card with the tab on the PCIe slot on the system board.
2. Press the graphics card down firmly until the graphics card snaps into place.
3. Push the graphics card end holder towards the graphics card to secure it in place.
4. Tighten the captive screw that secures the end holder to the graphics card.
NOTE: Depending on the configuration of graphics card you have ordered, there might be an additional captive screw that
must be tightened.
5. Replace the two screws (#6-32) that secure the graphics card to the rear wall of the chassis.
6. Connect the power cable to its corresponding power connector on the graphics card and ensure that the cables are fully seated.
NOTE: Ensure that the cables are completely inserted into the connectors.
NOTE: The type of connector on your graphics card varies depending on the configuration ordered.
70 Removing and installing Customer Replaceable Units (CRUs)