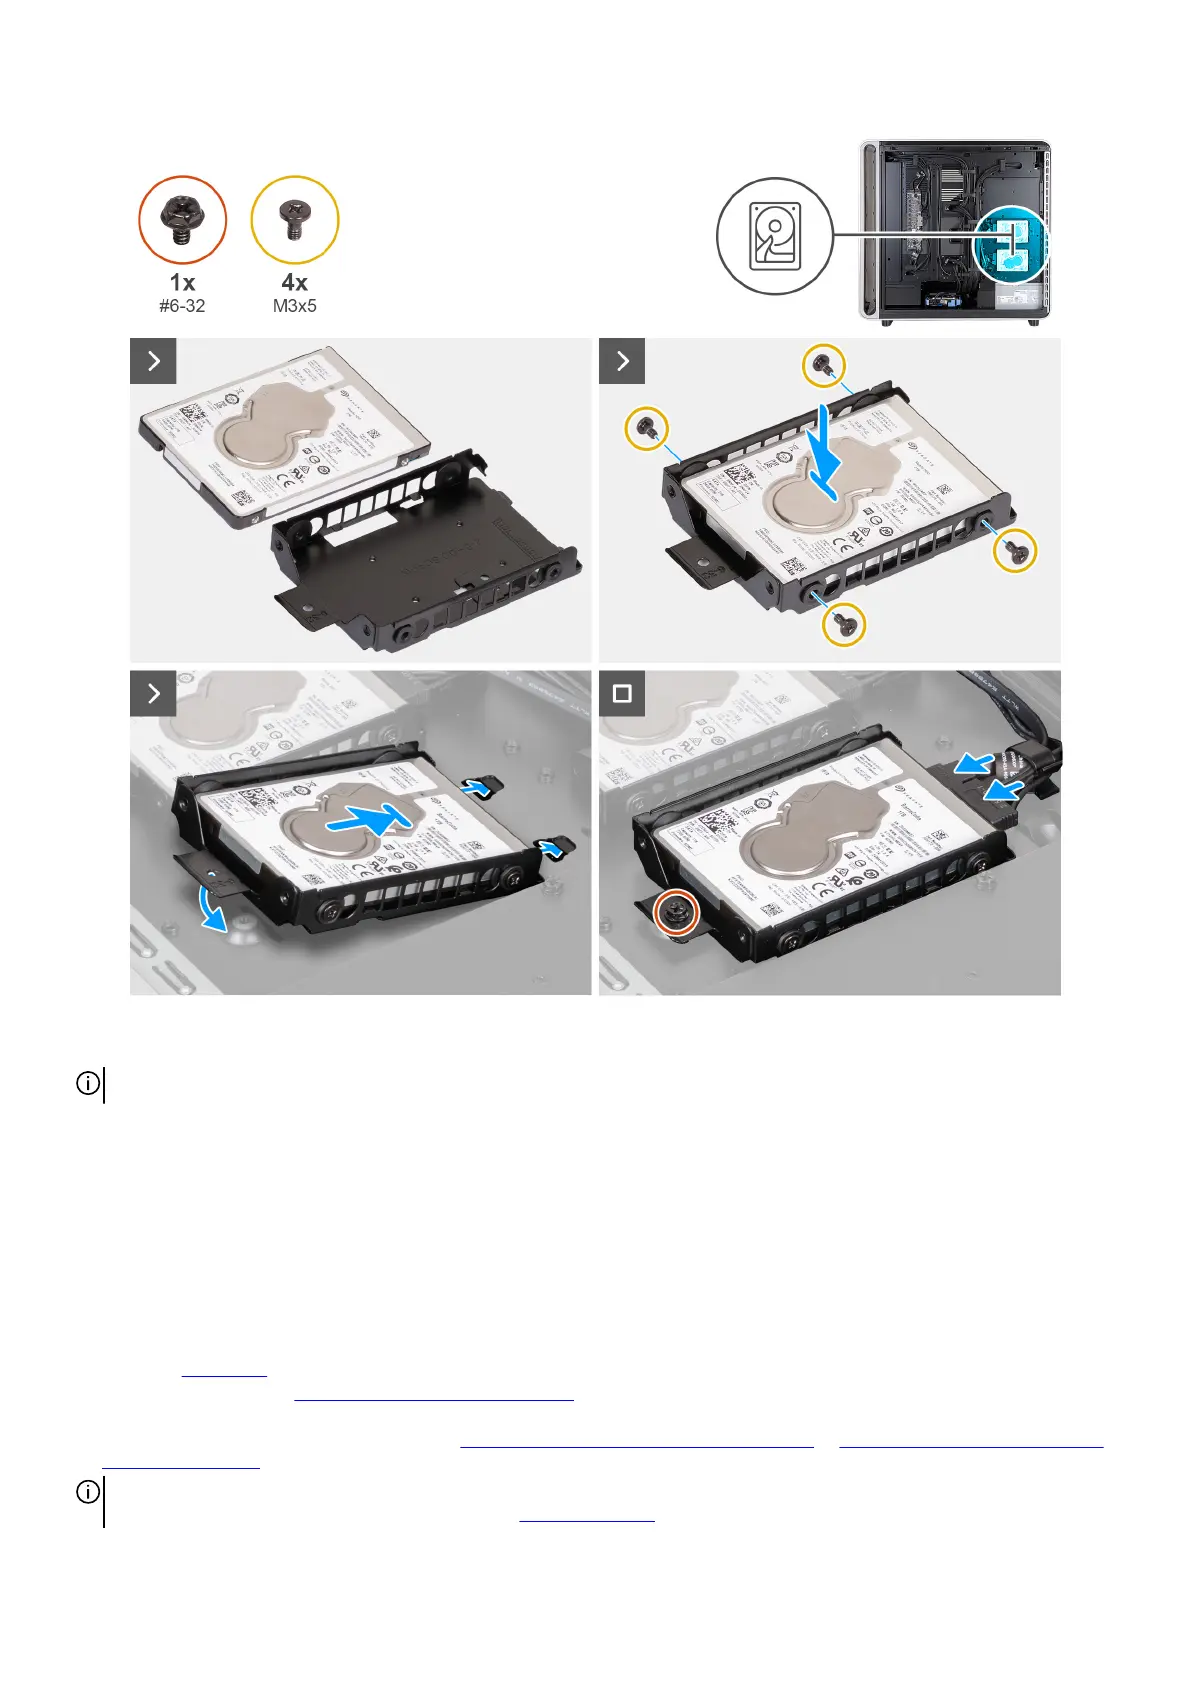
Figure 83. Installing the 2.5-inch hard drive
NOTE: Ensure that the hard drive cage and hard drive orientation are correct when installing the hard drive.
Steps
1. Align and place the hard drive in the hard drive cage.
2. Replace the four screws (M3x5) that secure the hard drive to the hard drive cage.
3. Connect the data and power cables to the hard drive.
4. Align the slots with the tabs on the hard drive cage and slide the hard drive cage into the chassis.
5. Replace the screw (#6-32) that secures the 2.5-inch hard drive cage to the chassis.
Next steps
1. Install the right cover.
2. Follow the procedure in After working inside your computer.
3. Verify if the storage device is installed correctly (optional). If you are replacing a storage device which does not have the
operating system installed, follow the steps in Identifying storage device in device manager or Identifying your storage device in
system setup (BIOS), to identify the storage device.
NOTE: To install the operating system on to your storage device, see Reinstall Windows to the Dell factory image using
recovery media in the Knowledge Base Resource at Dell Support Site.
96 Removing and installing Customer Replaceable Units (CRUs)