CALIBRATION
iKon-L SECTION 8
Page 142
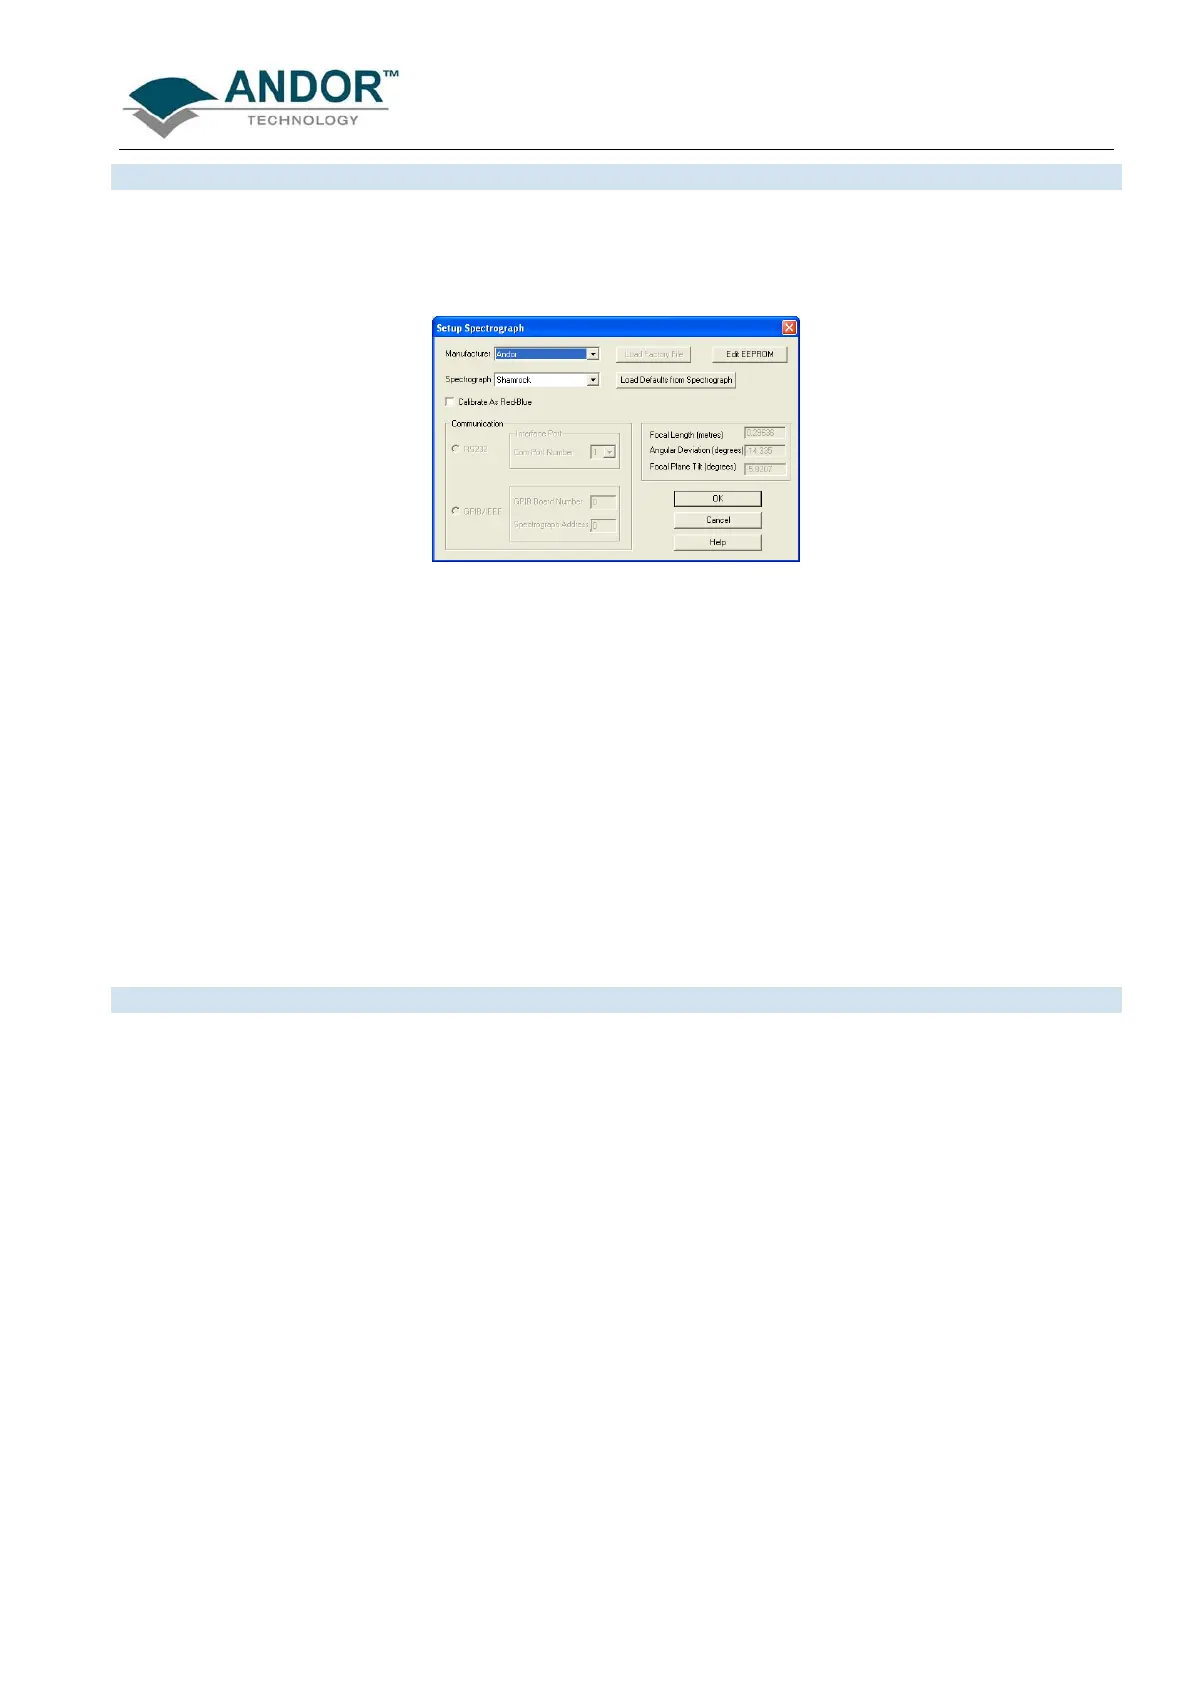
8.3.1 - Setup Spectrograph
Before you can perform a calibration using the spectrograph, you must ensure that the system knows which
spectrograph you are using. To select the type of spectrograph to be used, click the Setup Spectrograph
button on the Spectrograph X-Calibration dialog box and the Setup Spectograph dialog box appears, e.g.:
From the Manufacturer drop-down lit, select the appropriate company name and from the Spectrograph drop-
down list, select the model type being used, then click OK. The Spectrograph X-Calibration will appear again,
with the details of the selected spectrograph. With the exception of User Defined, selecting one of these options
will cause the system to select and display (in grayed, i.e. non-writable, text boxes) your spectrograph’s Focal
Length, Angular Deviation and Focal Plane Tilt.
If you select the User Defined option from the drop-down list, you should consult the manufacturer’s handbook
for details then key in the values for the spectrograph. If you are using a motorized spectrograph, the system
may be able to load spectrograph attributes (number of gratings, lines/mm, etc.) directly. The Load Defaults
from Spectrograph button
is enabled if an appropriate motorized spectrograph is chosen from the
Spectrograph drop-down list.
Depending on the type of spectrograph being used, you can also select the type of interface needed from the
Communications section of the dialog box.
8.3.1.1 - Calibrate As Red-Blue
Some CCD detectors readout data in the reverse direction to Andor cameras. In this case, the longer
wavelengths (red) are to the left (as viewed from the detector), and shorter wavelengths (blue) are to the right.
If you tick the Calibrate As Red-Blue option in the Setup Spectrograph dialog box, the system then uses
software to ‘reverse’ the output of the detector when it generates a data window, thus presenting the display in
the more usual orientation.
 Loading...