My BERNINA
3 Set Up the machine 26
3.1 Prior to Machine's First Use
TIP
BERNINA recommends lubricating the hook before
using the machine for the first time or after a longer
period of non-use. [}see page100]
Lubricating the hook keeps the machine running
smoothly and quietly.
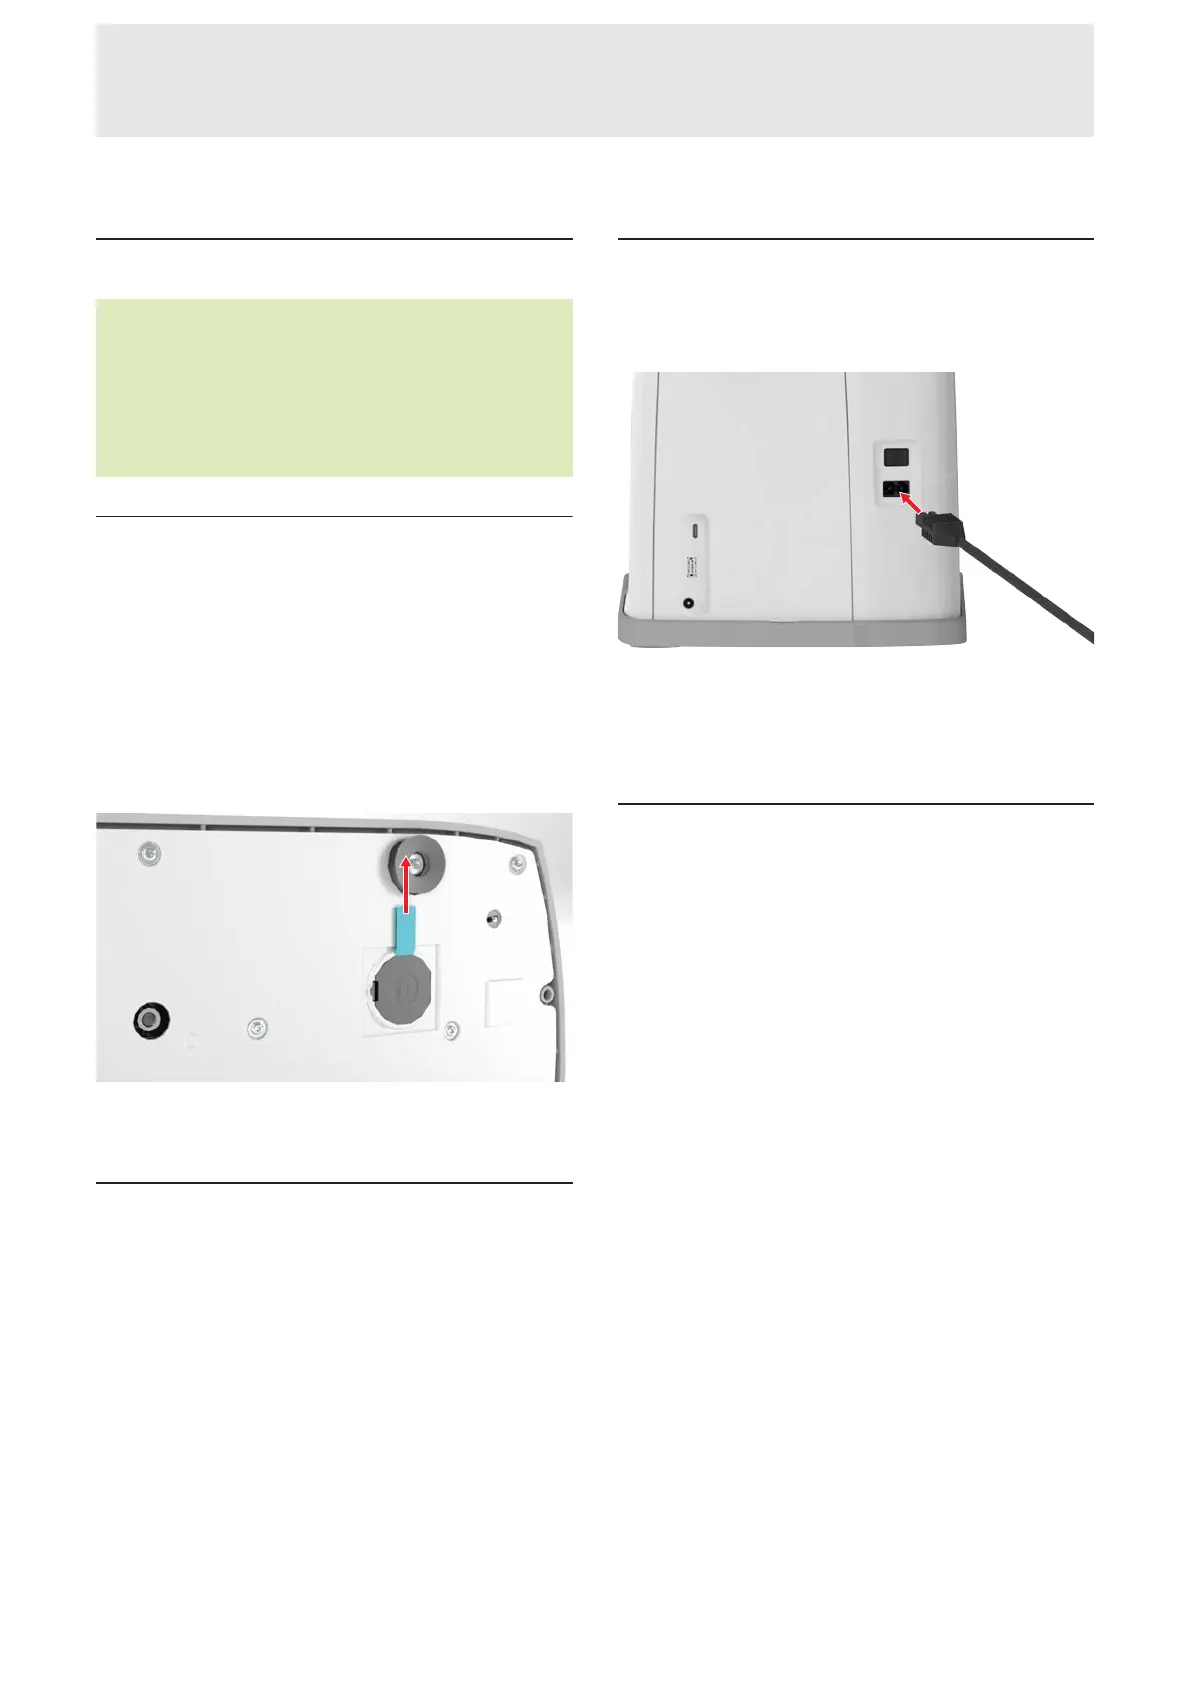
Removing the Protective Film on the
Battery
Your BERNINA 990 contains a battery, which ensures
that the clock continues to run, even if the machine is
switched off and disconnected from the power supply.
The protective film must be removed before the battery
can be used.
1. Carefully set down the machine on its back.
2. Pull the protective film on the battery out of the
battery compartment.
3. Set Up the machine.
3.2 Working Area
A stable table with a secure stand is a good prereq-
uisite for optimal sewing results. Ergonomics of the
sewing table is important to protect the muscles and
joints of the back, shoulder, arms and hands. The
recommendation for optimal ergonomics includes
matching the table height with the body posture. Avoid
remaining in the same position for long periods.
The machine can also be operated when standing.
Correct Sitting Position
With the arms bent (90°), the fingertips can touch the
stitch plate in a comfortable sitting position.
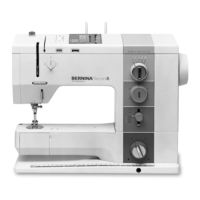
3.3 Connecting the Machine and
Switching it On
1. Insert the cable into the machine.
2. Insert the power plug of the power cable into the
socket.
3. Switch on the machine using the power switch.
3.4 Preparing the Machine for
Sewing
For your sewing project, you must prepare and set the
machine accordingly.
Prerequisite:
n The machine is switched on.
n The sewing settings have been made. [}see
page45]
n The foot control is connected. [}see page27]
1. Attach the Slide-on Table if required. [}see
page28]
2. Attach the Knee Lifter. [}see page29]
3. If the Embroidery Module is connected and is not
to be removed, move the embroidery hoop to the
sewing position. [}see page43]
4. Remove the embroidery hoop. [}see page43]
5. Select Sewing Mode via the main menu or the
Home Screen. [}see page22]
ð The Sewing Screen appears. [}see page49]
6. Use a suitable stitch plate. [}see page30]
7. Use a suitable sewing needle. [}see page33]
8. Attach and select a suitable presser foot. [}see
page41]
9. Prepare and edit stitch pattern. [}see page61]
10. Thread a suitable bobbin thread. [}see page39]
11. Thread a suitable upper thread. [}see page34]