My BERNINA
3 Set Up the machine 30
TIP
The lateral position of the lever can be adjusted by
your local BERNINA dealer if required.
Raising the Presser Foot
1. Push the Knee Lifter to the right and hold it there
with your knee.
ð The presser foot is raised and the feed dog is
lowered.
2. Release the Knee Lifter slowly to lower the presser
foot.
ð The presser foot is lowered and the feed dog is
raised.
Lower the Presser Foot
►
When the presser foot is raised, push the Knee
Lifter all the way to the right and slowly release it.
ð The presser foot is lowered, the feed dog is
raised and the thread tension is activated.
3.10 Stitch Plate
The supplied 9-mm Stitch Plate is suitable for most
sewing applications. For specific applications, e.g.
PunchWork, special stitch plates are used. The special
stitch plates are marked with a color code.
n Without color code: 9mm Stitch Plate
n Orange: Straight and CutWork Stitch Plate
n Yellow: PunchWork Stitch Plate
n Blue/purple: 5.5mm BISR Stitch Plate
Vertical lines are engraved on each stitch plate, which
you can use as a ruler for guiding the fabric in a
straight line. You can use the diagonal lines to align the
fabric at a precise 45° angle. You can use the
horizontal lines to lay the fabric at the specified
distance from the needle.
1Pressure Point for Release 2Fabric Placement
3Needle Position 4Ruler in cm 5Ruler in inches
6Color Code 7Sensor
Changing the Stitch Plate
Prerequisite:
n The needle and the presser foot are raised.
1. Lock screen and sewing functions.
2. Remove the needle and presser foot.
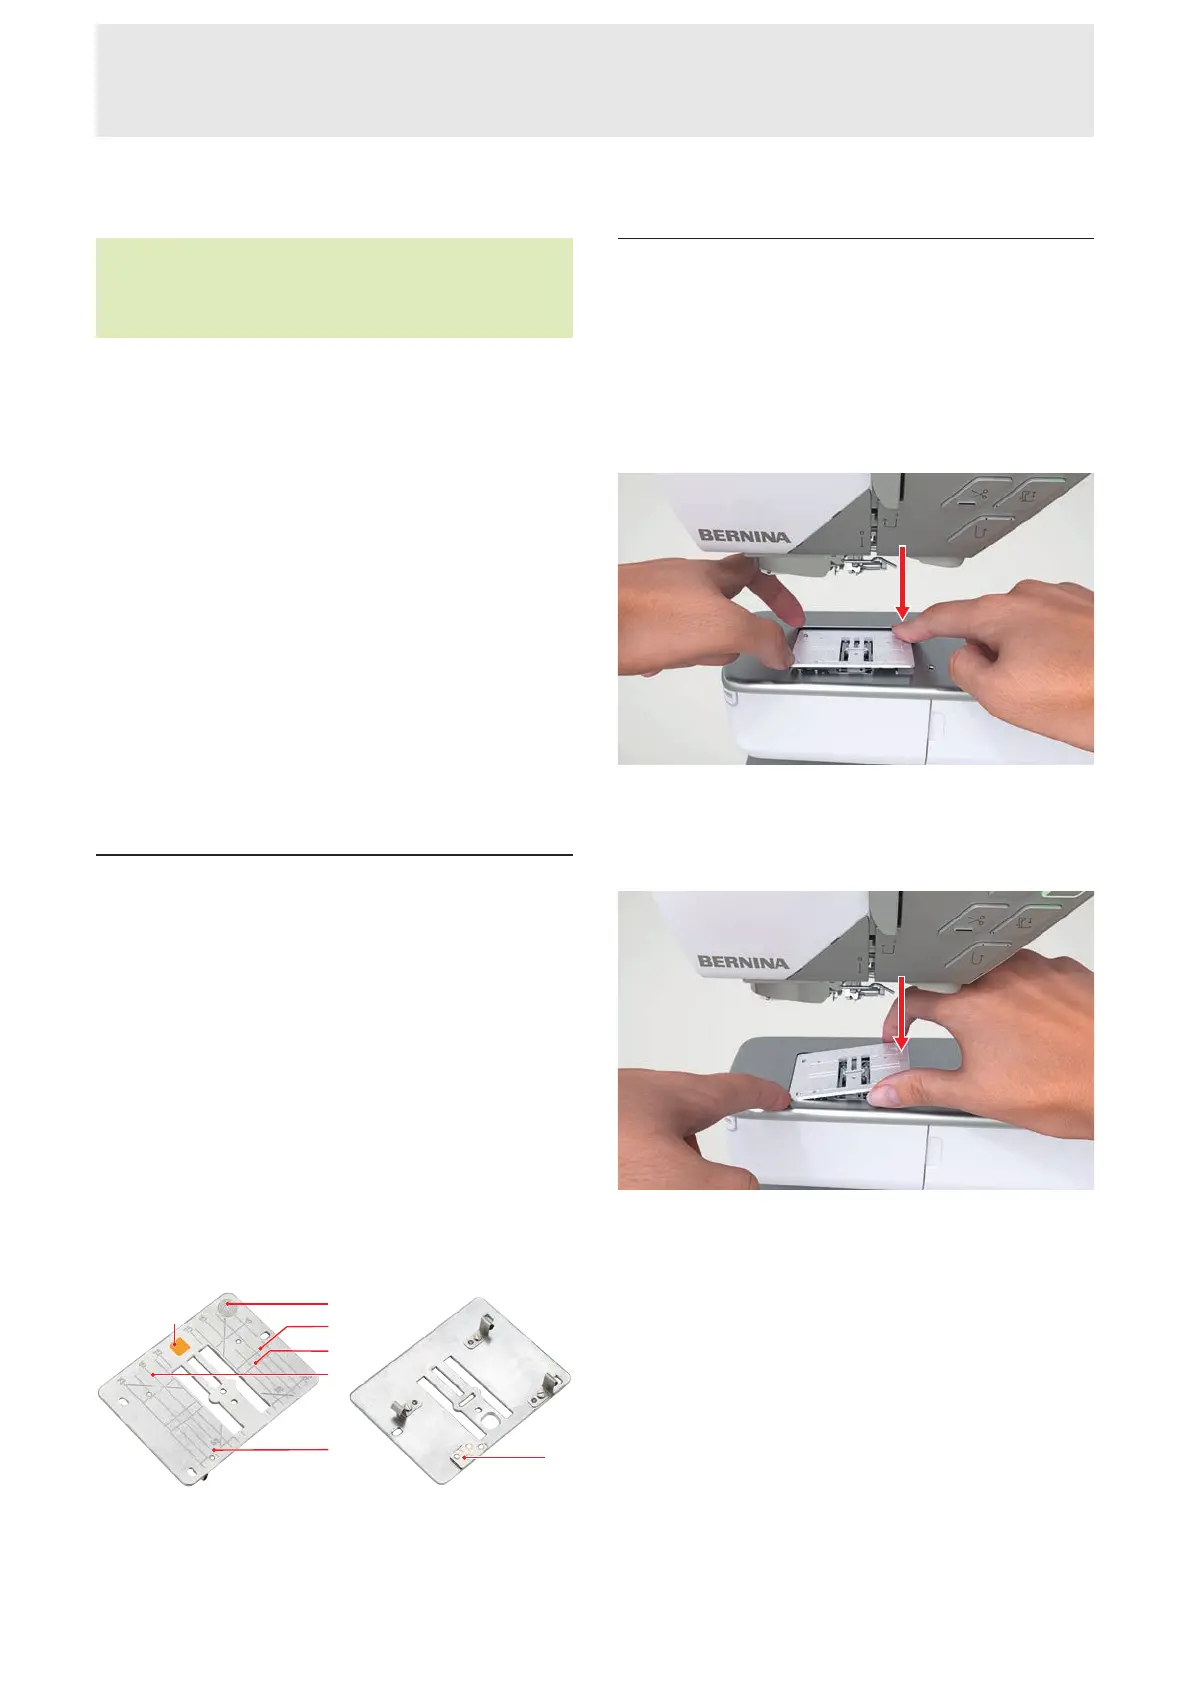
3. Press the stitch plate down at the pressure point for
release on the right until it tips.
4. Remove the stitch plate.
5. Place the openings of the new stitch plate above
the corresponding guide pins and press the stitch
plate down until it clicks into place.
6. Unlock sewing functions and screen.
ð The machine recognizes the new stitch plate
and displays it in the Status Bar.
ð The machine checks the compatibility of the
stitch plate with the attached needle and the
selected stitch. If the stitch cannot be sewn
with the attached stitch plate, the stitch is
shown in red in the stitch preview and the
machine will not start.