My BERNINA
3 Set Up the machine 43
NOTICE
Lifting or moving the machine when the
Embroidery Module is connected
Damage to the embroidery module connection and
machine.
►
Before lifting or moving the machine, detach the
embroidery module.
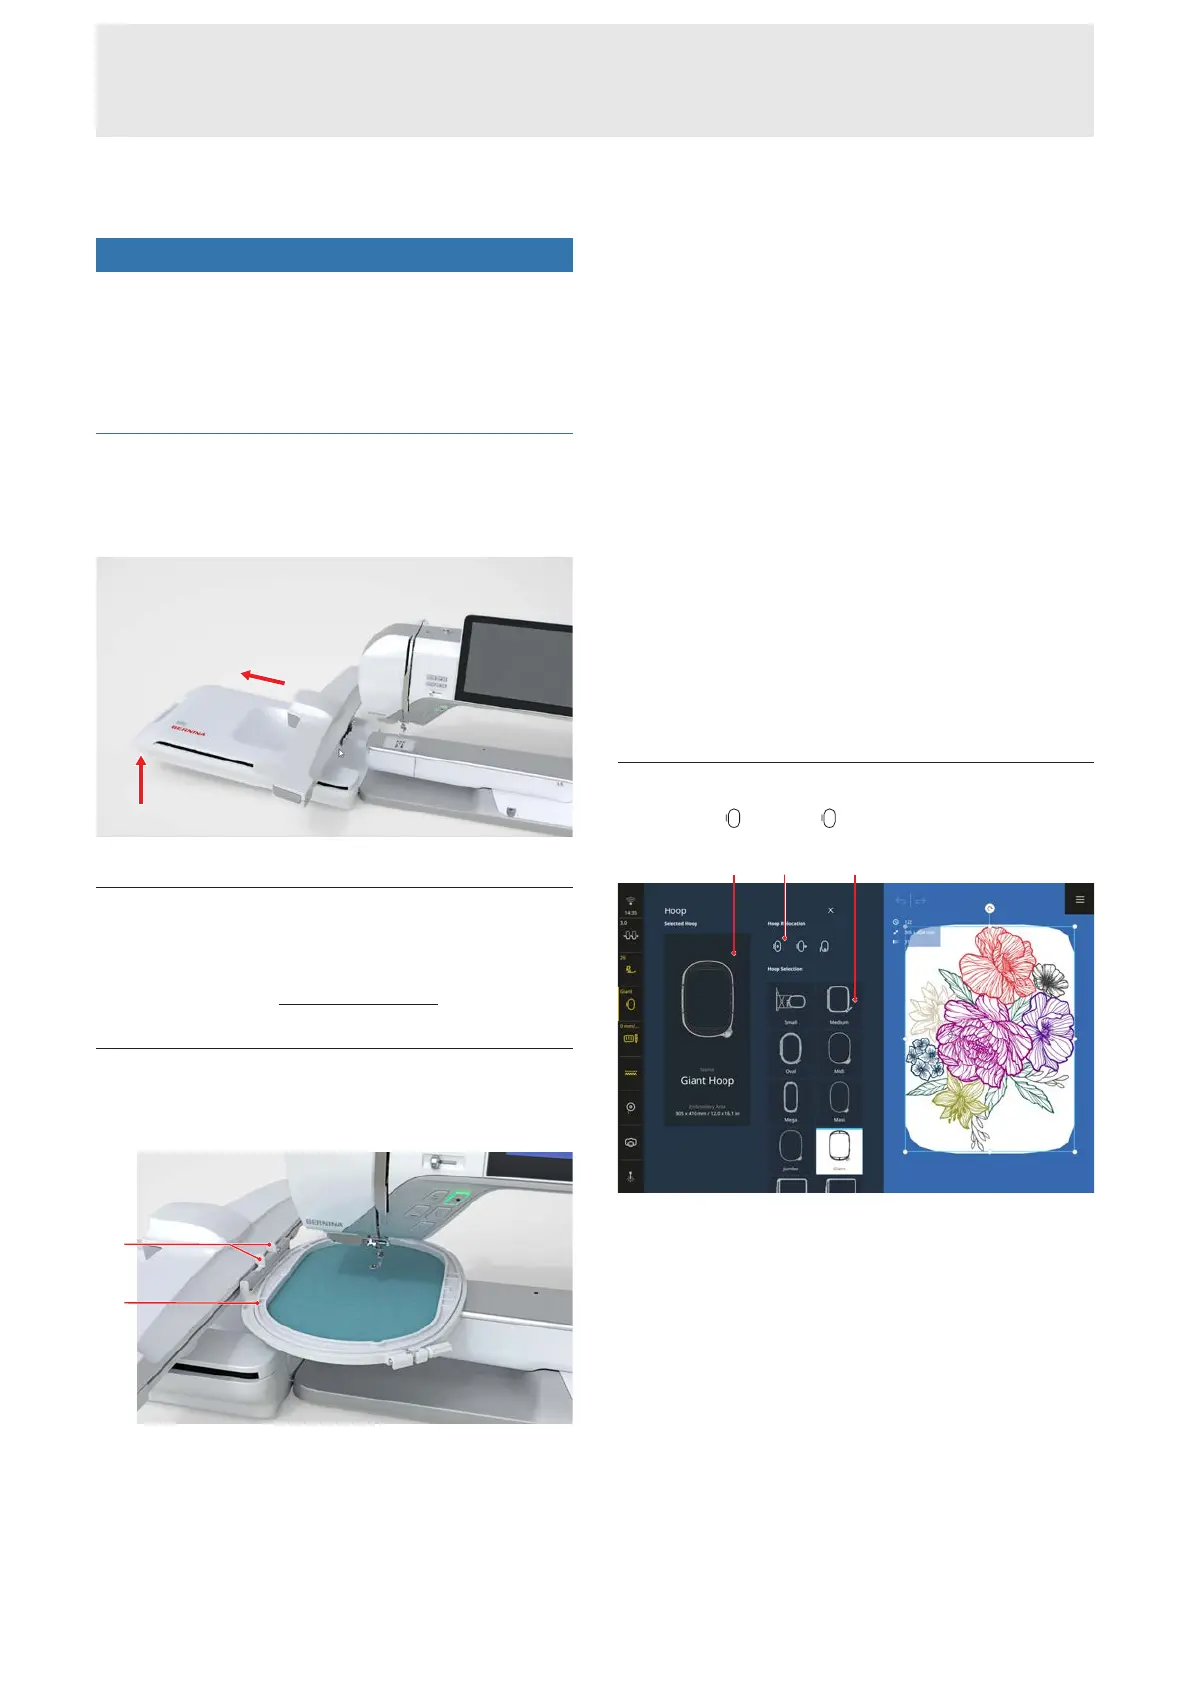
Removing the Embroidery Module
►
Lift the embroidery module on the left side and
carefully pull it to the left.
Preparing the Embroidery Hoop
Prepare the embroidery hoop according to the hoop
instructions. You can download the instructions for
embroidery hoops at
www.bernina.com.
Attaching and Removing the Hoop
Attaching the Hoop
1Attaching Mechanism 2Hoop
1. Raise the needle.
2. Raise the presser foot.
3. Hold the hoop with the right side of the fabric up
with the attaching mechanism to the left.
4. Position the hoop below the presser foot.
5. Squeeze both attaching mechanisms of the hoop
towards each other.
6. Position the embroidery hoop above the bracket of
the embroidery arm.
7. Press the hoop down until it clicks in position.
8. Release the attaching mechanism.
9. Select the embroidery hoop on the machine. [}see
page43]
10. Before using the embroidery hoop for the first time
or if the needle position and the center of the
embroidery hoop are not aligned, calibrate the
embroidery hoop on the machine. [}see page48]
Removing the Embroidery Hoop
1. Squeeze both attaching mechanisms of the hoop
towards each other.
2. Remove the hoop.
Hoop Overview
Embroidery
►
Hoop
1Selected Hoop 2Hoop Relocation 3Hoop
Selection
Selected Hoop
The attached hoop is automatically recognized and
shown against a dark background in the Status Bar and
in the Selected Hoop section.
If no embroidery hoop has been attached, an
embroidery hoop matching the size of the embroidery
design is preselected in the Hoop Selection section.
The selected hoop is shown against a light background.