My BERNINA
3 Set Up the machine 27
TIP
For special sewing techniques and fabrics, the
Consultant will recommend a presser foot, stitch
plate and needles as well as fabrics and sewing
settings. [}see page24]
3.5 Preparing the Machine for
Embroidery
For your embroidery project you must prepare and set
the machine accordingly.
Prerequisite:
n The machine is switched on.
n The embroidery settings have been made. [}see
page47]
1. Select Embroidery Mode via the main menu or the
Home Screen. [}see page22]
ð The Embroidery Screen appears. [}see
page79]
2. Remove the Knee Lifter.
3. Insert the Straight Stitch Plate. [}see page30]
4. Insert a suitable embroidery needle. [}see
page33]
5. Attach and select a suitable embroidery foot. [}see
page41]
6. Attach the Embroidery Module. [}see page42]
7. Attach the suitable hoop. [}see page43]
8. Prepare and edit embroidery designs. [}see
page83]
9. Thread a suitable bobbin thread. For a higher
bobbin thread tension, use a bobbin case with a
high thread tension. [}see page39]
10. Thread a suitable upper thread. [}see page34]
TIP
For special embroidery techniques and fabrics, the
Consultant will recommend an embroidery foot,
stitch plate and needles as well as fabrics and
embroidery settings. [}see page24]
3.6 Foot Control
You can operate the front foot control with the ball of
your foot and the rear foot control with your heel. By
pressing with the ball of your foot, you can start and
stop the machine and control the speed with the
amount of force applied to the control. By pressing
with your heel, you can raise or lower the needle or
execute further functions. You can configure the
functions in the Sewing Settings. [}see page46]
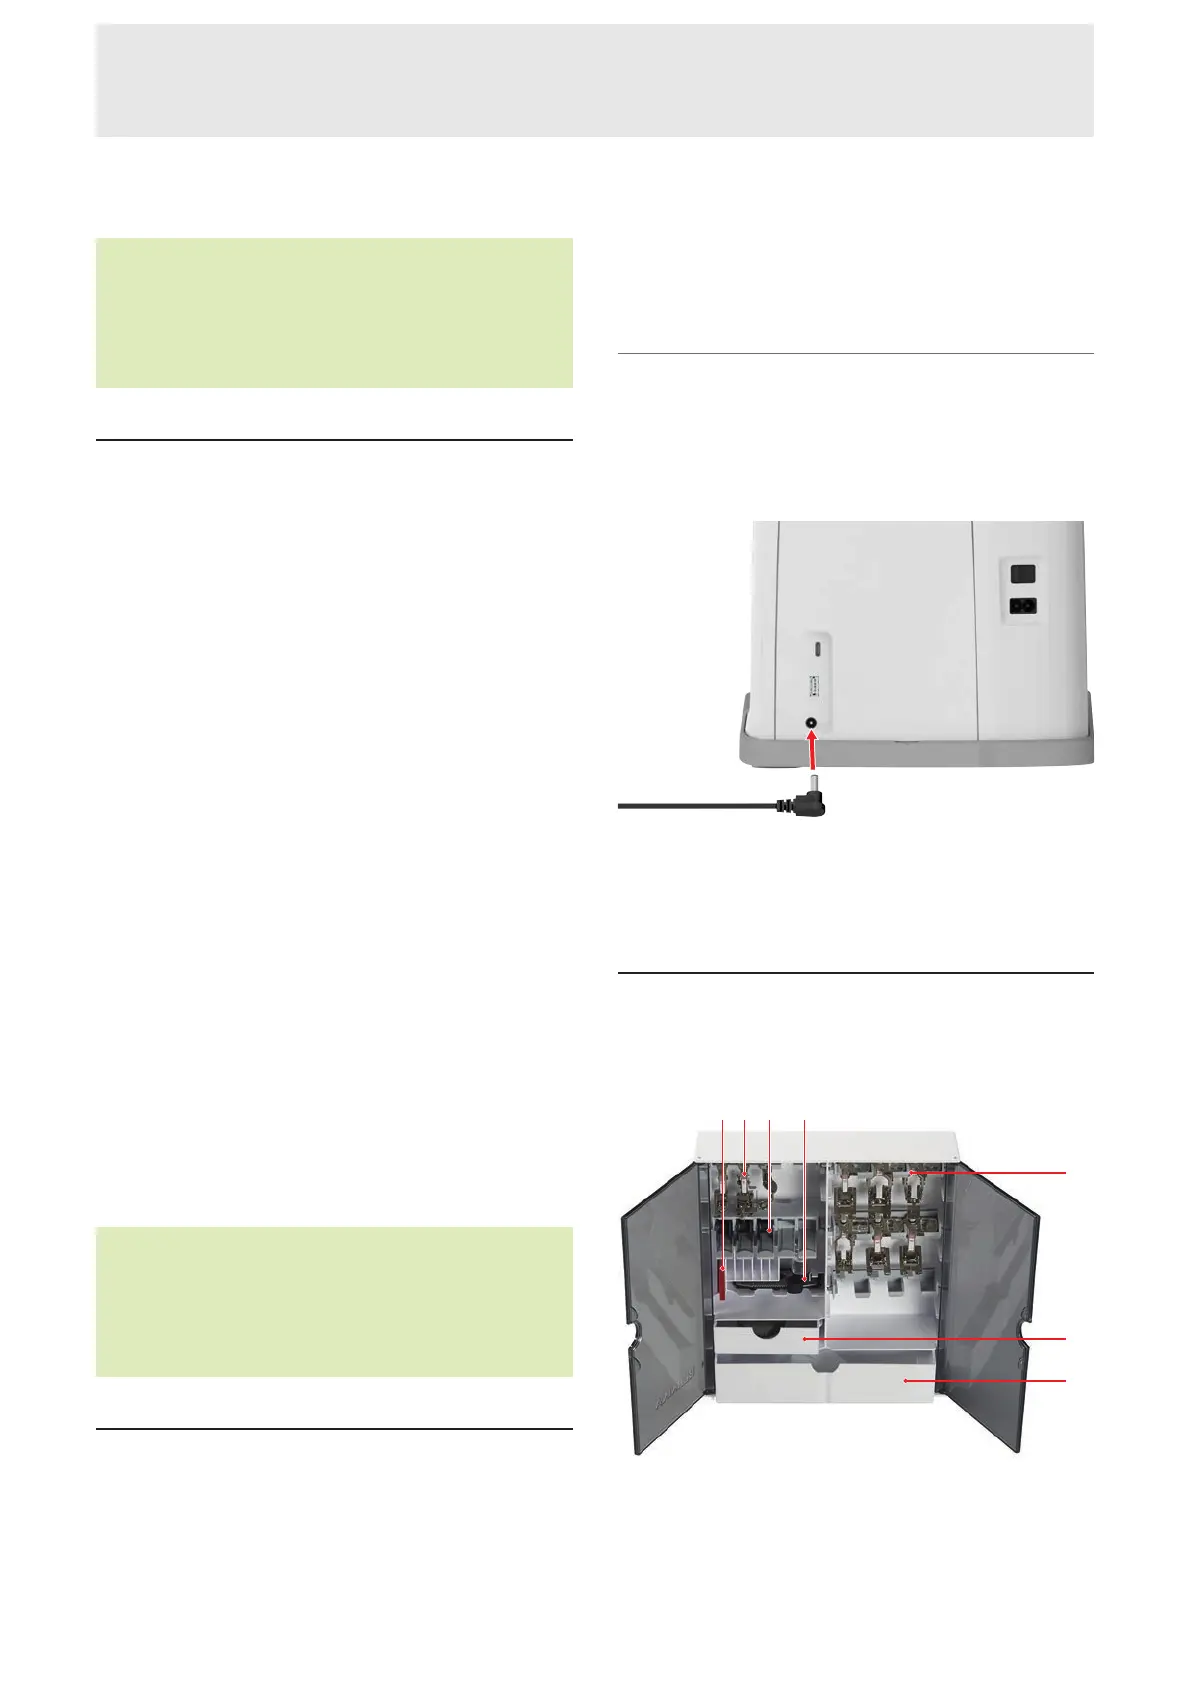
Connecting the Foot Control
1. Unwind the cable of the foot control to the desired
length.
2. Insert the plug of the cable into the foot control
socket of the machine.
3. Place the Foot Control on the floor in a
comfortable position for sewing.
4. If the cable is too long, roll up excess length.
3.7 Storing Accessories
The accessories box provides tidy storage for your
accessories.
1Holder for Needle Sets 2Holder for Presser Feet
without Lens 3Bobbin Holder with Spring Button
4Compartment for Buttonhole Foot with Slide#3A
5Holder for Presser Feet with Lens 6Drawer, Small
7Drawer, Large