My BERNINA
3 Set Up the machine 33
Needle Purpose
Hemstitch Twin
Needle
130/705HZWIHO
100
Needle distance:
2.5
For special effects with
hemstitch embroidery.
Universal Triple
Needle
130/705HDRI
80
Needle distance:
3.0
For visible hems in stretch
fabrics, decorative sewing.
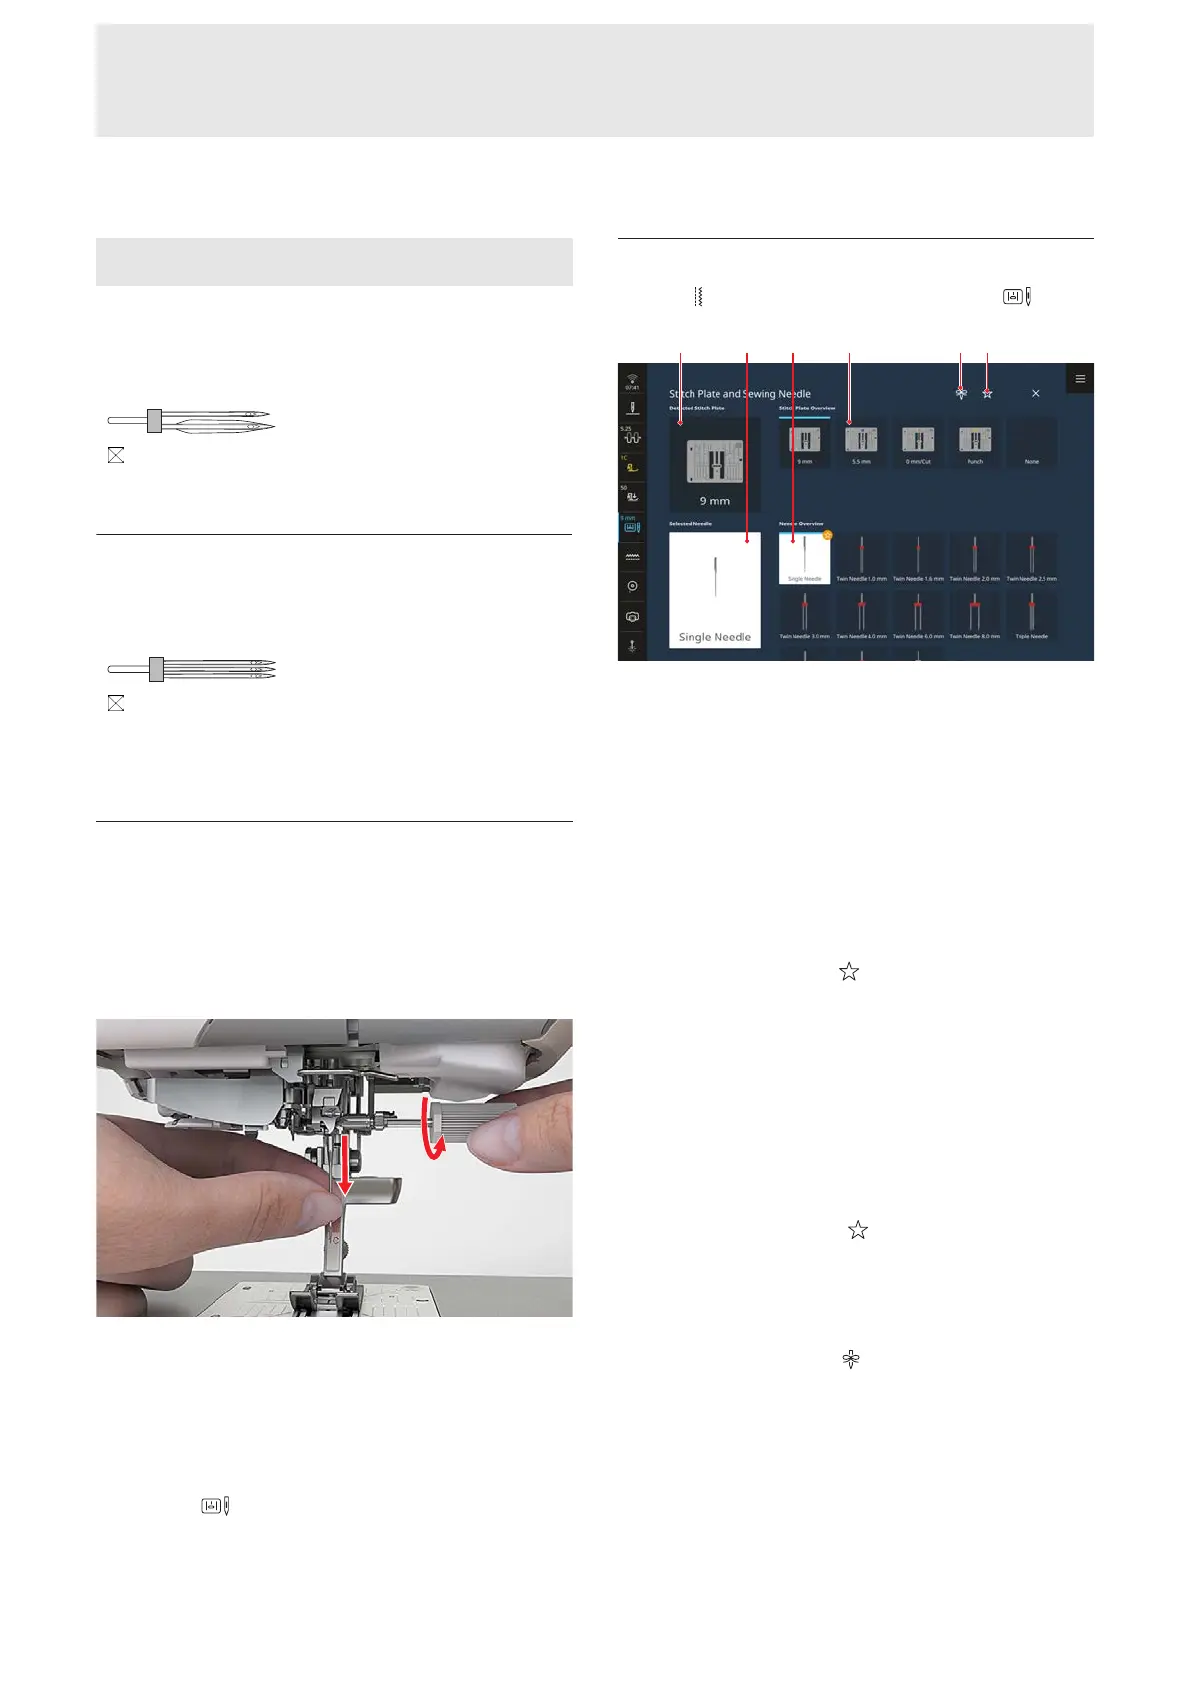
Changing the Needle
1. Raise the needle.
2. Lock screen and sewing functions.
3. Loosen the screw on the needle using the gray Torx
Screwdriver and pull the needle out in a downward
direction.
4. Insert and push the new needle with the flat side to
the back as far up as it will go into the needle
holder and hold it in place.
5. Tighten the screw.
6. Unlock sewing functions and screen.
7. In the Status Bar, tap Stitch Plate and Sewing
Needle
and select the fitted needle in the
Needle Overview section. [}see page33]
Stitch Plate and Sewing Needle
Sewing
►
Stitch Plate and Sewing Needle
1Detected Stitch Plate 2Selected Needle 3Needle
Overview 4Stitch Plate Overview 5Needle Minder
6View Recommended
The attached Stitch Plate is automatically recognized
and shown in the Status Bar and in the Detected
Stitch Plate section.
The stitch plates and needles compatible with the
machine are displayed in the Stitch Plate Overview
and Needle Overview sections.
Recommended stitch plates and needles are shown
with the Recommended
icon.
In order to verify the compatibility of the stitch plate,
presser foot and needle, you must select the attached
needle in the Needle Overview section. The selected
needle is shown in the Selected Needle section and in
the Status Bar. If the selected needle can no longer be
used with the stitch plate or the presser foot, an error
message is dsiplyed.
Recommended
With the Recommended
function, you can filter
the overview by recommended stitch plates and
needles.
Needle Minder
With the Needle Minder
function you can note the
needle type and needle size of the attached needle. If
you have forgotten which needle is attached, you can
look it up at any time.