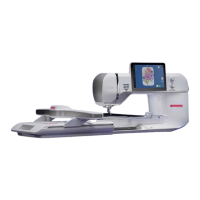
Embroidery
12 Prepare and Edit Embroidery Designs 83
12.1 Loading the Embroidery
Design
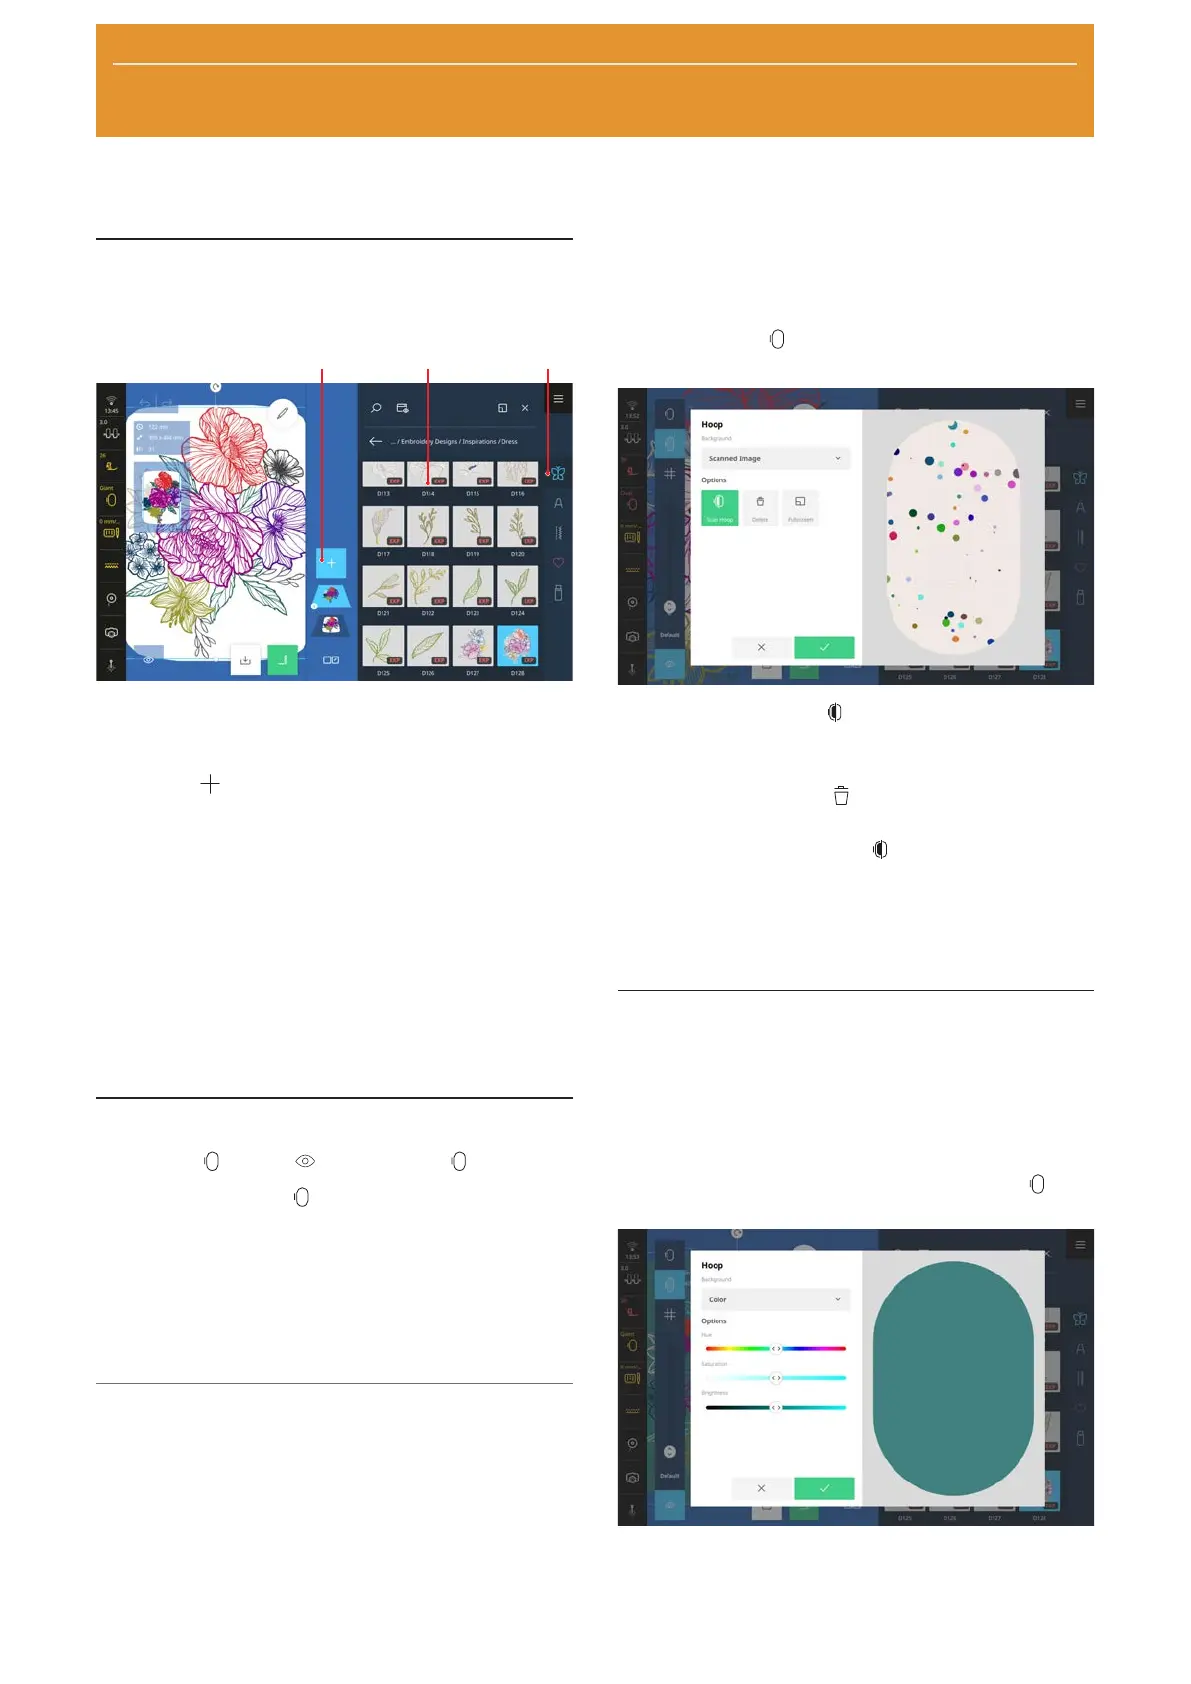
1Add Design 2Selection Area 3Quick Access Bar
1. If the File Manager is not open, tap the Add
Design
function in the layer bar.
2. Tap the embroidery design category in the Quick
Access Bar.
3. Find and load the desired embroidery design in the
File Manager.
ð The embroidery design is displayed in a hoop in
the design preview that is closest to the size of
the design.
Further information on the selection area can be found
in the File Manager. [}see page81]
12.2 Hoop Background
Embroidery
►
View
►
Background
With the Background function, you can select a
hoop background.
n None: Show white background.
n Scanned Image: Scan the hoop and show as a
background image. [}see page83]
n Color: Set the background color. [}see page83]
Scan Hoop
If you wish to position an embroidery design precisely
on patterned fabric, a quilt or a project, simply hoop
the fabric and scan it as a background image.
Prerequisite:
n A hoop with the hooped project is attached.
n An embroidery foot or no presser foot is attached.
n The thread is removed from the needle and is
outside the embroidery area.
1. Select the Scanned Image option in the
Background
function.
ð The last scanned image is displayed.
2. Tap the Scan Hoop icon.
ð The hoop is scanned and the image is
displayed.
ð With the Delete
function, you can delete
the scanned image.
ð With the Scan Hoop
function, you can scan
the hoop again.
3. To use the scanned image as the background,
confirm the image.
Setting the Background Color
You can use a colored hoop background to simulate
the color of the fabric, so that you can better visualize
how the embroidery design will appear on the project.
Embroidery designs with light colors in particular are
easier to see on a dark background.
1. Select the Color option in the Background
function.
2. Set the hue, saturation and brightness to your
preferences and confirm.