Embroidery
12 Prepare and Edit Embroidery Designs 89
Prerequisite:
n The desired position of the embroidery design is
marked on the fabric with two points and is clearly
visible.
n A hoop with the hooped project is attached.
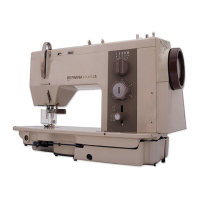
1. Tap the Grid
icon.
2. To maintain the size of the embroidery design,
activate the Retain Size
function.
3. Select any point on the grid as the rotation point.
4. Position the needle at the corresponding marking
on the fabric using the multifunction knobs and
confirm with the Pin
button. You can activate
the laser to assist with exact positioning of the
needle.
5. Select a second grid point. Position the needle at
the second marking on the fabric and confirm with
the Pin
button.
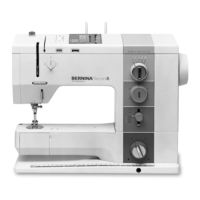
Positioning the Embroidery Design by means
of 2 Freely Positioned Points
With the Free Point
option, you can position
embroidery designs precisely on the fabric using 2
freely positioned points.
Prerequisite:
n The desired position of the embroidery design is
marked on the fabric with two points and is clearly
visible.
n A hoop with the hooped project is attached.
1. Tap the Free Point
icon.
2. To maintain the size of the embroidery design,
activate the Retain Size
function.
3. Select any point on the embroidery design as the
rotation point.
4. Position the needle at the corresponding marking
on the fabric using the multifunction knobs and
confirm with the Pin
button. You can activate
the laser to assist with exact positioning of the
needle.
5. Select the second point of the embroidery design.
Position the needle at the second marking on the
fabric and confirm with the Pin
button.
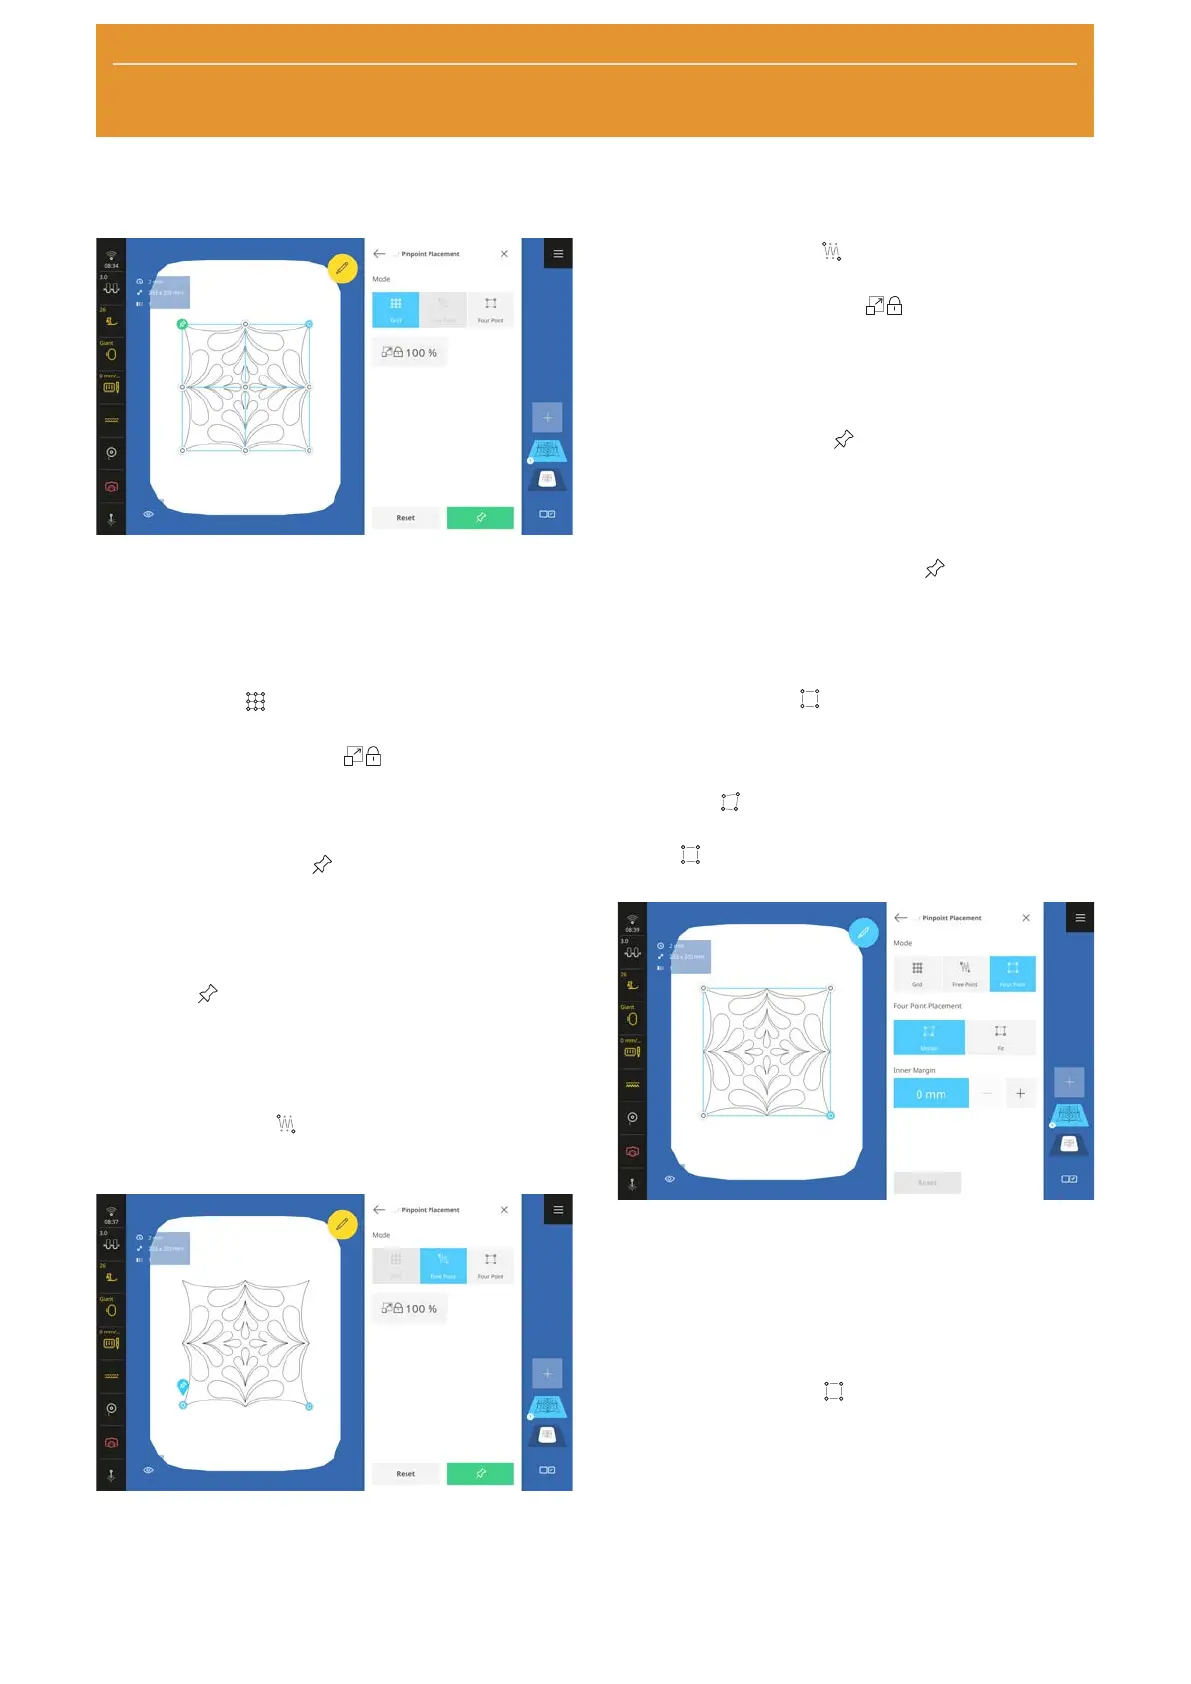
Positioning the Embroidery Design in a
Square
With the Four Point
option, you can position the
embroidery design in a square using four points, e.g. in
a quilt block. The following options can be used to
place the design:
n Morph
: The embroidery design is reshaped so
that it fits into the boundary.
n Fit
: The embroidery design is inserted propor-
tionally and centered within the boundary.
Prerequisite:
n The desired position of the embroidery design is
marked on the fabric with four points and is clearly
visible, or the hoop has been scanned and the
preview displays the fabric. [}see page83]
n A hoop with the hooped project is attached.
1. Tap the Four Point
icon.
ð The design is placed inside a rectangular
bounding box.
2. Select one of the corner points and position the
needle over the corresponding marking on the
fabric with the multi-function knobs. You can
activate the laser to assist with exact positioning of
the needle.
3. Select all corner points one after the other and
position the needle.