3 - 53
Main parts
Application of Assembly
Application
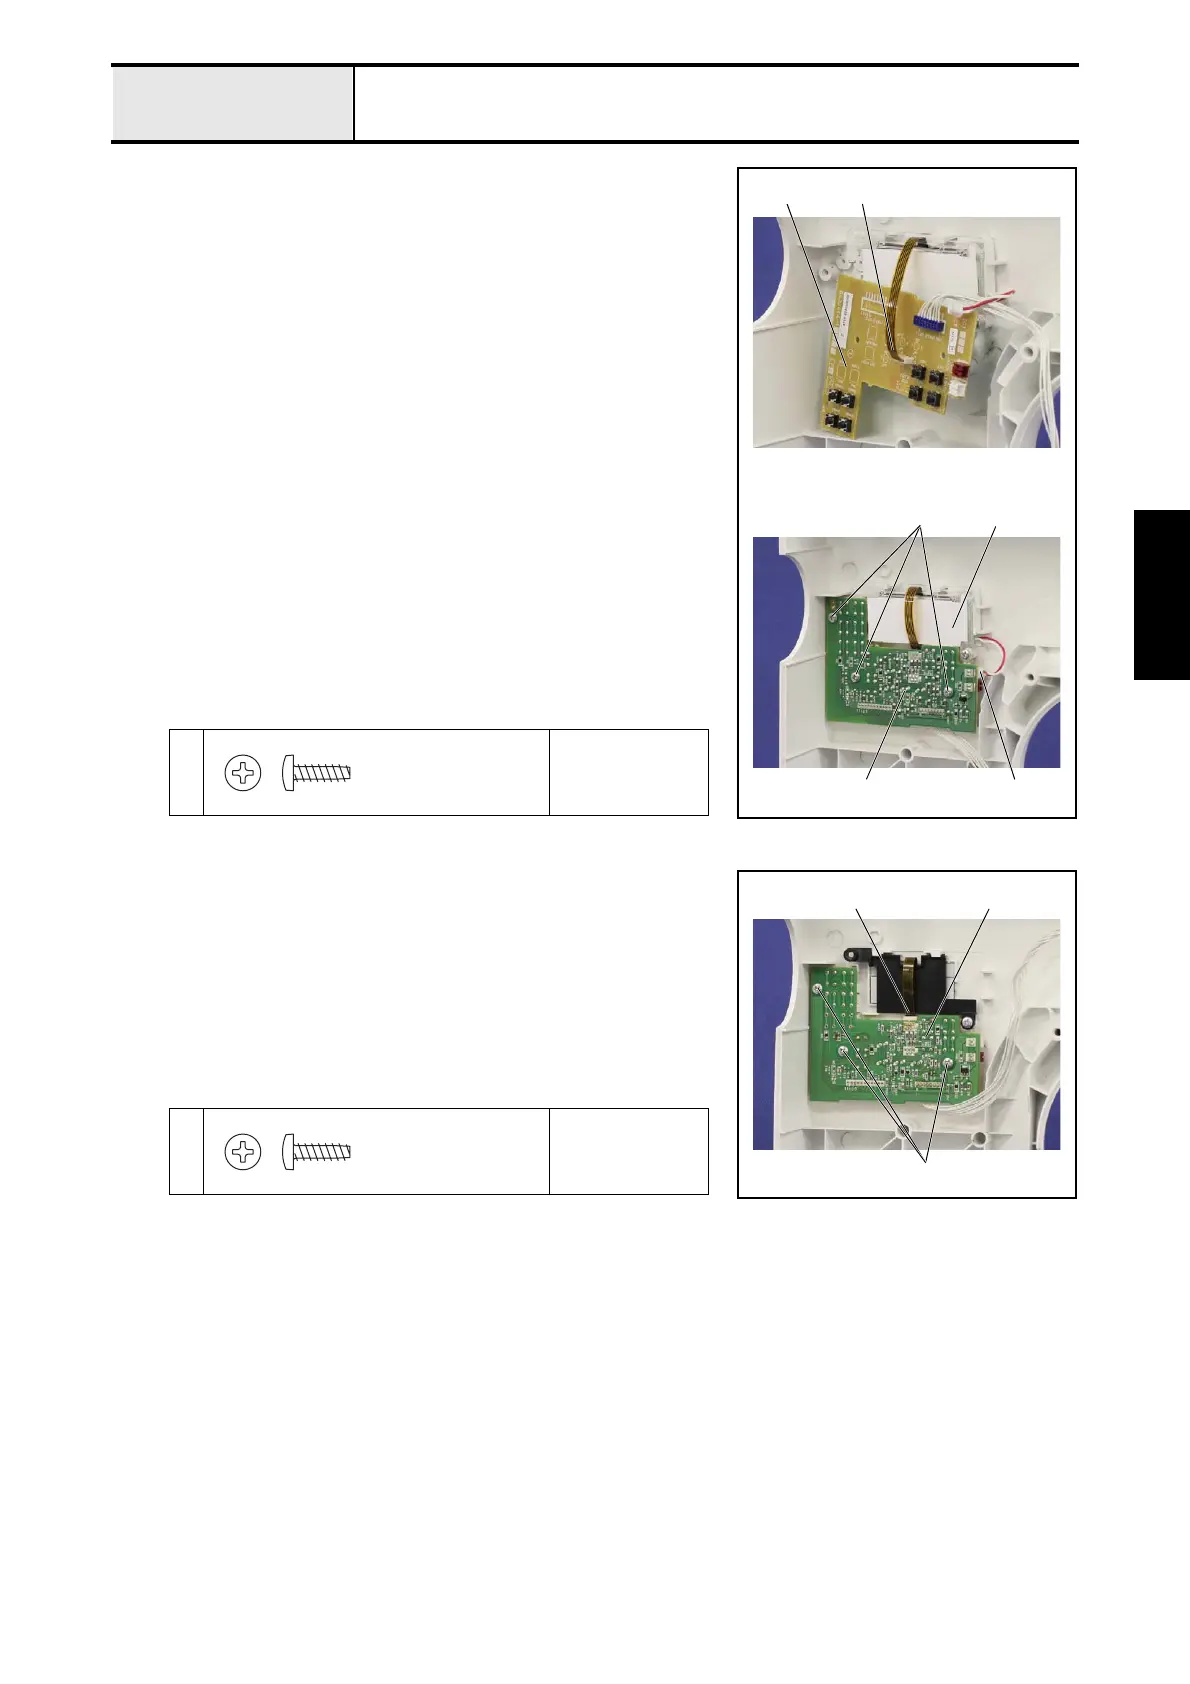
2-8-C “Curvy shape model” equipped with LCD backlight
1. Connect the flat cable 1 of the LCD to the operation PCB assy. 2.
2. Set the operation PCB assy. 2 to the front cover assy. with the 3 screws
1.
*Key point
• Check that contact the selecting/manual buttons to each
switch of the operation PCB assy. 2.
3. Connect the connector 3 of the single light guide assy. 4 to the operation
PCB assy. 2.
1
Torque
0.59 – 0.78 N·m
12
1
32
4
Taptite, Bind B
M3X10
2-8-D “Curvy shape model” not equipped with LCD backlight
1. Connect the flat cable 1 of the LCD to the operation PCB assy. 2.
2. Set the operation PCB assy. 2 to the front cover assy. with the 3 screws
1.
*Key point
• Check that contact the selecting/manual buttons to each
switch of the operation PCB assy. 2.
1
Torque
0.59 – 0.78 N·m
1
1
2
Taptite, Bind B
M3X10
 Loading...


